Design Donor Receipts
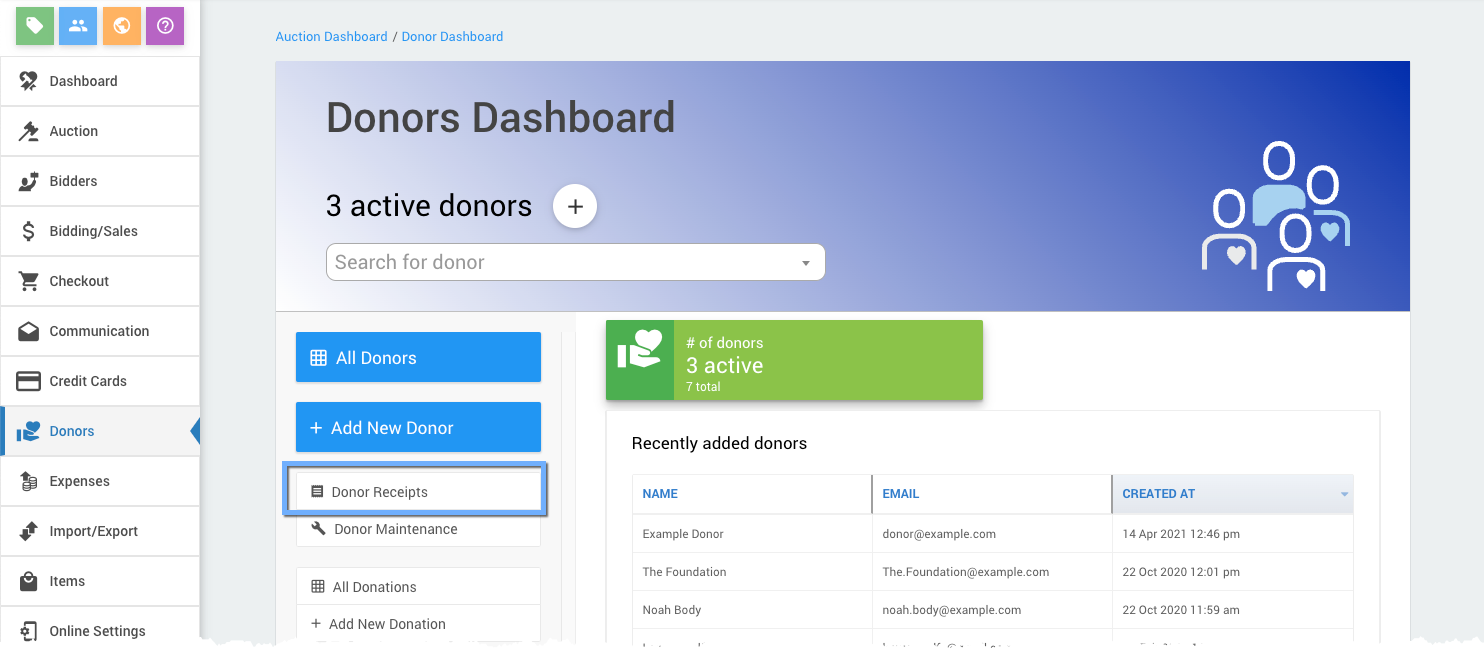
From the main Auction Dashboard, click through the Donors entry and then click the Donor Receipts entry in the Donors dashboard. This will open the Donor Receipts dashboard.
Auctria allows you to design customized, professional-looking receipts that can be exported as PDFs for printing. To create Donor Receipts, the following should have been created and/or considered as needed:
- you should already have created appropriate (optional) Stationery; and,
- all details, such as description and value, should be entered for each donation.
Designing Printed Donor Receipts
To start designing printed donor receipts, from the main Auction Dashboard click Donor Receipts and then click Print Donor Receipts.
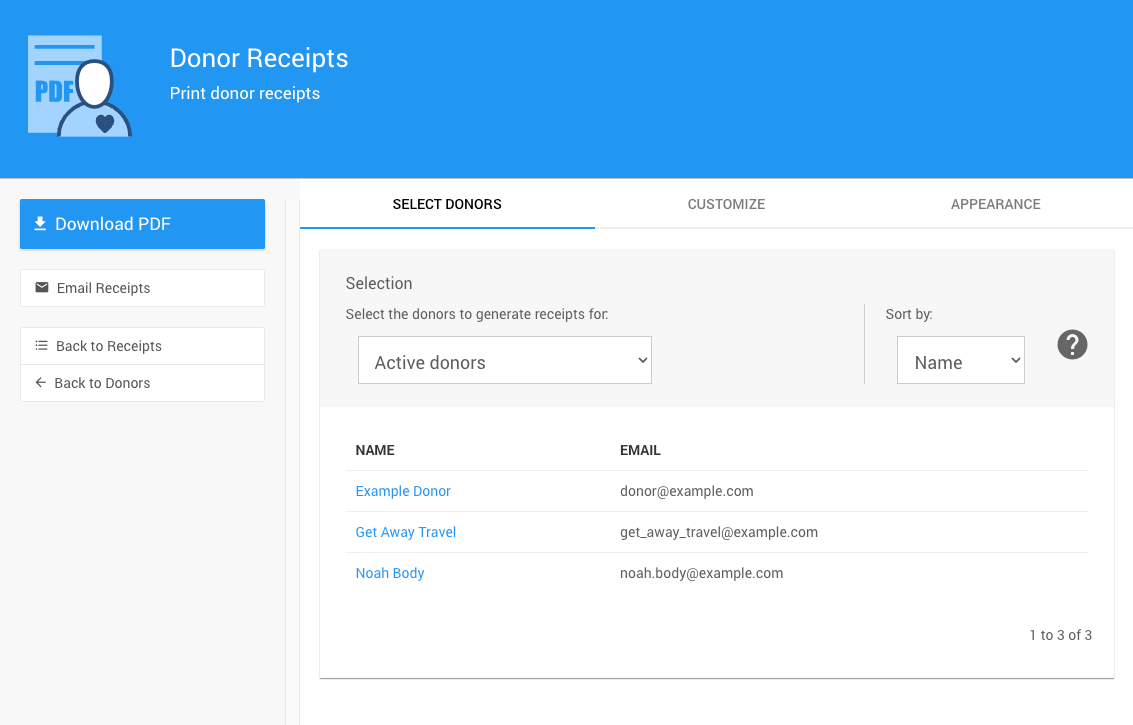
There are 3 tabs on the Print Donor Receipts window that allow you to
- Select Donors to receive receipts
- Customize the information and text shown on donor receipts
- define the Appearance of the page, layout, and fonts on donor receipts
Auctria Pro-Tip from Launch Services!
To access the information on each tab, click the tab heading. To enter text and make changes, select the Edit icon (blue pencil) in the appropriate section. To save the changes, click the blue Save icon in that section. To cancel the changes, click the white Undo icon in that section.
As you are working on customizing and defining the appearance of the Printed Donor Receipts, you can use the Download PDF button to see how your changes look. See Print Donor Receipts for more information.
Select Donors
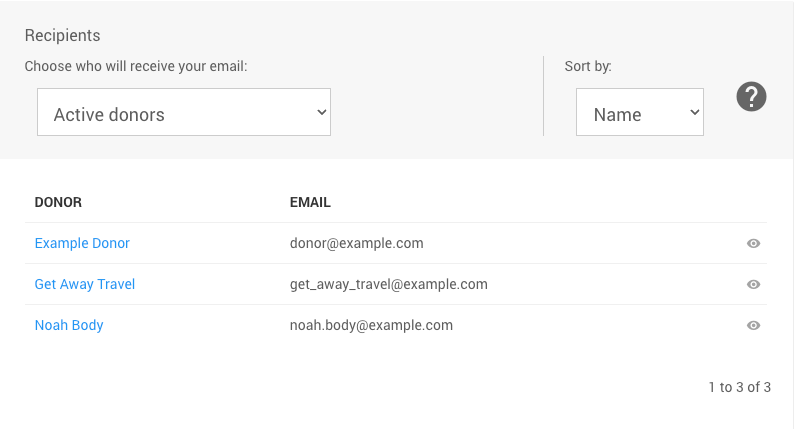
The default Active Donors will be set when you first open Donor Receipts for the Recipients. See Donors Recipients Filters for more information.
Customize
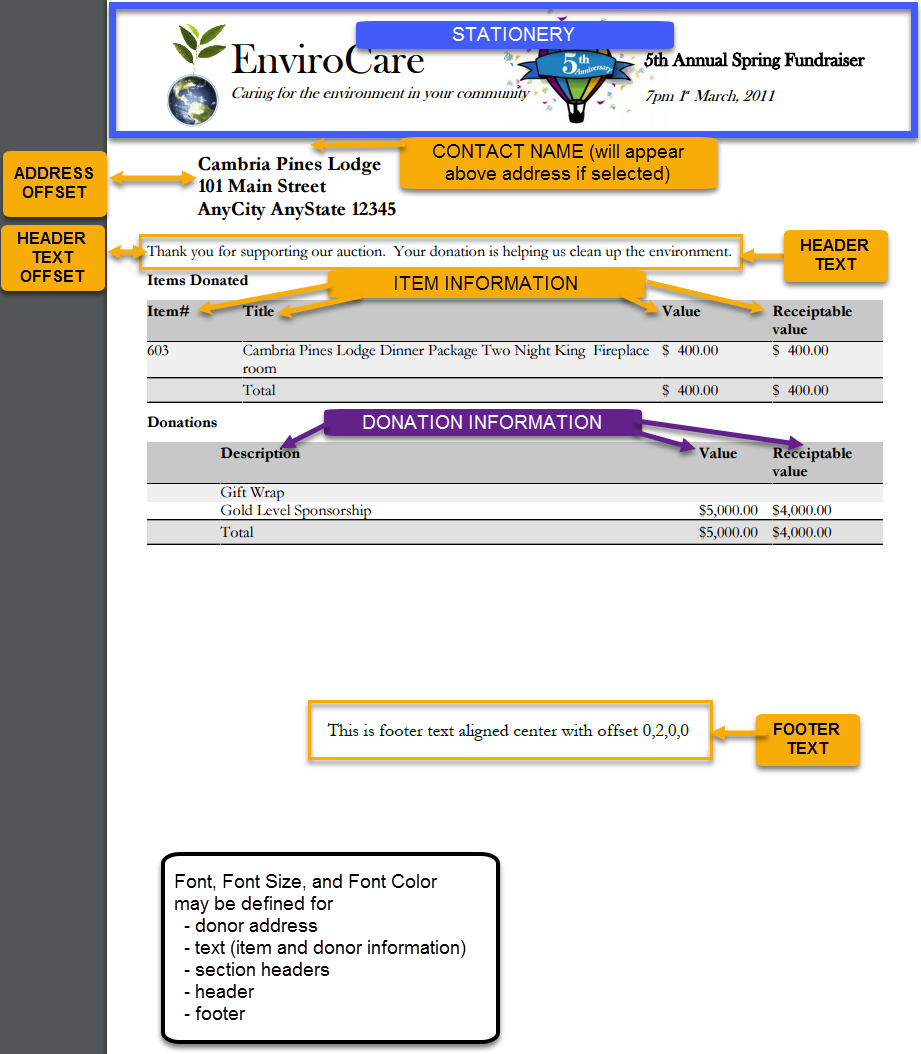
The Customize tab allows you to set custom "Header" and "Footer" text for your Printed Donor Receipts.
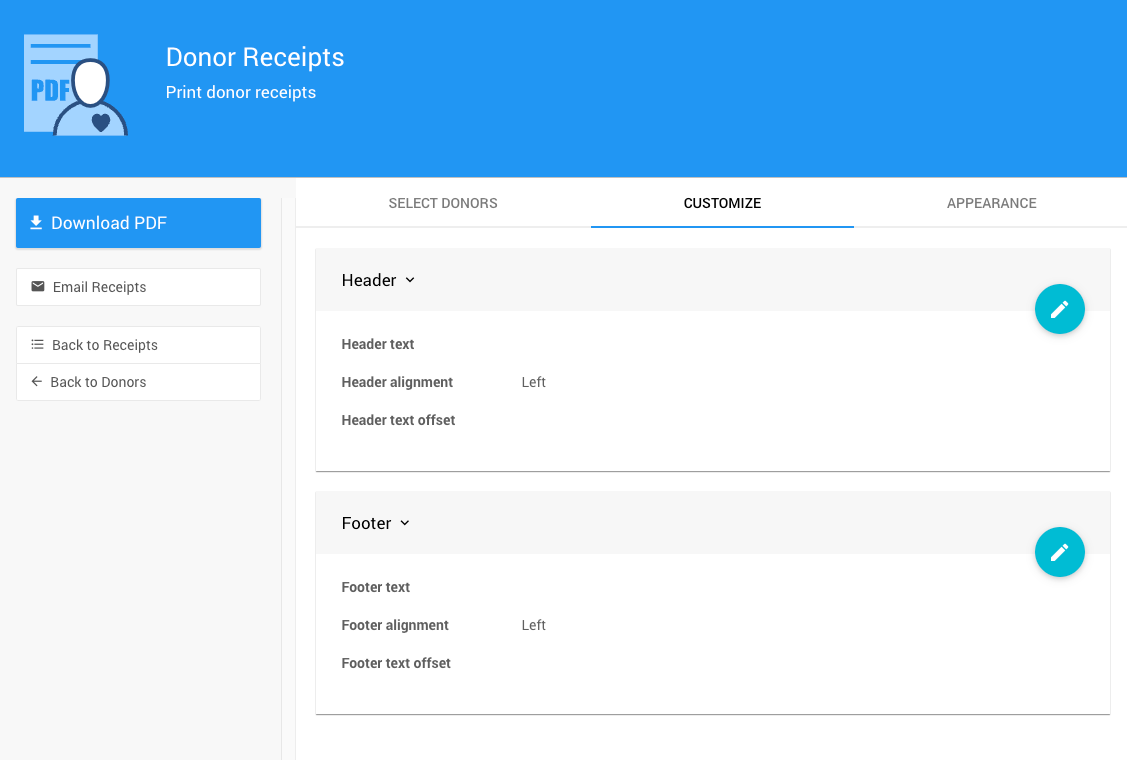
Text Enter text that you want to appear on the header or footer of each receipt.
Alignment Select Left, Center, or Right. This only applies to printed receipts.
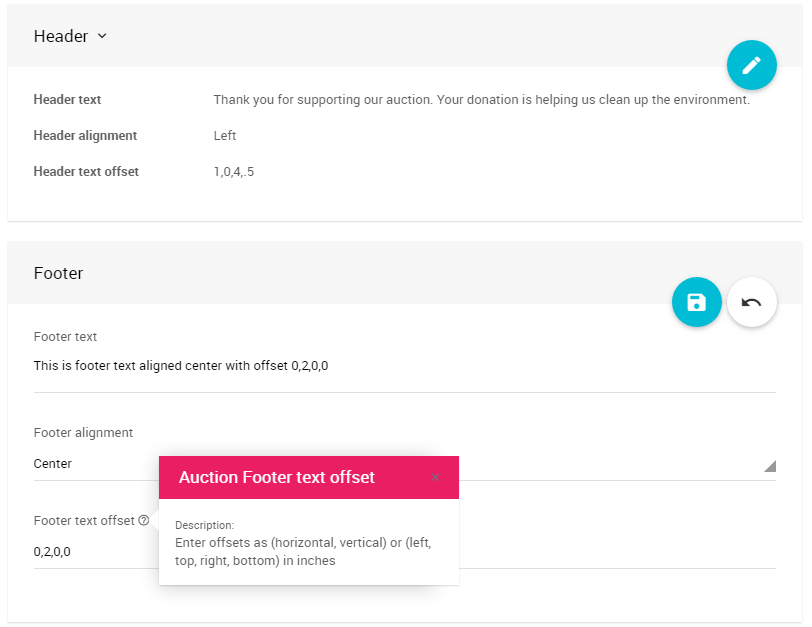
Offset Define how far the text should be offset from the margins. This only applies to printed receipts. Enter values in inches using the format
horizontal,verticalorleft,top,right,bottom.- Examples
- To offset the text
1inch horizontally and2inches vertically, enter1,2. This will apply the values to the the left/right and top/bottom "margins". - To offset the text
1inch on the right only, and2inches on the top only, enter0,2,1,0(as top/right/left/bottom).
- To offset the text
- Examples
Appearance
The Appearance tab allows you to define the page size, stationery, address offsets, font, and font color.
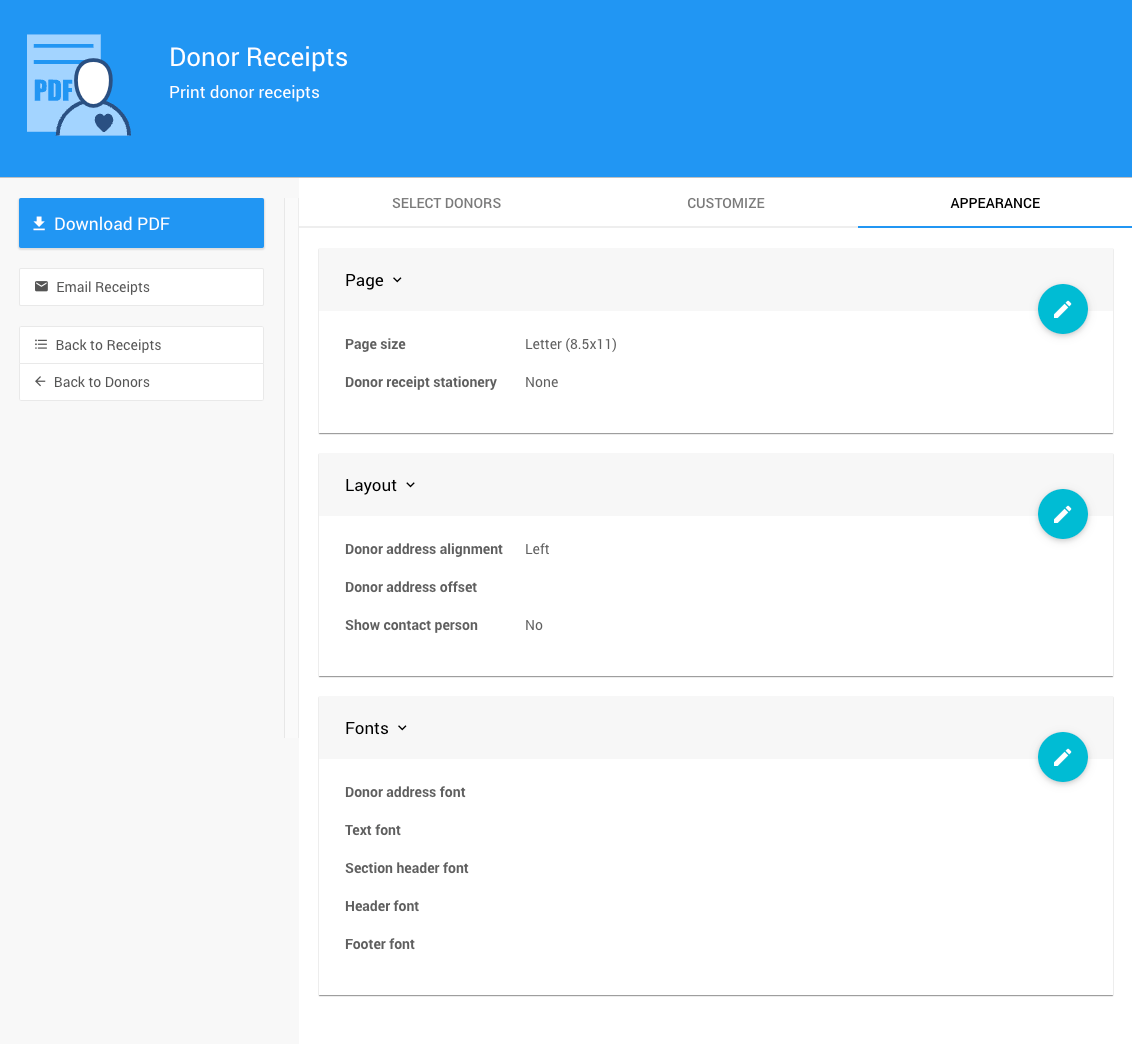
Page
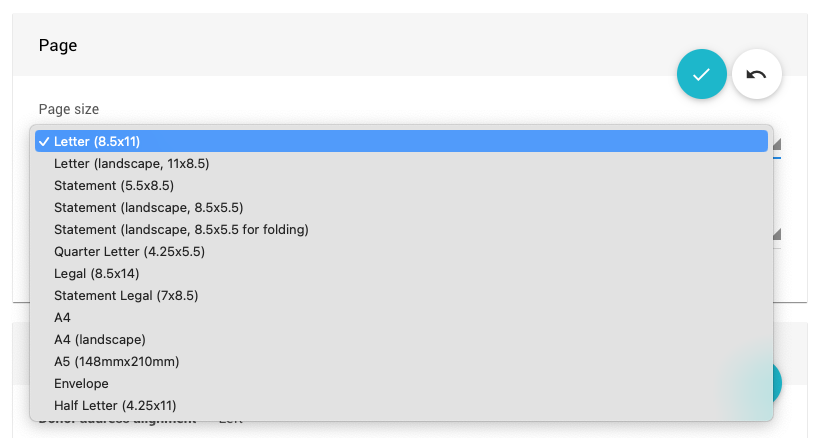
Page Size - Select the page size and orientation for Donor Receipts.
Donor Receipt Stationery - if available, select the stationery to use for the Donor Receipts from the drop-down selector.
IMPORTANT
Stationery must already be set up in Printing - Stationery to be available to select here.
See Stationery for more information.
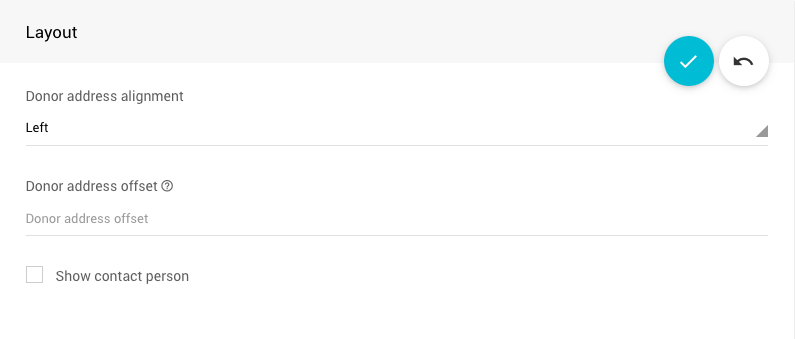
Layout
Donor Address Alignment - Select Left, Center, or Right
Donor Address Offset - Define how far the text should be offset from the margins. enter in inches in the format (horizontal, verical) or (left, top, right, bottom) For example, to offset the text 1.5 horizontally, and 1 inch vertically, enter (0.5, 1). To offset the text 1 inch from the right, and 0.25 inches from the bottom, enter (0,0,1,0.25)
Show Contact Person - If selected, the donor contact name will appear above the donor address on the Donor Receipt
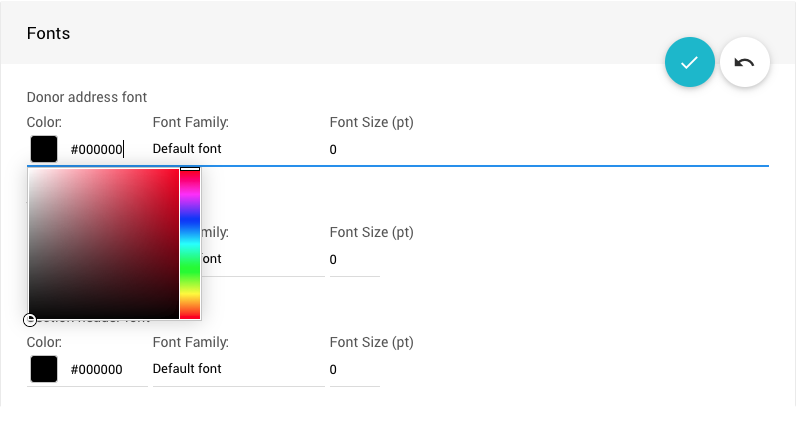
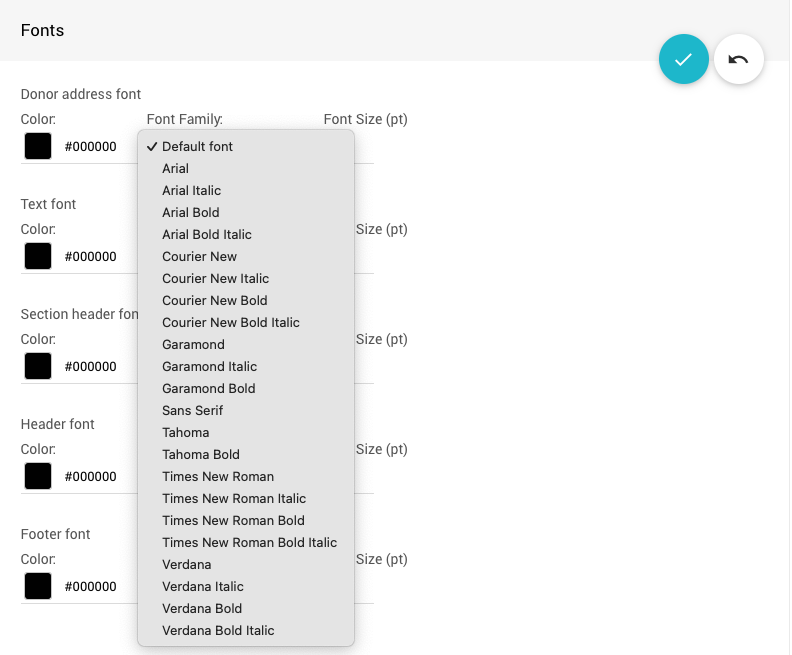
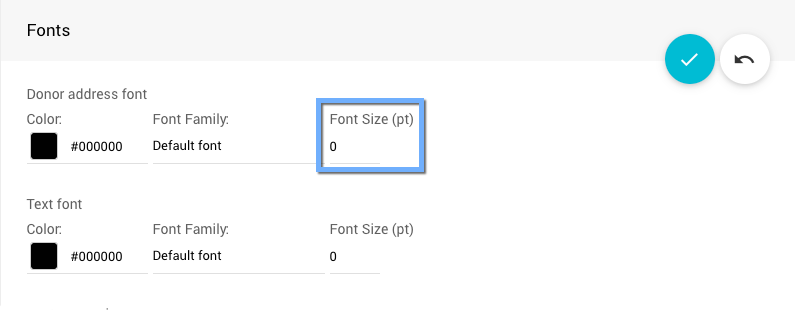
Fonts
Font, font size, and font color may be defined for the donor address, text (e.g. description, value), section headers, header and footer on the Donor Receipt.
To change the font color, click the color box to the left of the font name. On the color-picker that appears, click the rainbow slider on the right to change the color family, then click a spot on the left that matches the color you want.
To change the font, select a font from the drop-down menu.
To change the font size, set the appropriate value as needed.
INFORMATION
The "Default font" does not need to have a size set.
Click the blue checkmark icon to save your changes when finished.
To cancel changes, click the white undo arrow.
Last reviewed: March 2023