Countdown
Basic Content - Countdown
Drag and drop the More Column Content element from the Website Editor Sidebar into the column space where you want to add the Countdown element.
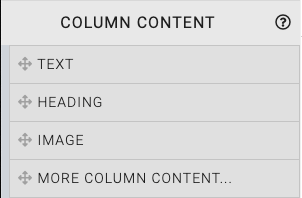
This will open the Choose Content window.
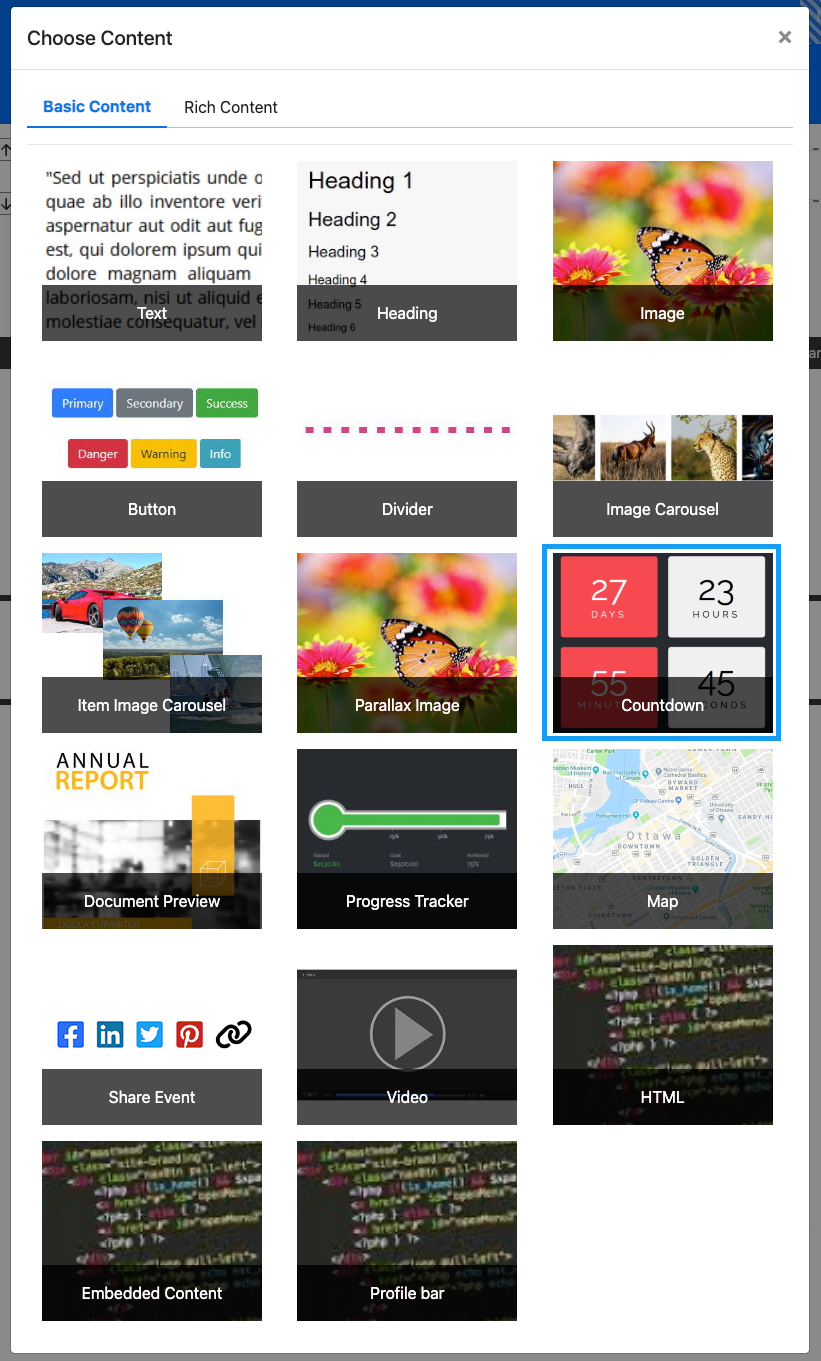
Clicking the Countdown element will now drop it into the column space you selected.
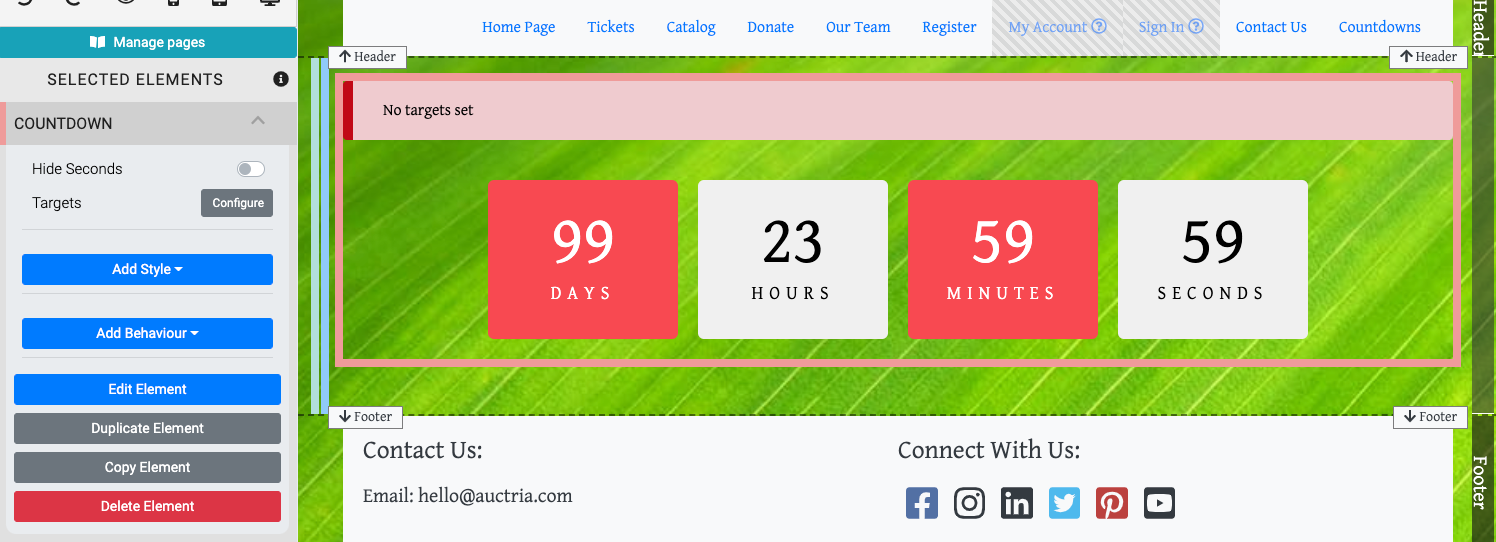
When the Countdown element is highlighted it will be seen in the "Selected Elements" section of the Website Editor Sidebar. Clicking on "Countdown" in the "Selected Elements" section will open up its settings.
Edit Countdown
Hide Seconds
This option allows you to toggle the display of the "Seconds" of the Countdown element.

Targets
By default, the Countdown element is not specifically set although it will show an amount of time based on 100 days initially. Clicking on the Targets Configure button will open the Select Targets window where you can set Targets to be used by the Countdown element.

Multiple Targets can be set for the Countdown element working in a cascading fashion. When the first Target has run down, the next Target will be used until it runs down, then the next Target will be used until no more Targets are available. If there are no valid Targets, the element will not display.

An example, based on a newly inserted Countdown element -- note the warning "No targets set".
Add Targets
To add a new Target you would click on the Add Target button.
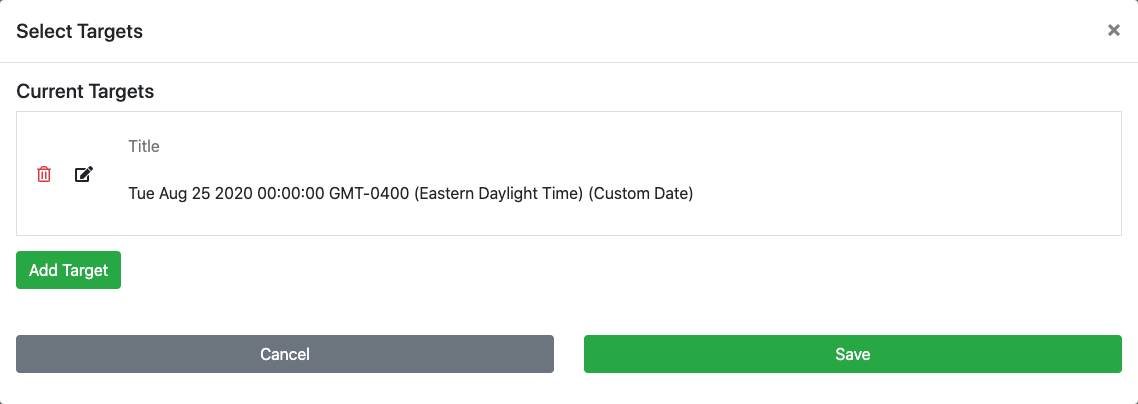
Edit Targets
To edit the *Add Target default item, click the "pencil in box" icon to open its options (clicking on the "trashcan" icon or simply closing without saving will cancel this operation as well).
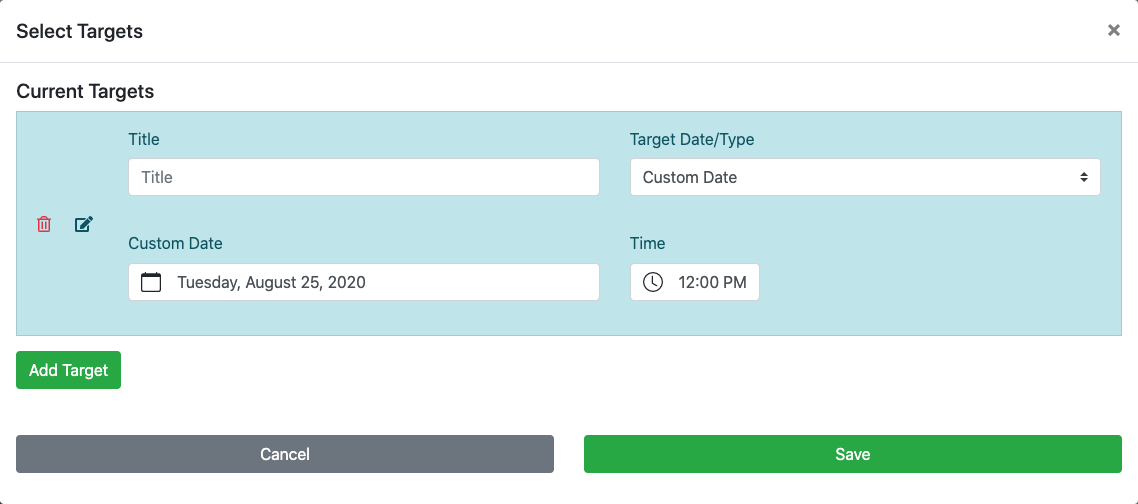
The default Target Date/Type option is set to Custom Date. You can set a custom Title as well as the Custom Date and Time for the target. There is a drop-down selector for the Target/Type option allowing you to choose pre-set/defined targets for Online Bidding Start and Online Bidding End.

When using the Custom Date option a date and time picker will be available to be used for selecting the custom date and time. When using the ... Start or ... End options the times defined under Online Bidding will be used. All three options provide for a custom Title (or can be left blank).
Example Targets
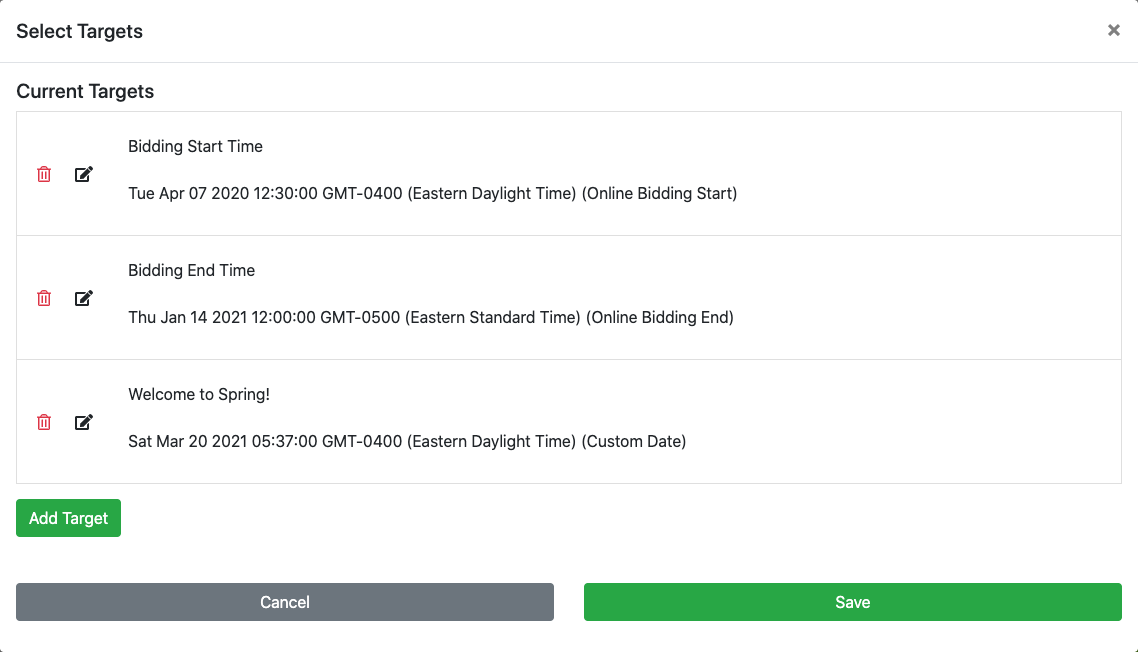
In the example above, the first target has already passed so it will not be used while the second target is still valid and will display its relevant details.
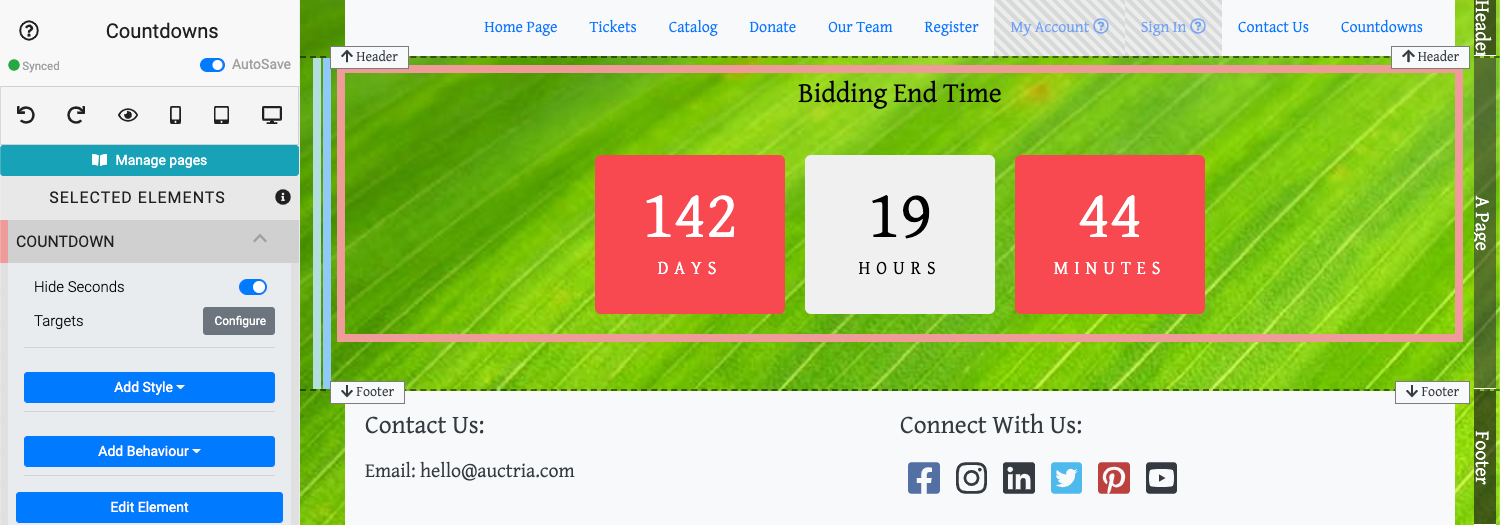
The third target will take the second targets place (in approximately 142 days, per the example) and welcome Spring 2021!
Change Countdown Styles (advanced)
The Countdown element uses special styles found after clicking the Add Style button.
Countdown Block Colors
There are Background styles unique to the Countdown element (Odd Background Color, Odd Text Color, Even Background Color, and Even Text Color).
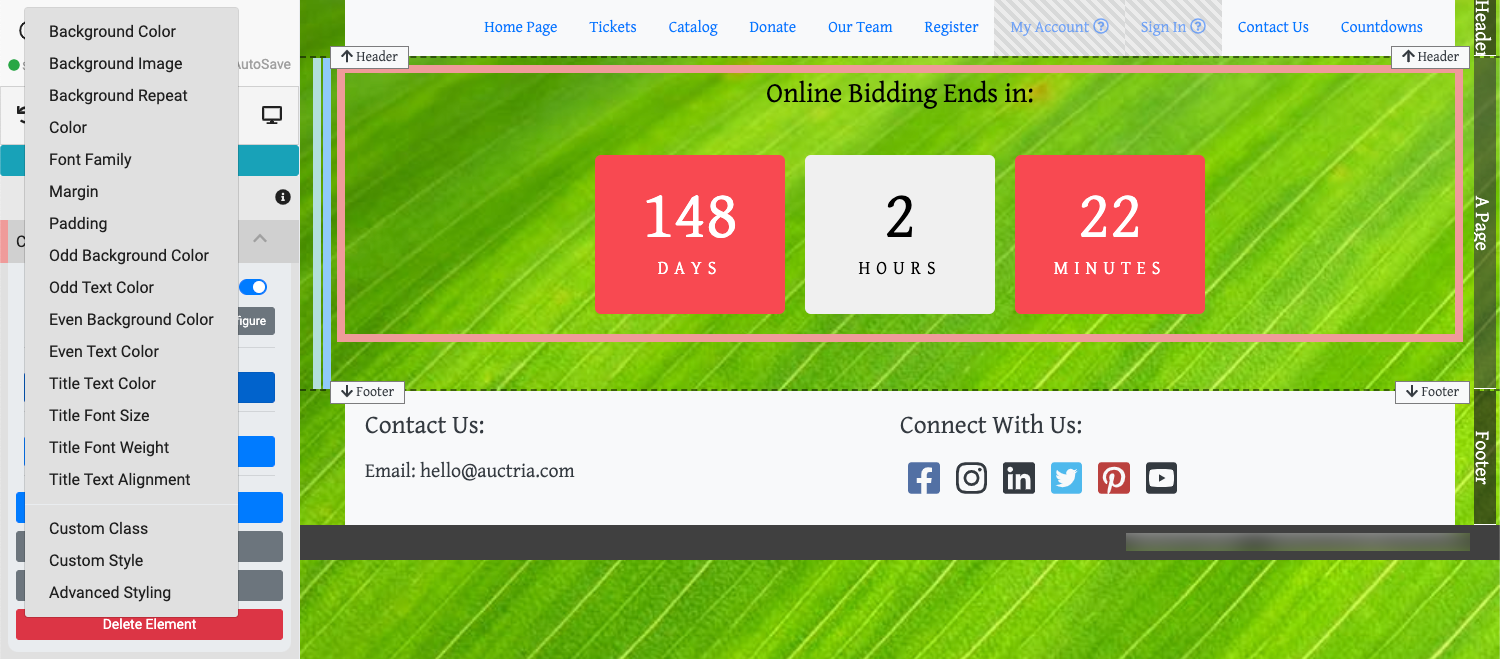
The Odd colors affect the Days and Minutes and the Even colors affect the Hours and Seconds. Setting these colors uses the same processes as setting a Background Color or Font Color.
For example, to set the Odd Background Color you would click on Add Style and then on Odd Background Color. This will make the style option available to be edited.

By default, the background color will be "empty" and not affect the views until a specific color is set. Clicking on the Old Background Color label will open a Color Picker to set your choice with.

Click the Odd Background Color label to ensure the color has been saved for this element.
Changing the Text color styles works in a very similar manner.
Countdown Target Titles (advanced)
The Countdown element also has unique Title styles (Title Text Color, Title Font Size, Title Font Weight, and Title Text Alignment) that can be set as needed.
These special style properties can be set using the same approach as setting other Font properties. See Fonts for more details in the Add Style section of the User Guide.
Also see Common Element Actions for more details on managing the Countdown element.
Last reviewed: February 2023