Quick Start: Donated Items
Welcome!
Auctria can be used to accept Item Donations, items donated to an auction event to be available for bidding by an Item Donor.
Our Quick-Start Guide to Item Donations will take you through setting up your event website to accept Item Donations, approving or rejecting those items for inclusion in your event's auction, and displaying approved Item Donations on the event website.
Pre-Requisites
- An Event
- An Event Website
- An Online Auction
Please see Quick Start: Online Auctions for more information if these have not been created.
Item Donations can be accepted on your event website using the Donate an Item page or pre-built section.
# Add Donate an Item Page
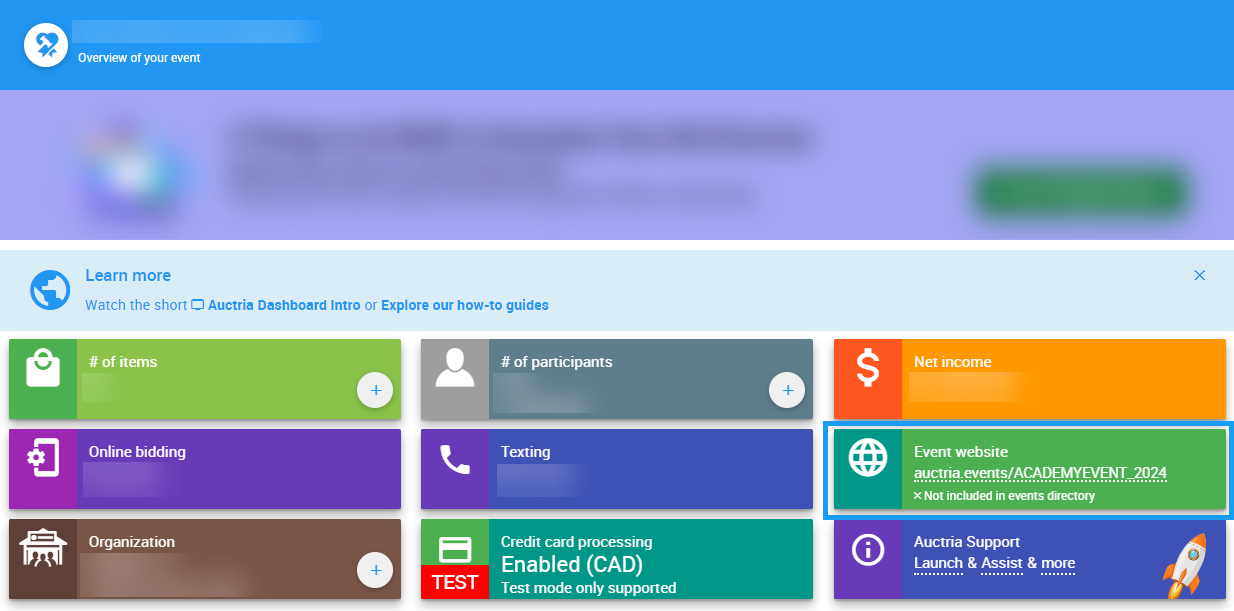
To start, open the Website Editor by clicking the Event website tile on the main Auctria dashboard and then clicking the Edit Website button on the Website page.

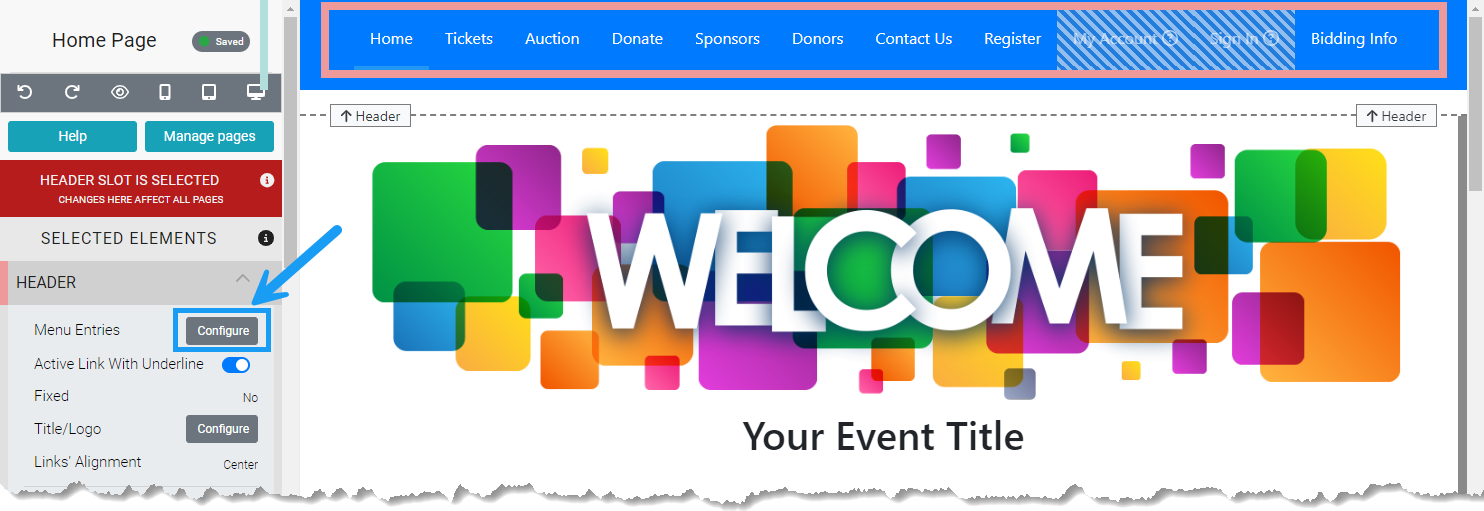
Select the header section at the top of your website. Then click the Configure button next to Menu Entries on the left sidebar of the website editor.
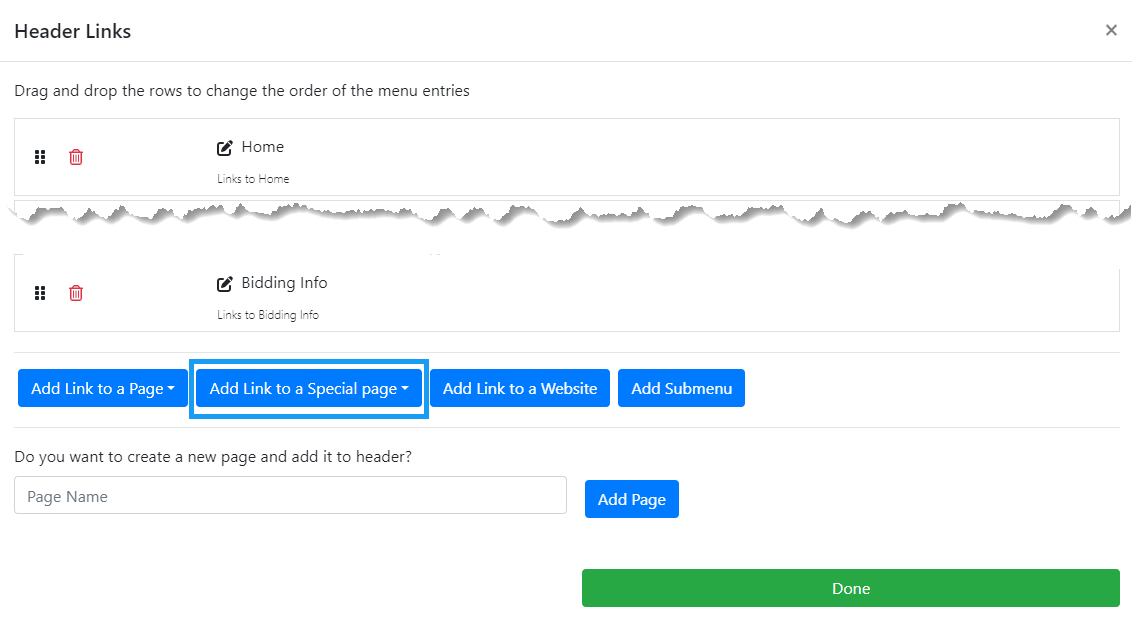
This will display the list of Header Links that appear in the top navigation of your event website. Scroll to the bottom and click the Add Link to a Special Page button.
Select the Donate an Item option from the drop-down, and the Donate an Item page will appear at the end of your header link list. You can drag and drop the page anywhere on the list to update the order.

# Add Donate an Item Section
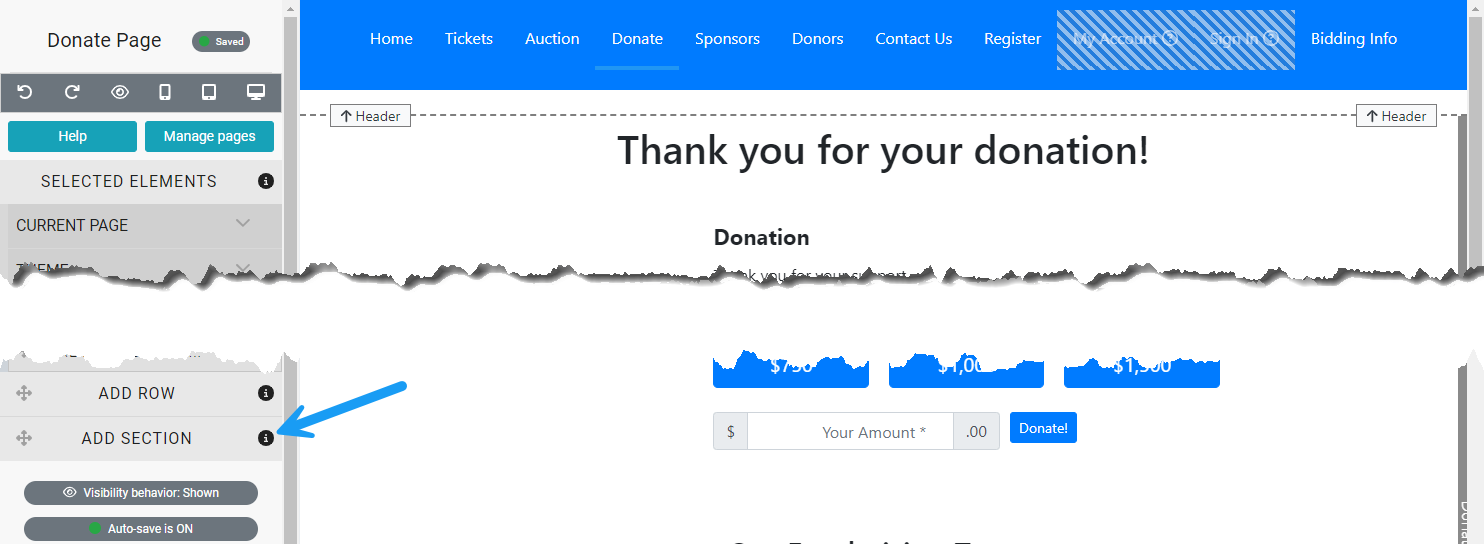
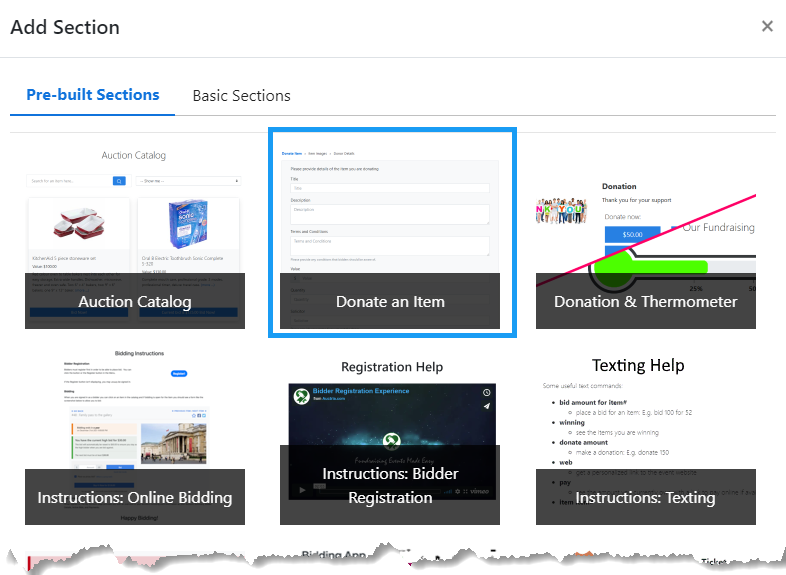
You can also add the Donate an Item section to an existing page on your website. Navigate to the page you wish to update in the website editor and scroll down on the left sidebar until you see the Add Section option. Click and hold on Add Section and drag it to the space on the page where you want the section to appear. Release, and you will see the Add Section menu.
Click on Donate an Item to add the section to your page. You can drag and drop the section to change its position on the page.
Now that you have a space to accept Item Donations on your event website, you can share the link with your Item Donors.
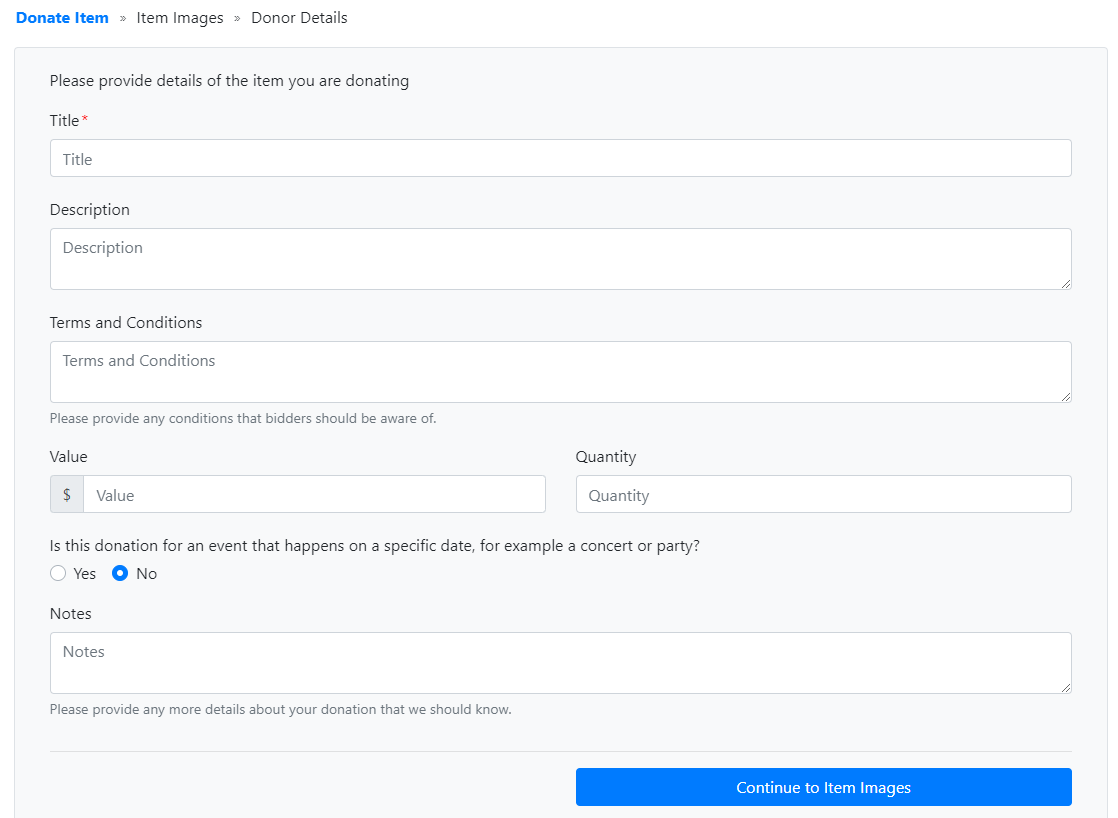
An Item Donor can click the link to your Item Donate page and enter the details of the item they wish to donate to your event, such as title, description, terms and conditions, value, and quantity. Item Donors can specify whether the donation is for an event, such as a concert or dinner party. They can also upload images for their item.
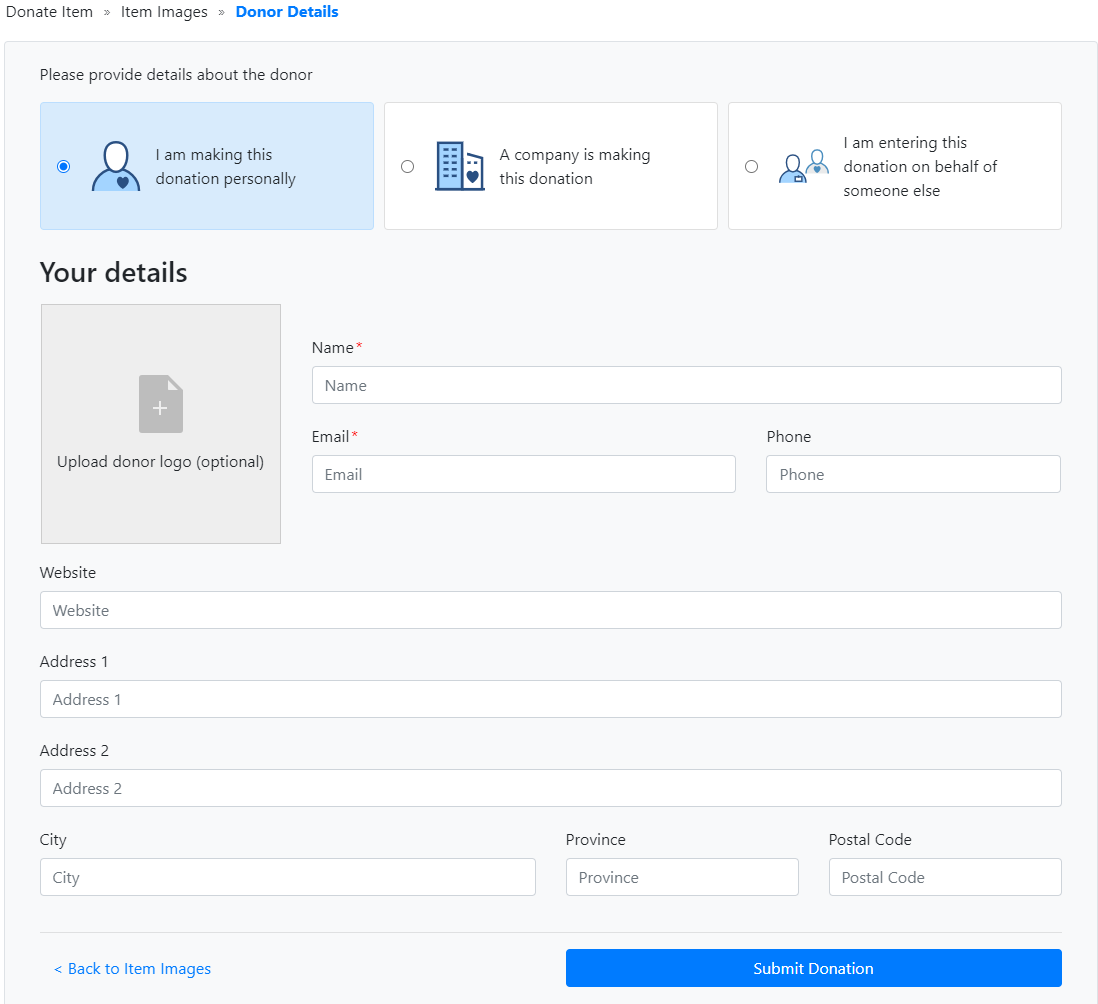
Finally, Item Donors will be asked to provide details about themselves or the individual or organization making the donation.
Once completed, they will receive an email confirmation that includes a reference number and a link to edit their submission at any time before it is accepted.
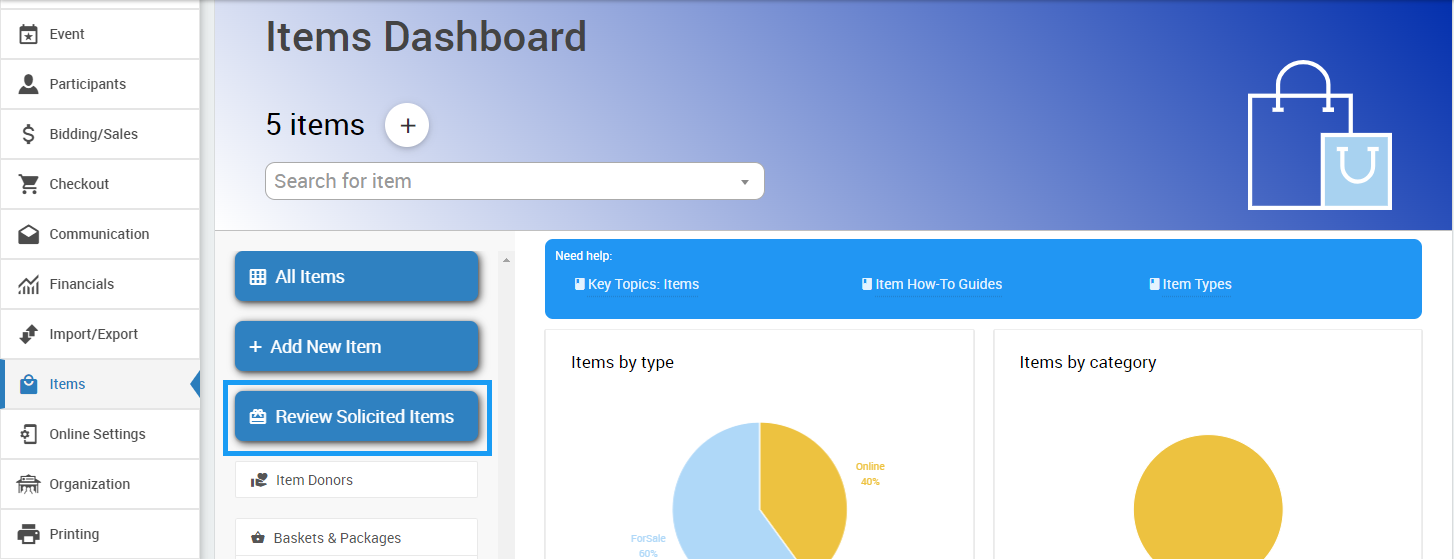
Event organizers are notified via email when an Item Donation is submitted. To review the list of Item Donations, click on the Items entry on the left Auctria sidebar. This will open the Items Dashboard.
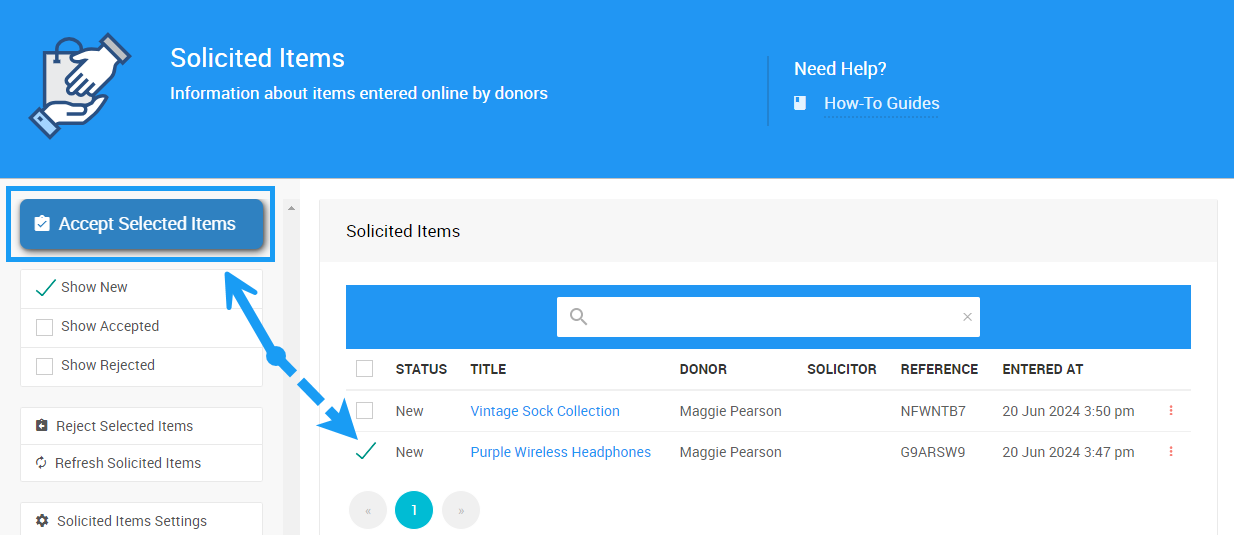
Click on Review Solicited Items to open the Solicited Items page. Here, you will see the list of items ready for review.
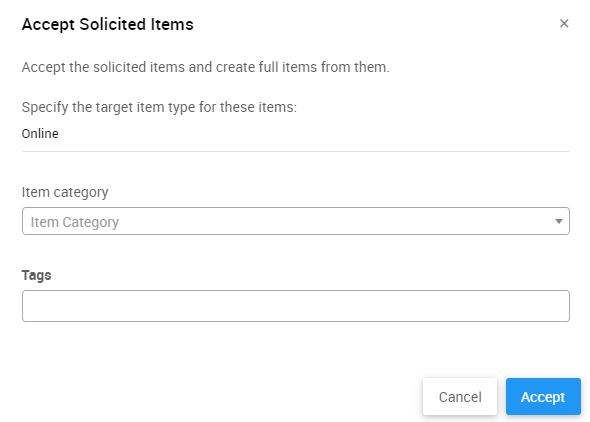
To approve an item, click on the checkbox on the left side of the item name. Then, click the Accept Selected Items button. This will open a window where you can specify the Item Type and any categories or tags you wish to use.
To reject an item, click on the checkbox and then click the Reject Selected Items button on the left sidebar.

You can approve or reject multiple items at once by clicking the checkboxes next to the item entries before clicking the Approve or Reject buttons. To approve or reject all items on the list, click the checkbox in the top bar next to Status to select all current entries.
By default, approved items will be added using the Online type for the item, and will appear in the catalog on the event website.
- Quick Start: Online Auctions
Learn how to set up an Online Auction Event for the first time in Auctria. - Solicited Items
The Solicited Items dashboard allows you to accept items submitted through the Solicit Items form on your event website.

Last reviewed: June 2024