How To Set Up An Online Event
There are a few significant steps to setting up an Auctria "Online" event.
You will need to add Items, create your event website, and set the website address. You may also need to adjust the Online Bidding Times for your online event.
This guide will take you through setting up an Online Event.
You can add items from the main Auction Dashboard under Items Add New Item.
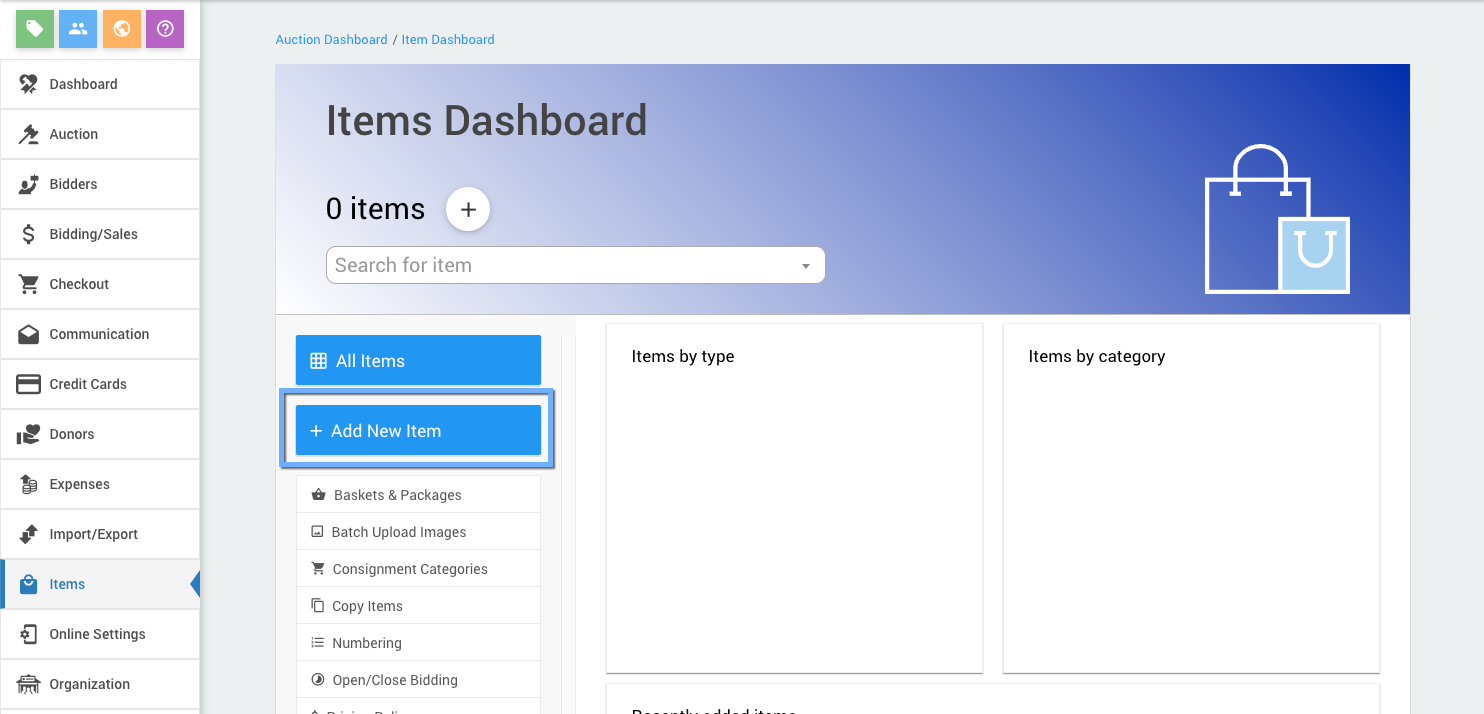
For a fully online event, these items should have their type set to Online. See Item Types for more information on the different items types in Auctria.
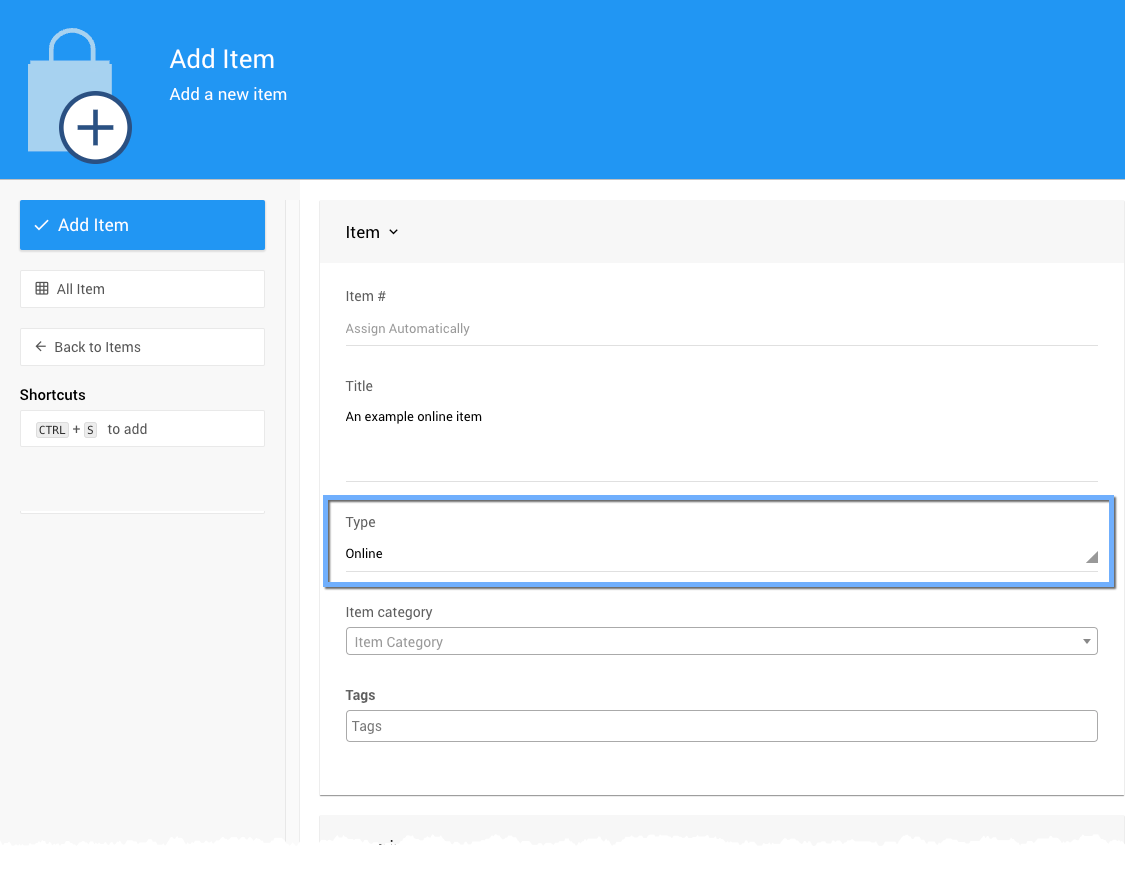
You can continue with the rest of the setup process before you finish adding all of your items. Items can be added at any time.
To Create A Website click on Website from the main Auction Dashboard.
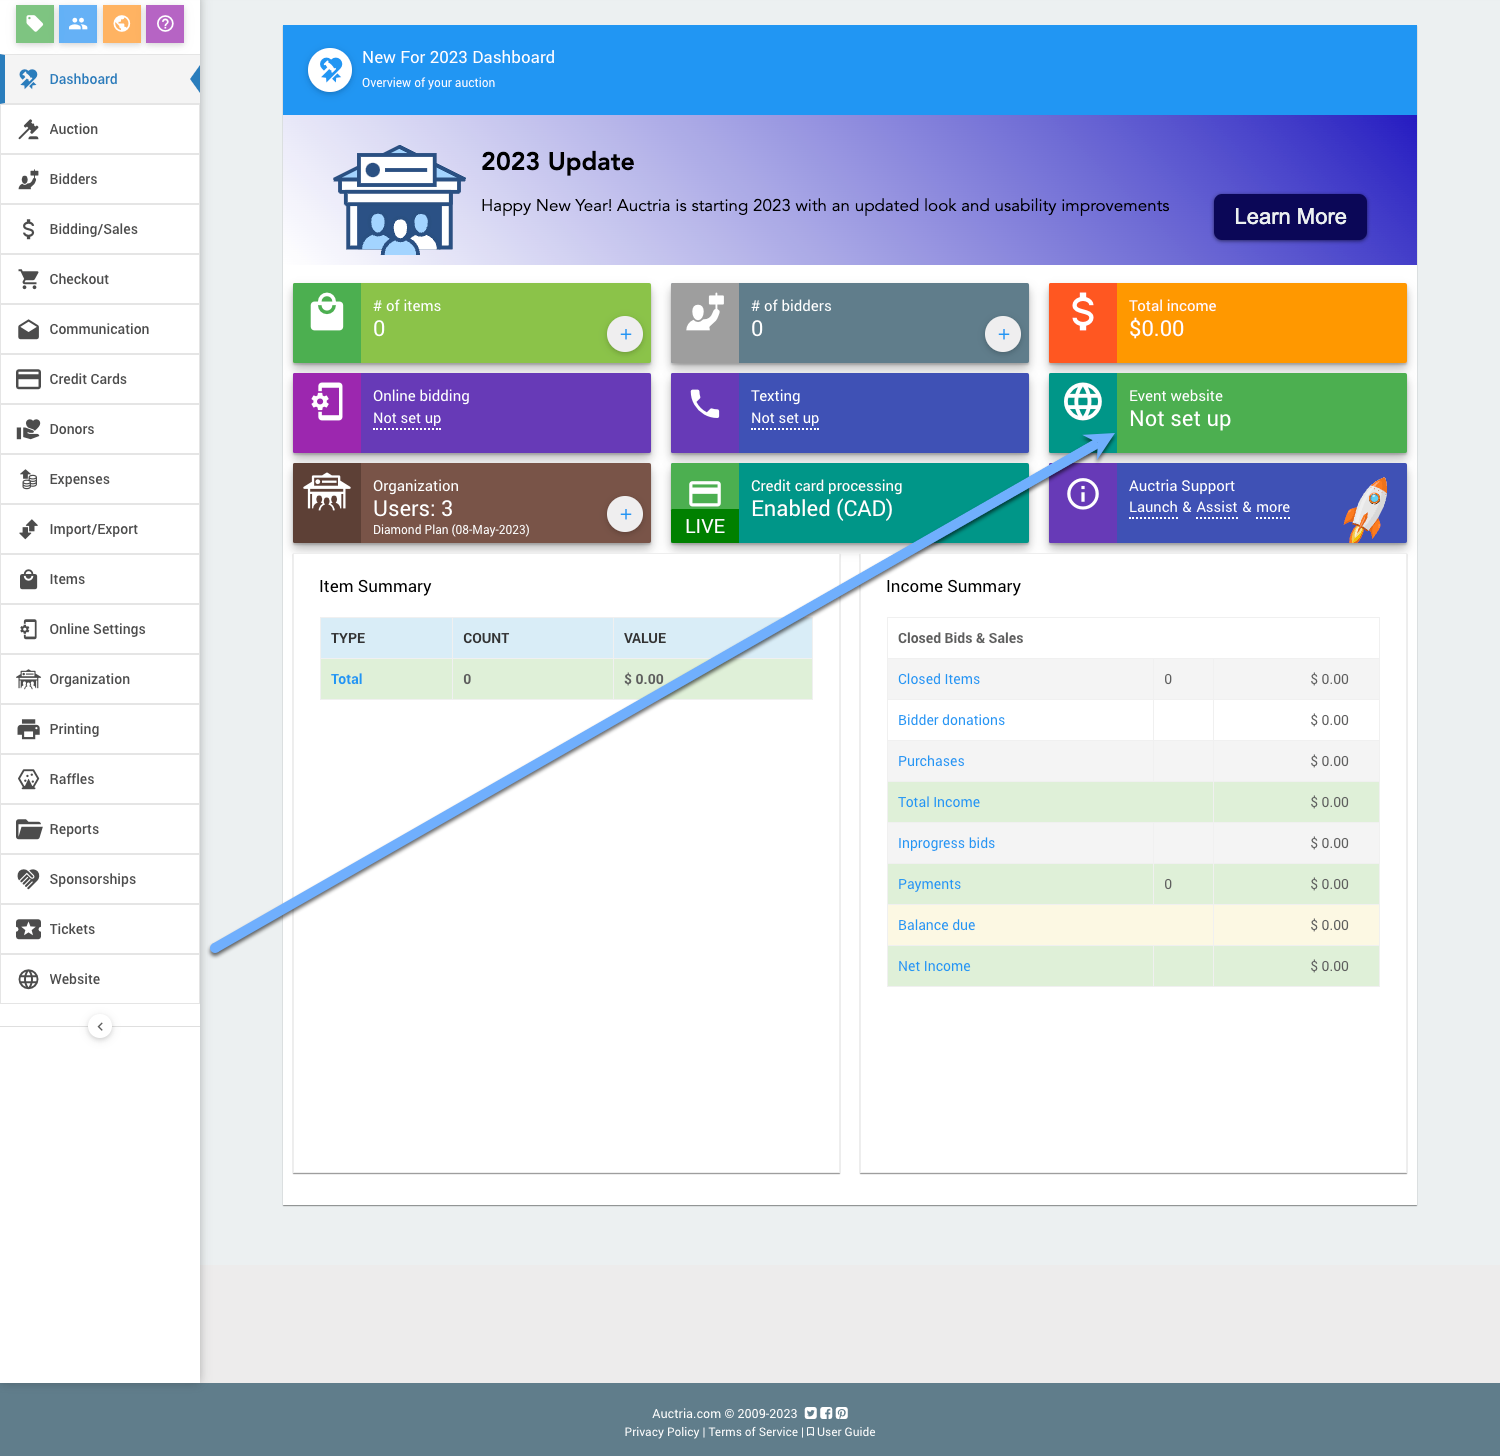
Scroll down to view the available website templates in the Create Website section and click on the Select this template button to create your website.
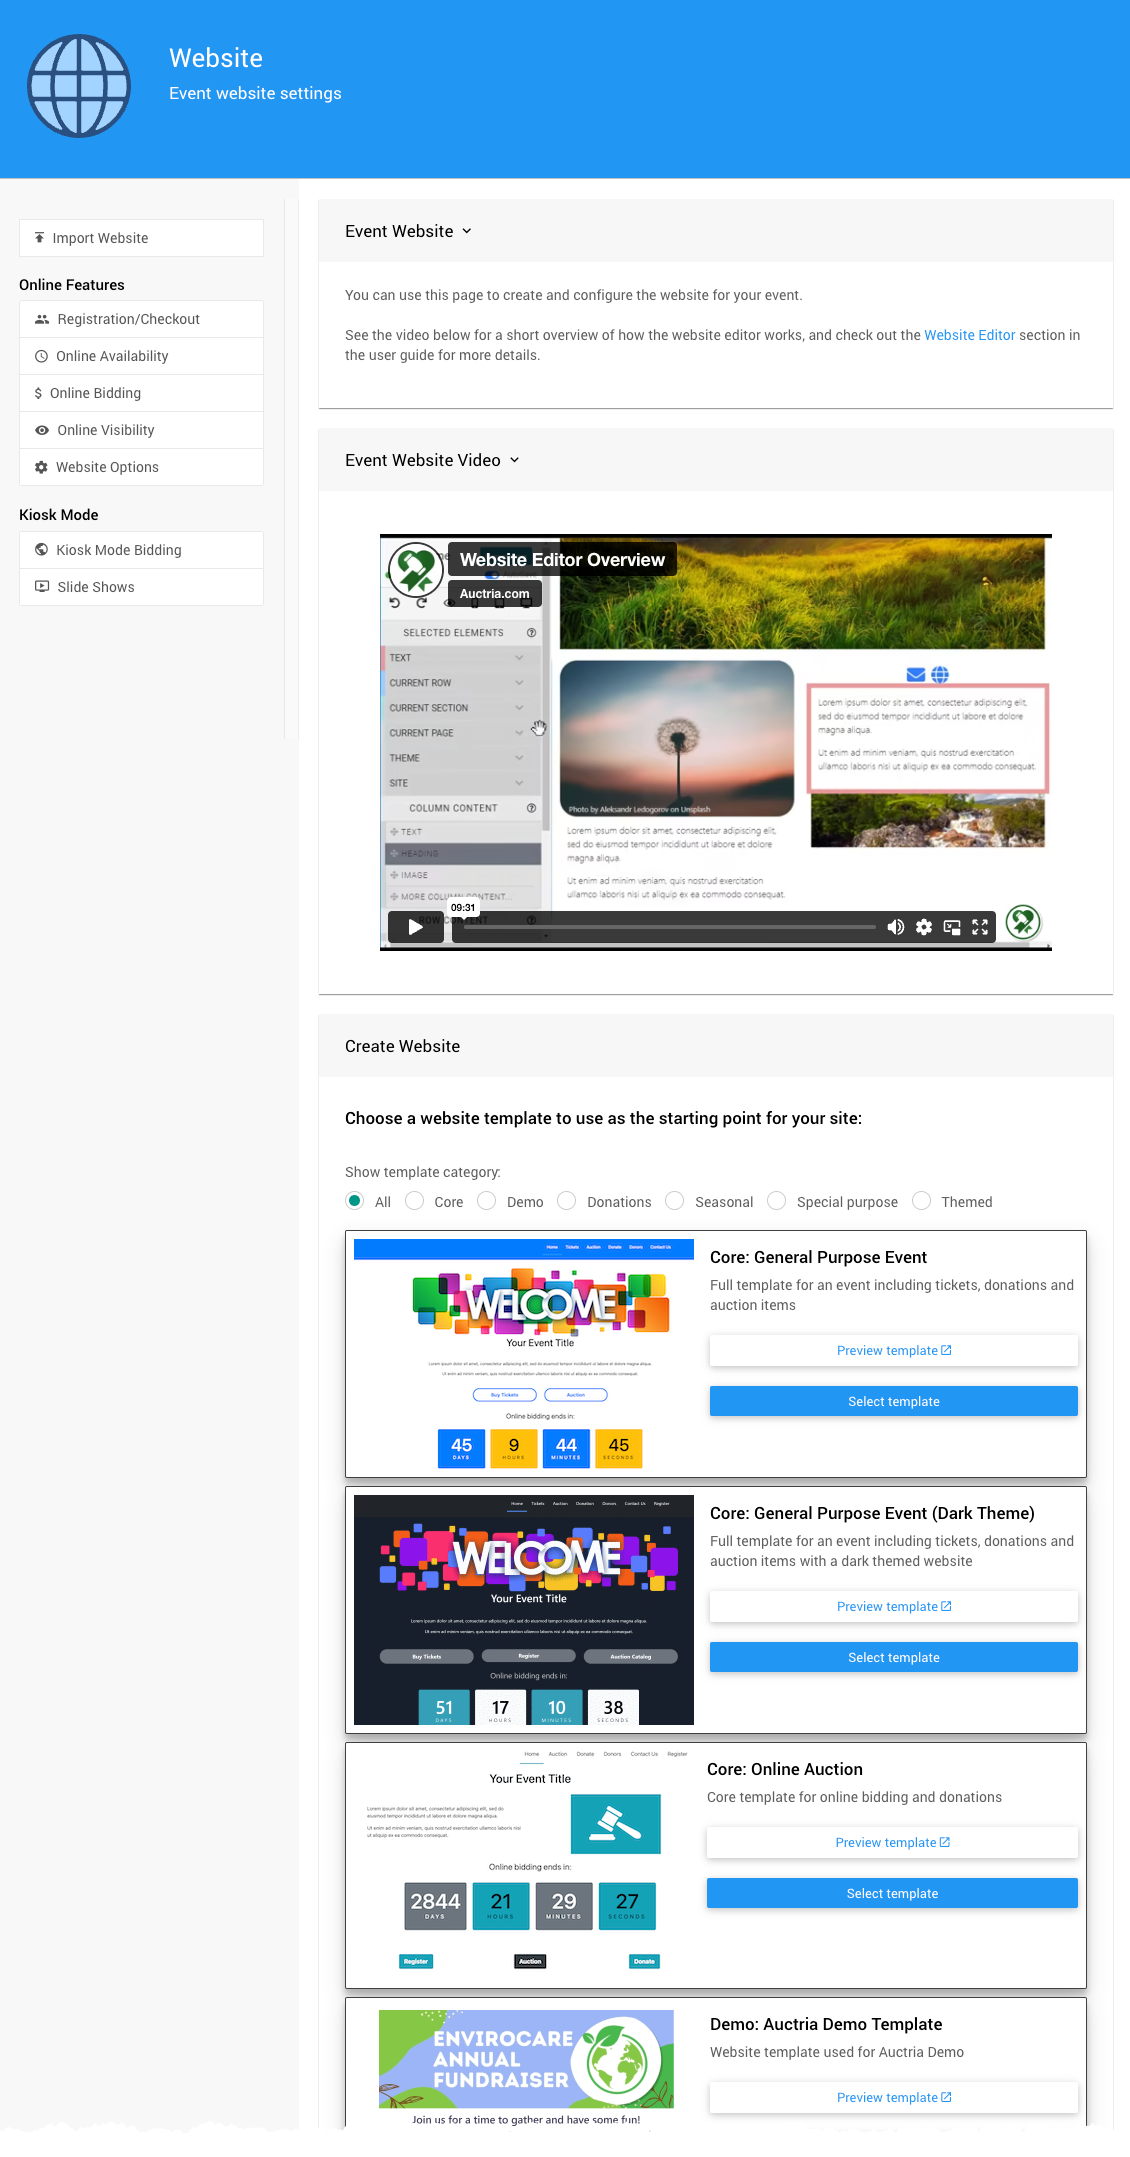
There are several template categories you can start with to create your Auction Website.
Read How To Create A New Event Website for more information.
# Define The Website Address
After creating the website, you will still need to set its "address." Click the "pencil" icon to edit the Event Website ID address field.
Website Addresses should only use letters, numbers, and hyphens (-). Using other "special characters" or "punctuation" could make your auction website unreachable.
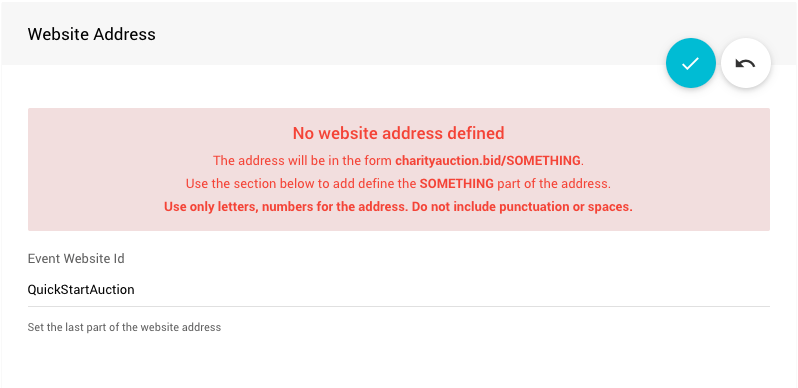
The Event Website ID is the portion of the URL after www.charityauction.bid/. In this case, the default Preferred Domain is being used. You can choose from more auction domains; see How To Set The Website Address for more information on these options.
Your guests should be able to easily recognize the address connected to your organization or the current fundraiser event.
Click the "checkmark" icon to save the Event Website ID you entered.

Make sure you have a valid website address URL.
# Online Bidding Times
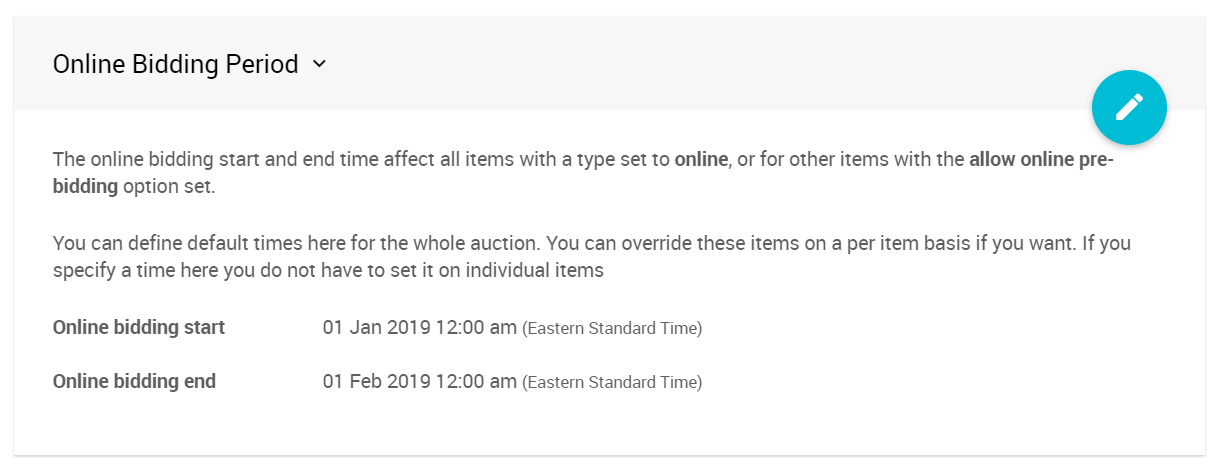
To enable Online Bidding, start by clicking on Website Online Bidding.

Enter both Online bidding start and Online bidding end times. These times will be used as the default start and end times for your "online" items. These times will also apply to all "Biddable" items.
IMPORTANT
Online bidding will not be enabled until you have specified both Online bidding start and Online bidding end times.
More Reading
You can now continue to add items to your event and make further customizations as needed.
- See the Introduction To Credit Cards section to learn about how to accept credit card payments through our integrated credit card processing services.
- See the Introduction to Website Editor section to learn how to customize your event website with more details.
- Add details about your Item Donors Dashboard to help promote them online.
The following User Guide sections and pages about Online Events may also be of assistance.
- How To Create A New Event Website
Creating Auctria event websites. - How To Set Up An In-Person Event
Creating an Auctria In-Person event.

Last reviewed: January 2024