Event Details
The Event Details page lets you modify the information about the event.
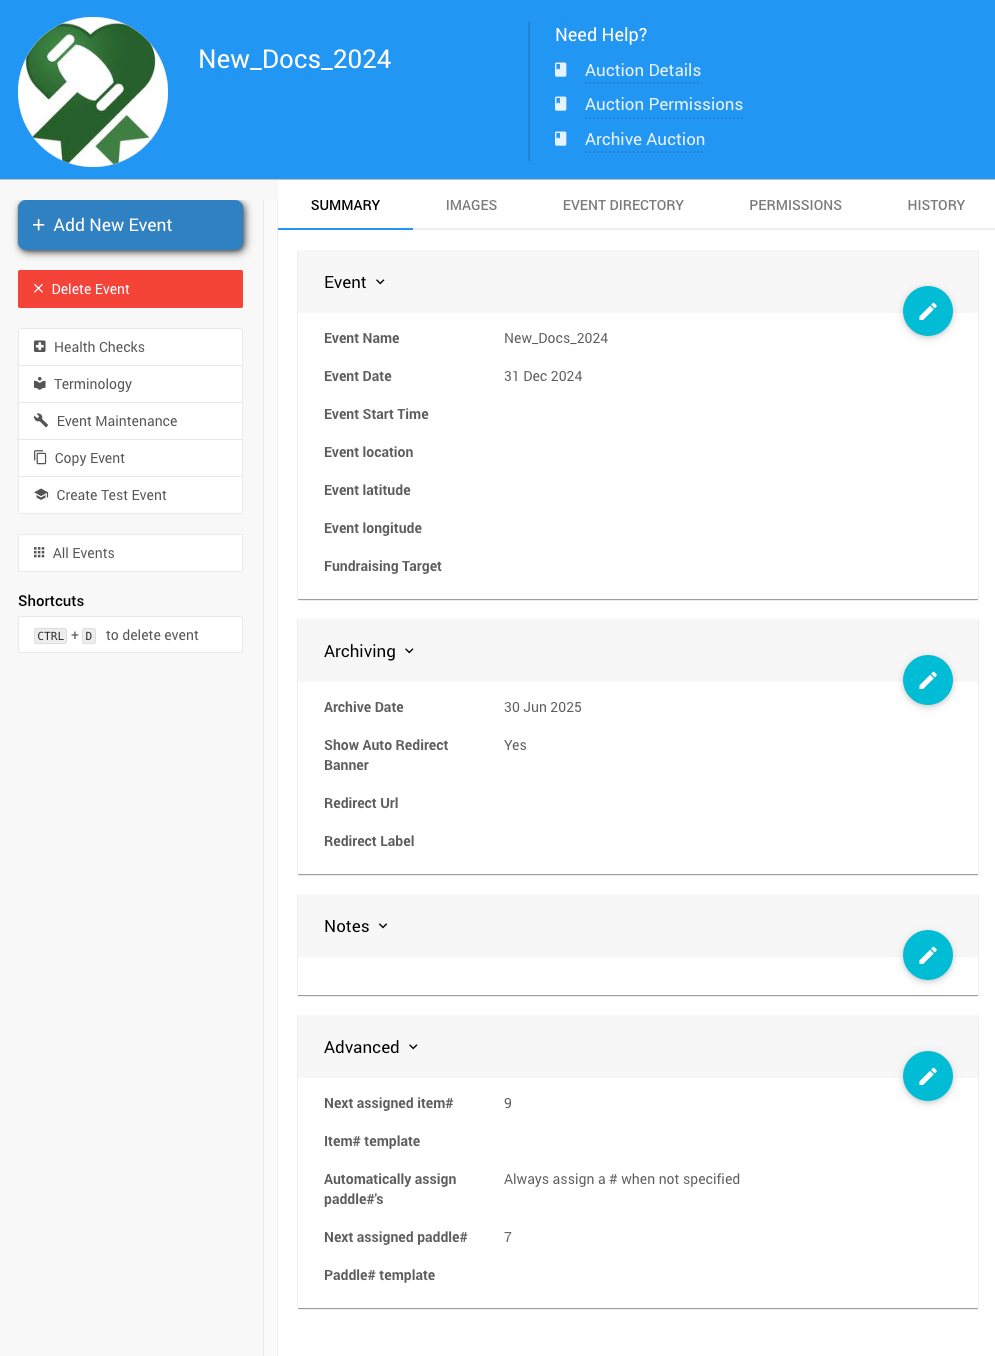
Summary
Suppose multiple events are in the same organization. In that case, the system will display the Event Dashboard based on the date defined on the event Summary tab as the Event Date. For example, Auctria will display an event from the last week; otherwise, the system will show the next upcoming event.
Event
- Event Name
The name of the event. - Event Date
The date the event is taking place. If there isn't a single day, then use the start date. - Event Start Time
The time your event starts (in your organization's timezone).
This is only used for in-person events. - Event Location
The event location will be shown as entered on the tickets. - Event Latitude
The event latitude will be used to link tickets to the event location. - Event Longitude
The event longitude will be used to link tickets to the event location. - Fundraising Target
The amount of money you hope to raise in this event.
Archiving
- Archive Date
Please enter the date after which this event will no longer be visible online to participants (you can still see it). - Show Auto Redirect Banner
When enabled (the default), a banner will be displayed on the current Event Website with a link to the most current event.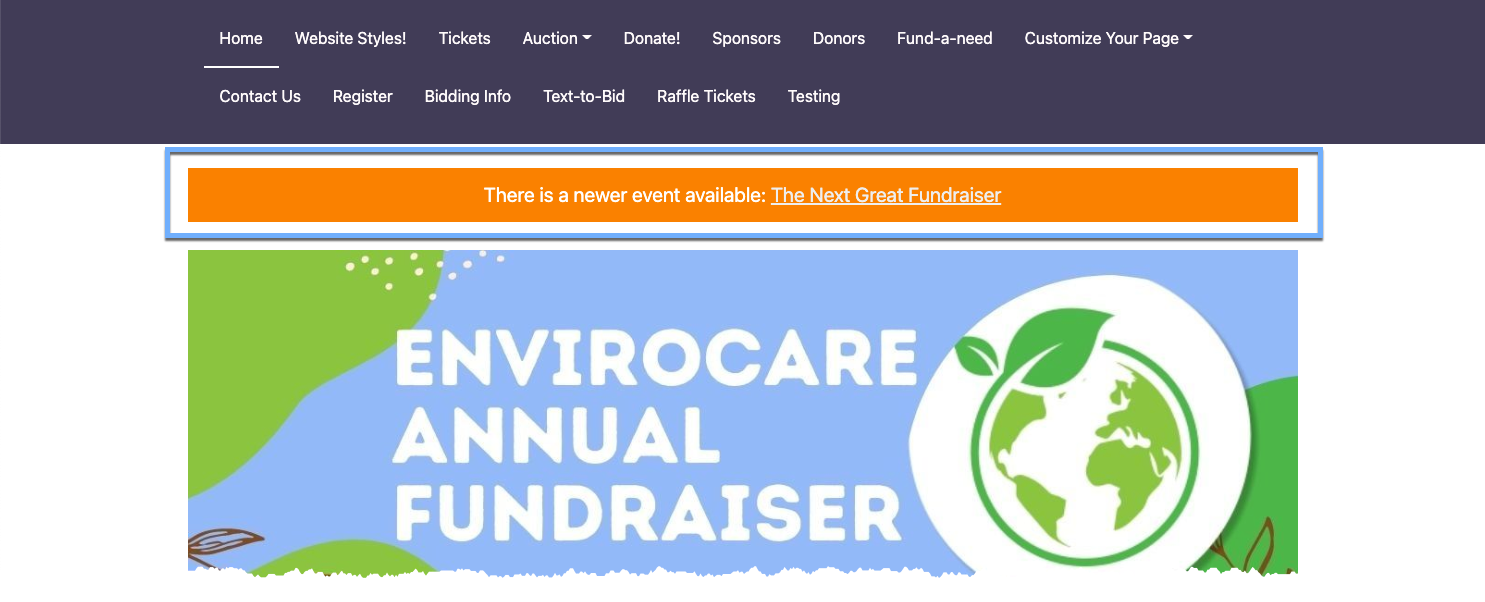
An example taken from a demonstration account event website Home page. - Redirect URL
A Redirect URL can be set to replace the system-derived newer event link. If the Redirect URL is left blank, it will default to the latest event in your organization. If set, the URL will be used explicitly in the Redirect Banner.
IMPORTANT
When using the Redirect URL property, you must include a fully formed address; the URL must begin with the appropriate HTTPS protocol for the website address.
Notes
This section can be used to make notes about the event, but it is not publicly visible.
Advanced Options
The following Advanced Options are available:
- Next assigned item#
The system will attempt to use this number as the number item#. - Item# template
Template used to format item numbers. Leave blank for default. - Next assigned participant#
The system will attempt to use this number as the next Paddle#. - Paddle# template
Template used to format paddle numbers. Leave blank for default.
These two settings (item# and template) let you change the number assigned automatically the next time an item or participant is created without a number being provided. You can adjust these if you have renumbered the items/participants or, for example, if you want participants registering online to receive a high number. You do not have to guarantee that the number you specify is "free"; the system will keep looking for a new number if it is taken.
The syntax of the template should include { { n } } (without spaces) in the place you want the number to appear. For example, to allocate all participant numbers as Bnnn, use the template:
B{{n}}
There are a couple of formatting filters you can apply. To pad all item (or participant) numbers to 3 digits with leading zeros, use:
{{n | pad3}}
This will create participant numbers 001, 002, 003, etc. There are also filters for pad4, pad5, and pad6 to pad to those lengths.
You can adjust the item#, or Paddle#, increment value (from the default of 1) to your preferred value with the following:
{{n | times:10}}
The numbers would then be allocated as 10, 20, 30, ...
Images
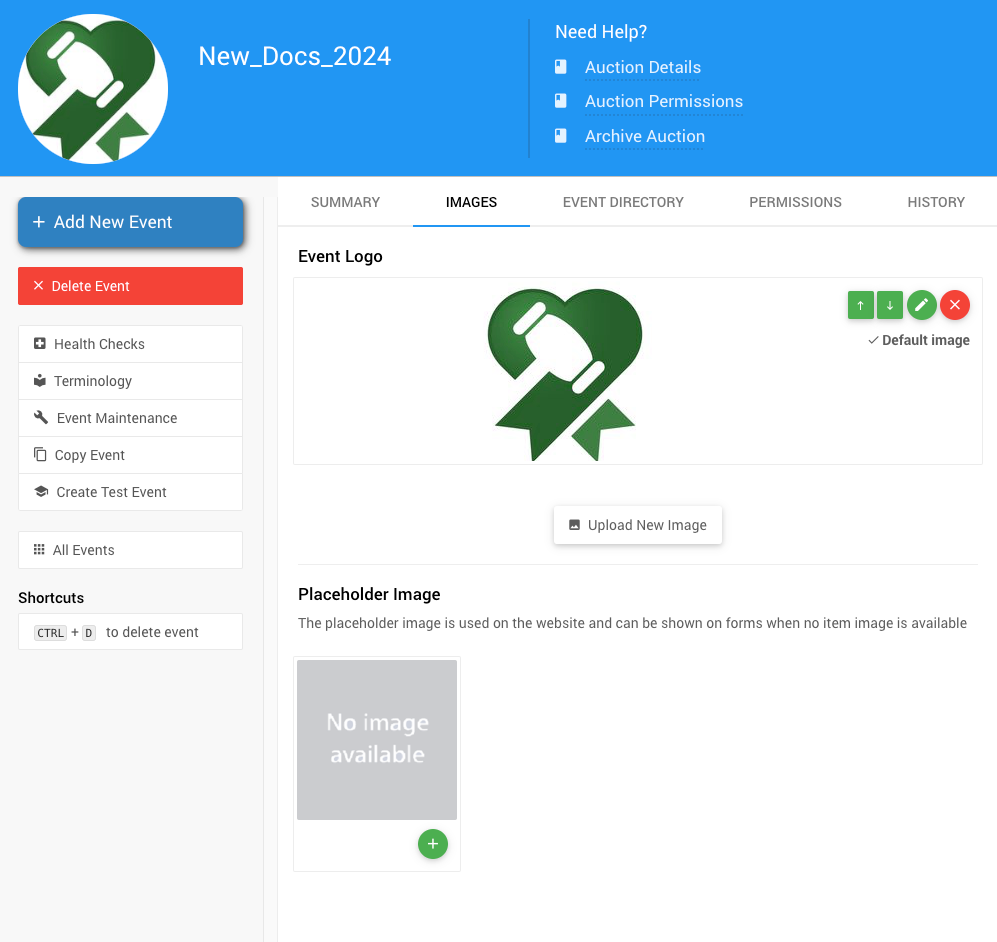
Event Logo
The Event logo is stored under the Images tab on the Event Details page. This tab allows you to upload, edit, or remove an image. If set, the Event Logo is used with your system emails and other communications using a logo image.
INFORMATION
Image Sizes The precise dimension is not critical (since screen sizes will vary), although a width roughly in the following ranges will work well in most cases:
- for "full-width" photos or images, a width of around 1200px is best;
- for "half-width" photos or images, a width around 600px should be used; and,
- page background images work well up to 1600px wide.
See Adding And Modifying Images for more details.
Placeholder Image
A Placeholder Image can be uploaded for where an image is used on the website and shown on forms when no item image is available.
Event Directory
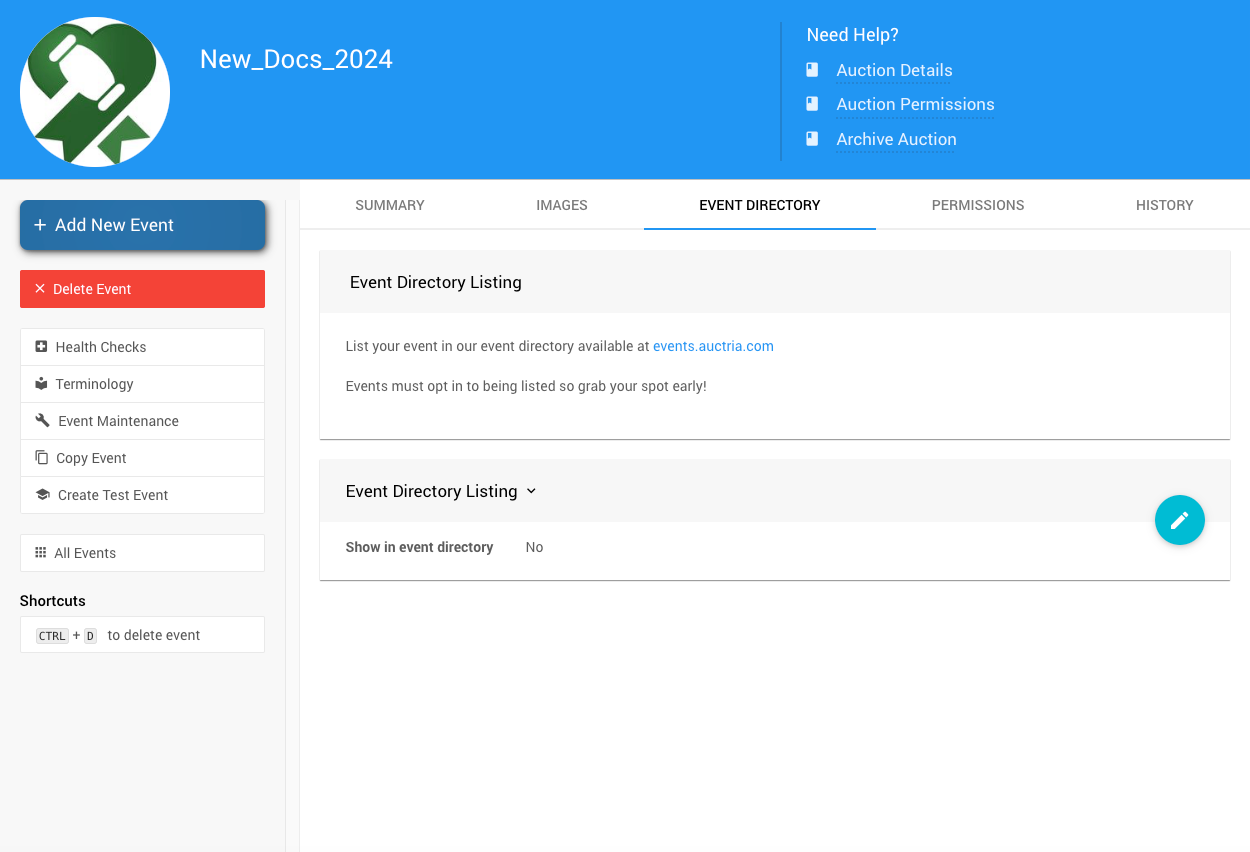
Event Listing Enabled
Suppose you add your event to the Auctria Events Listing page. In that case, you will have several additional sections to update.
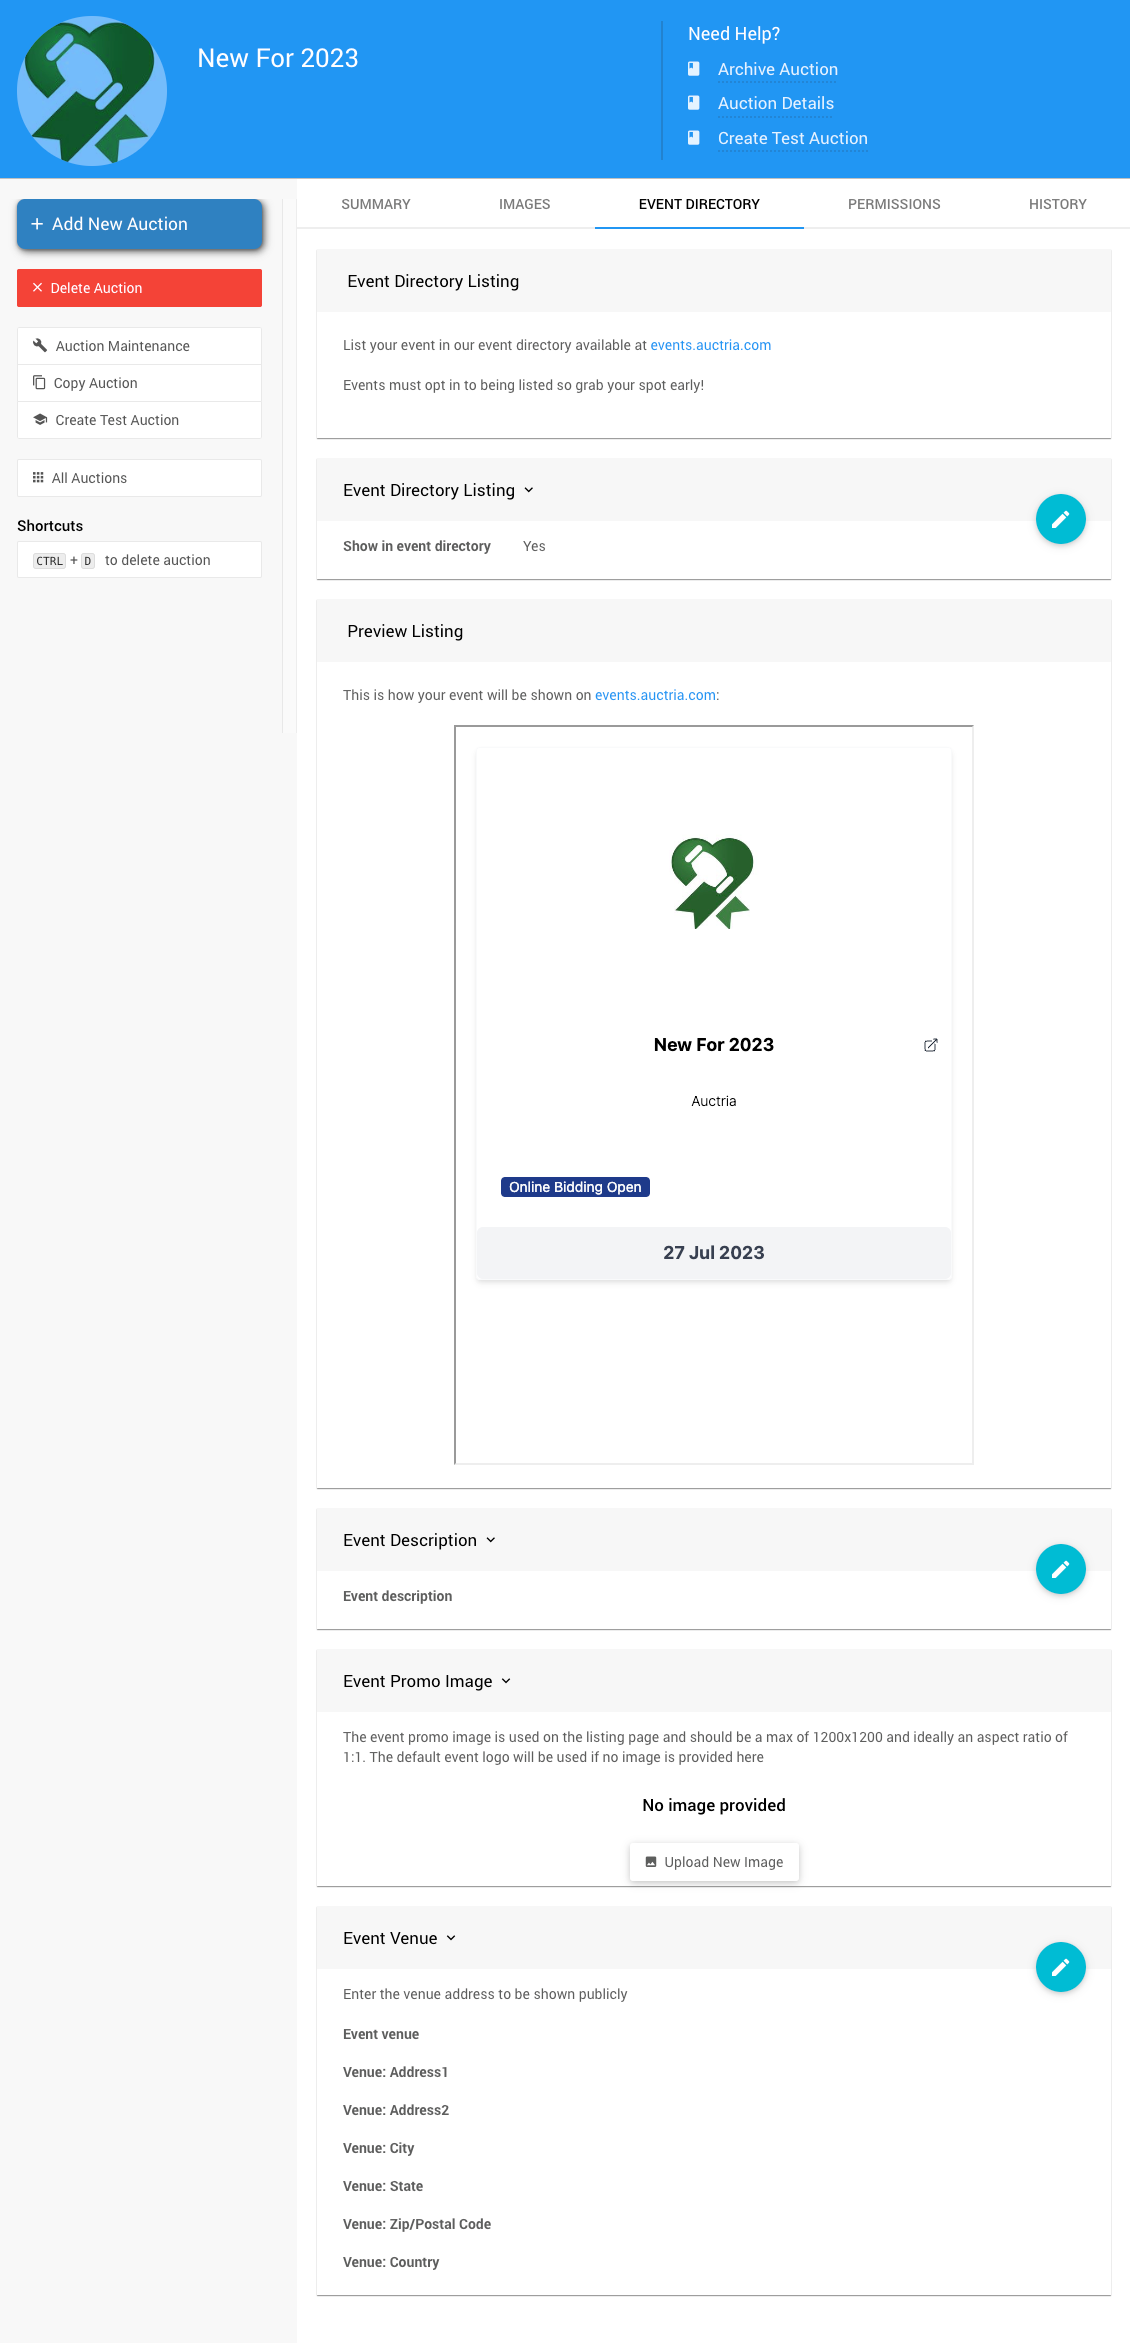
- Preview Listing -- This is how your event will be shown on https://events.auctria.com/.
- Event Description -- This is where you can add additional information about the event.
- Event Promo Image -- This image will be used instead of the default event logo.
- Event Venue -- You can enter the venue address to be shown publicly.
Permissions
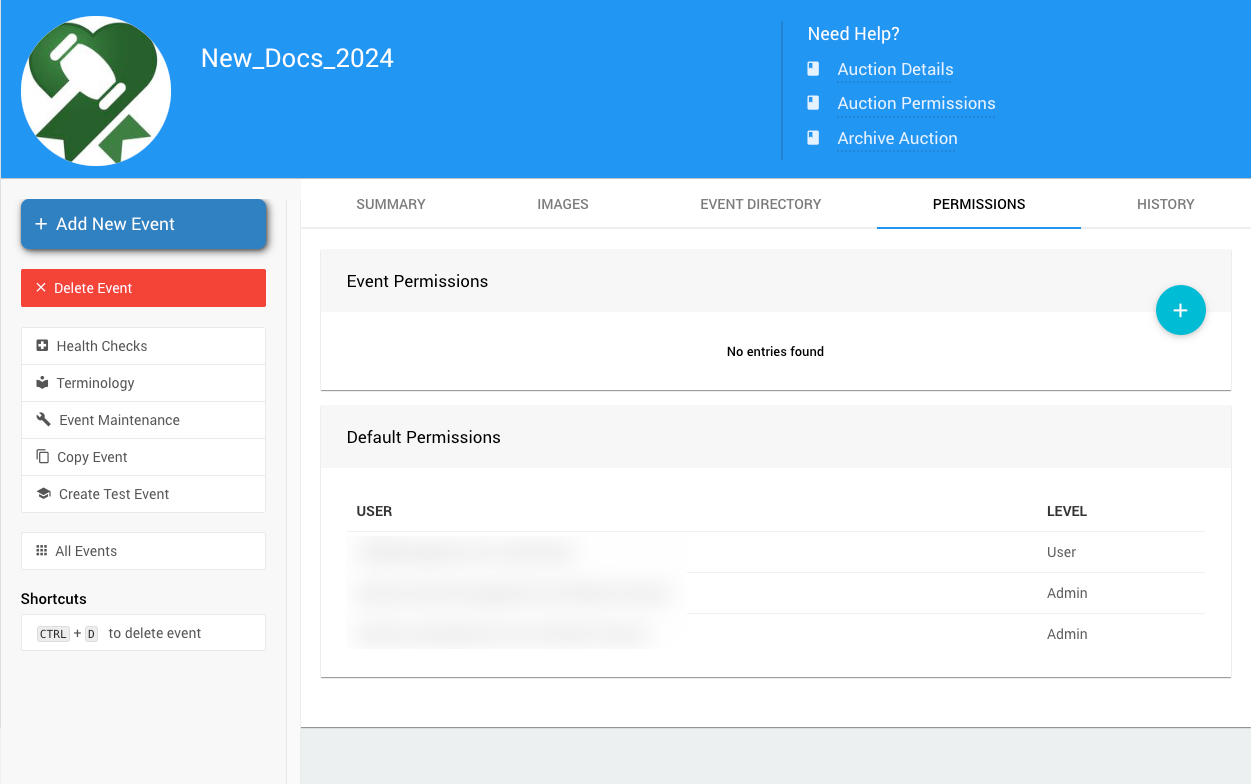
Event Permissions
To add new Event Permissions or Users, click the + icon to open the Add Event Permissions window.
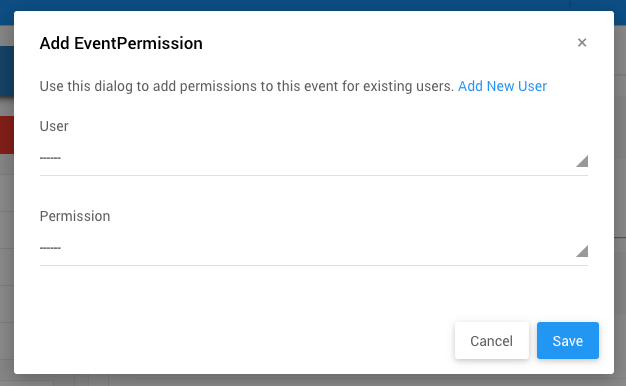
Use this dialog to add permissions for existing users to this event. If a "new" user is required, see Adding Users for more information.
Default Permissions
The Default Permissions section lists the current users and their User Permissions level in the event.
See Event Permissions for more information.
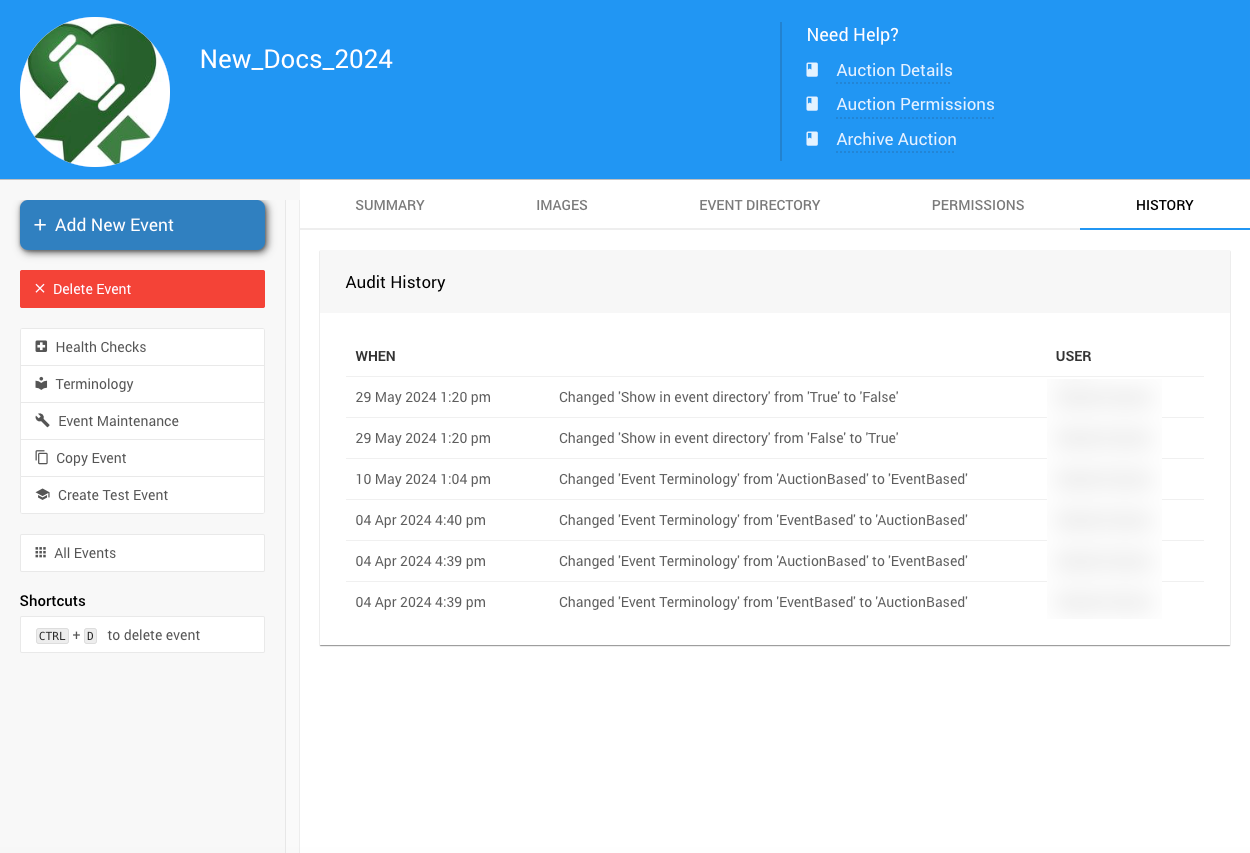
History
The HISTORY tab provides a transactional history of the event for reference.
Audit History
Add New Event
Links to How To Add A New Event.
Delete Event
Opens the "Delete event?" confirmation window.
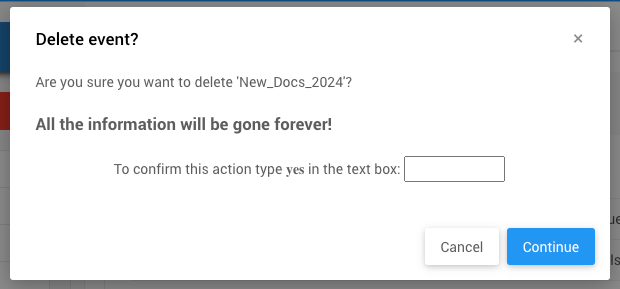
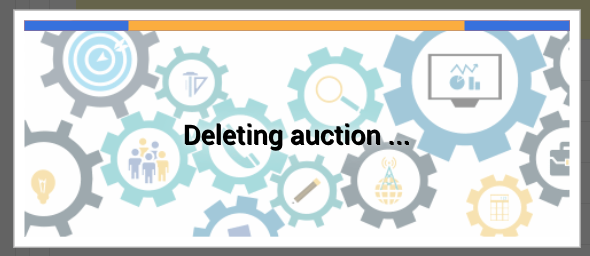
After typing yes and clicking the Continue button, a pop-up progress window will display. At the same time, the event is being deleted from Auctria.
Event Maintenance
Links to the Event Maintenance page.
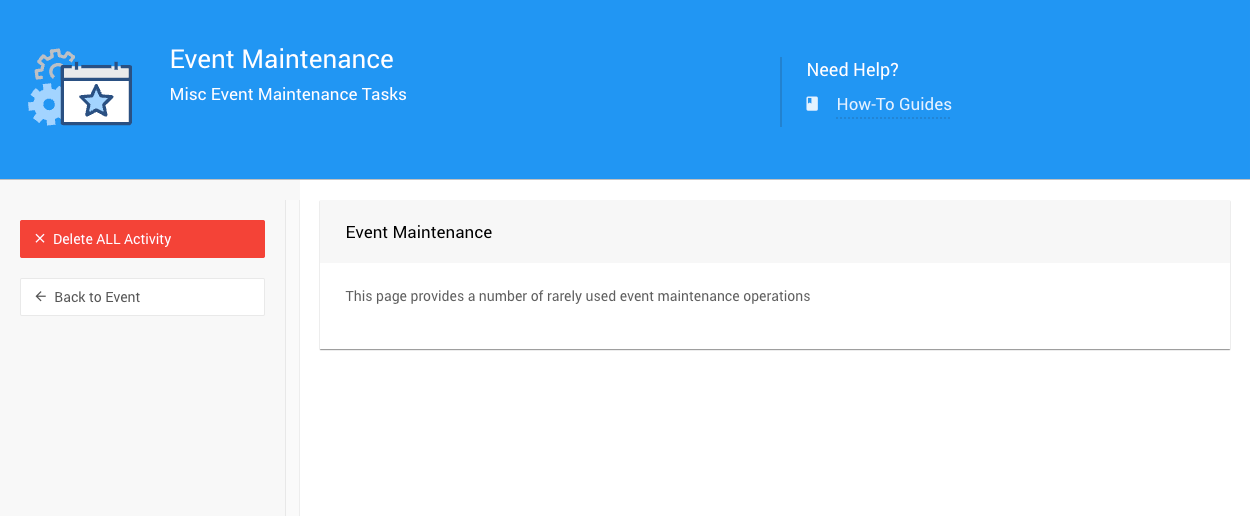
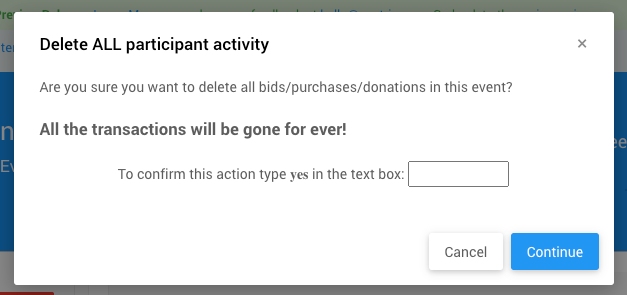
Clicking the Delete ALL Activity button will pop up a confirmation window.
Copy Event
Links to the Copy Event page.
Create Test Event
Links to the How To Create A Test Event page.
All Events
Links to the All Events dashboard.
Shortcuts
CTRL+Dto delete event
Last reviewed: May 2024