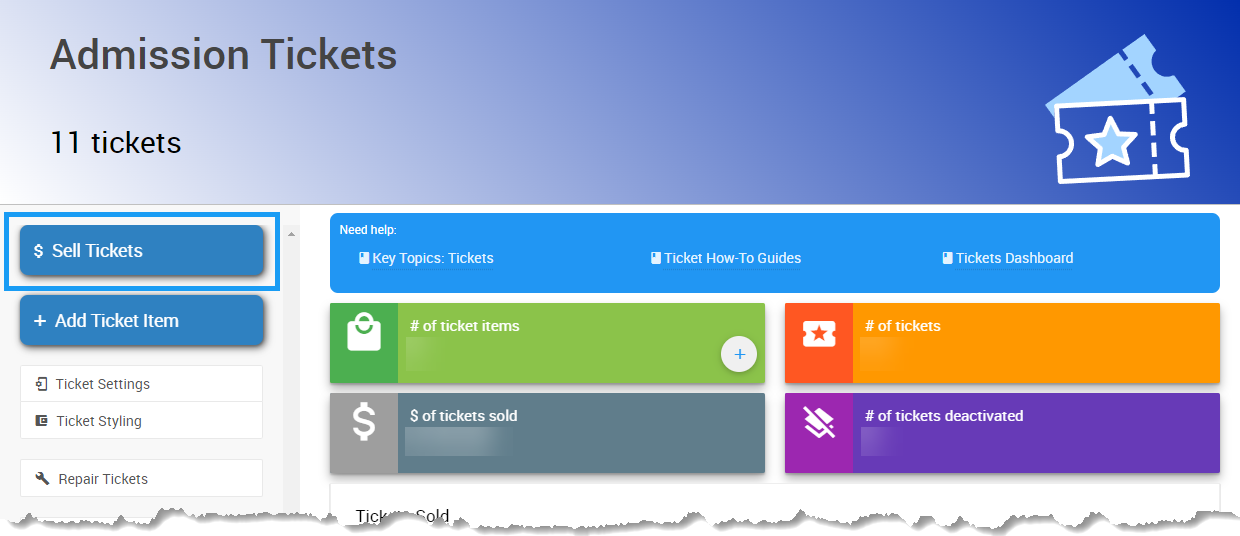
Admission Ticket items can be sold from the main Event Dashboard's Tickets menu item.
This is the recommended method for organizers to sell admission tickets directly to guests and correctly register the tickets.
INFORMATION
Admission Tickets items sold through the Event Website (or manually using the Sell Tickets dashboard function) will trigger the full Registration/Checkout process and create a participant record for the purchaser as part of that process.
Click Tickets on the left sidebar and then click the Sell Tickets button to open the Record Ticket Sales page.
An example taken from a demonstration event.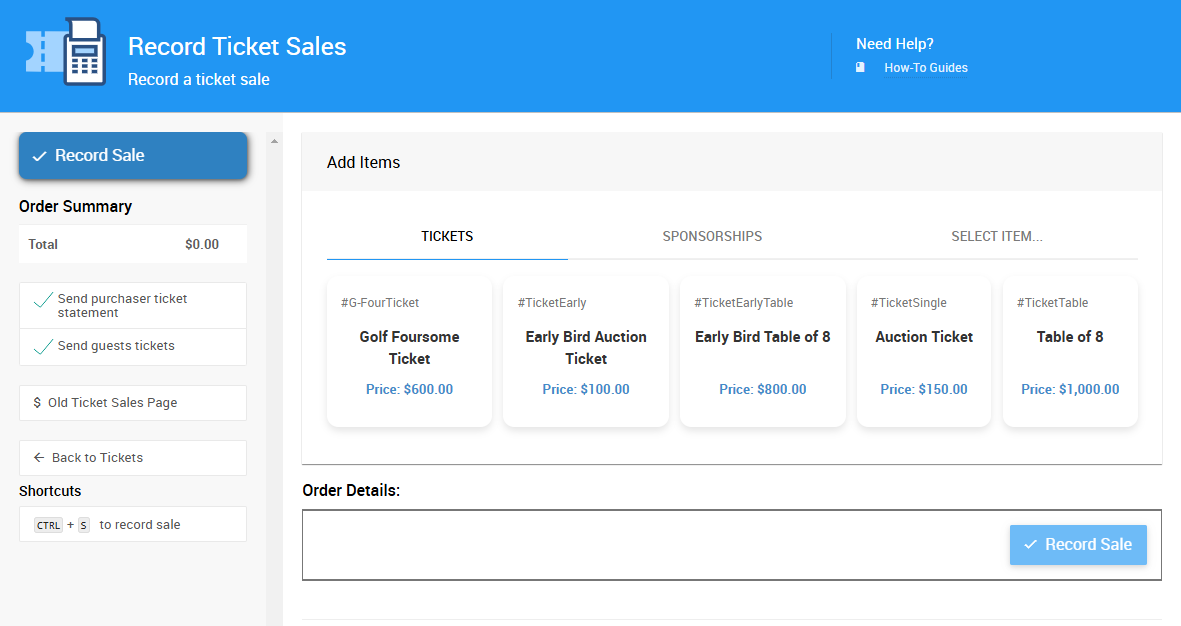
An example from a demonstration event.IMPORTANT
Admission Tickets should only be sold through using Record Ticket Sales page and not through the Sales dashboard on the left sidebar.
Tickets sold through the Sales dashboard will not create participant/guest records and ticket numbers will not be generated (or assigned).
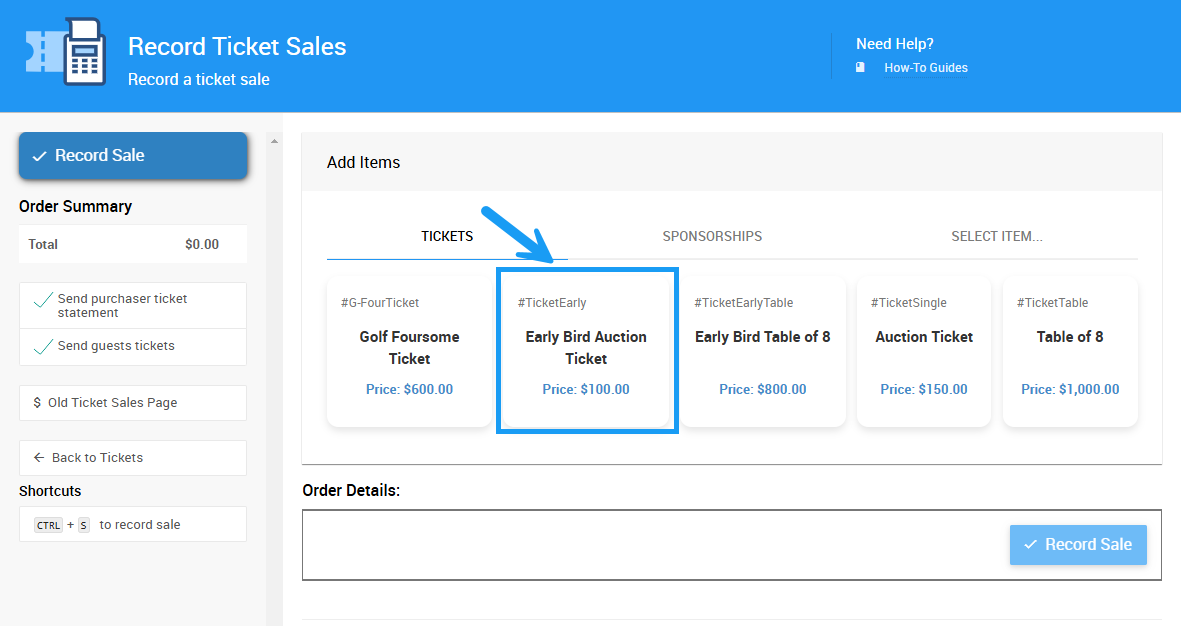
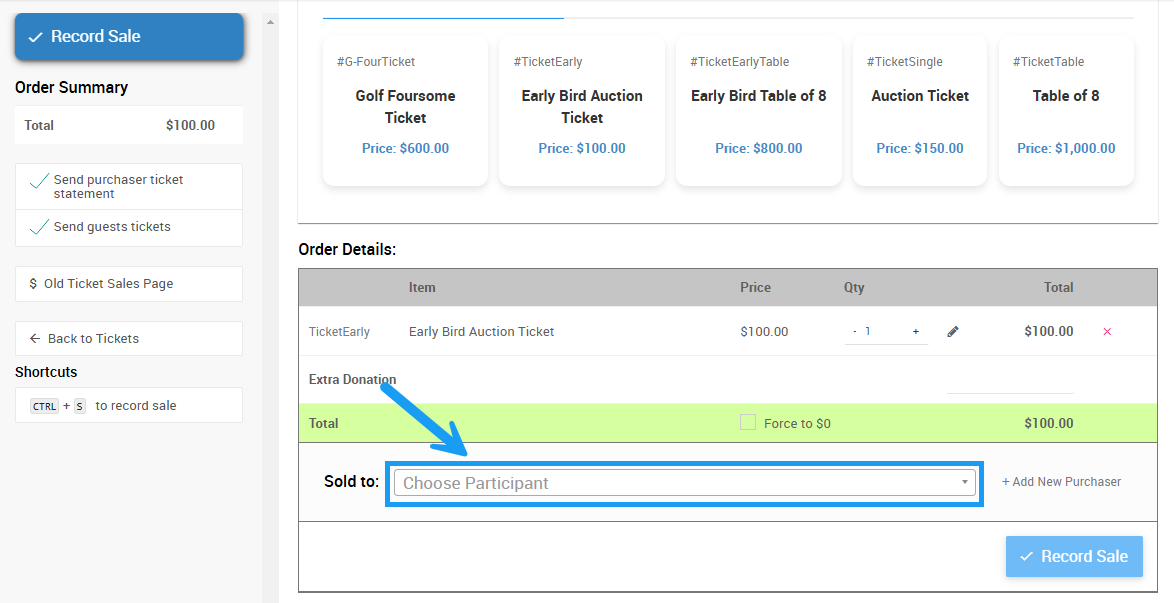
Choose the ticket item you wish to sell by clicking on the appropriate block from your list of Ticket items.
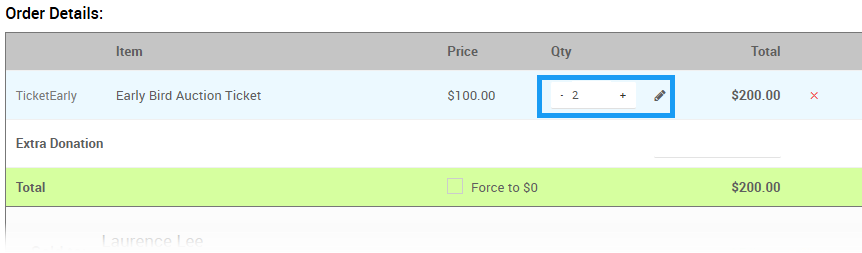
An example from a demonstration event.You can adjust the quantity of tickets being sold by changing the number in the Quantity box at the top of the Order Details section.
An example from a demonstration event.Click the Choose Participant field at the bottom of the Order Details section.
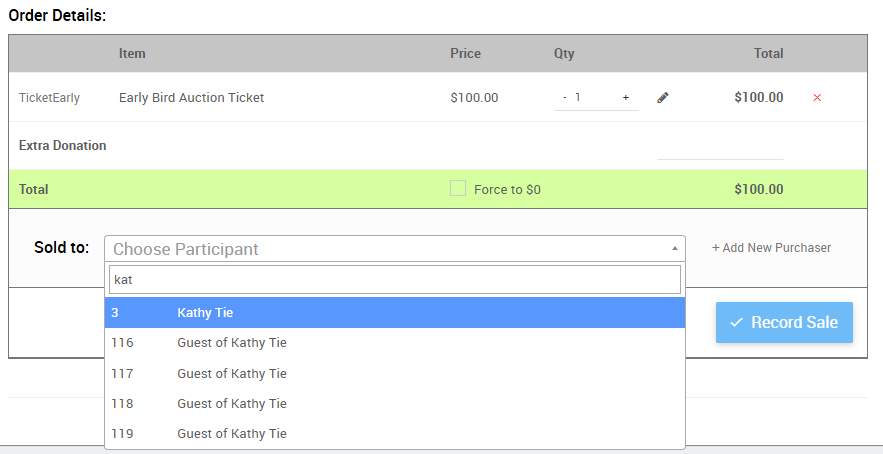
An example from a demonstration event. Choose Existing Participant
Begin typing the name of an existing participant and select their name from the drop-down list to choose them as the purchaser.
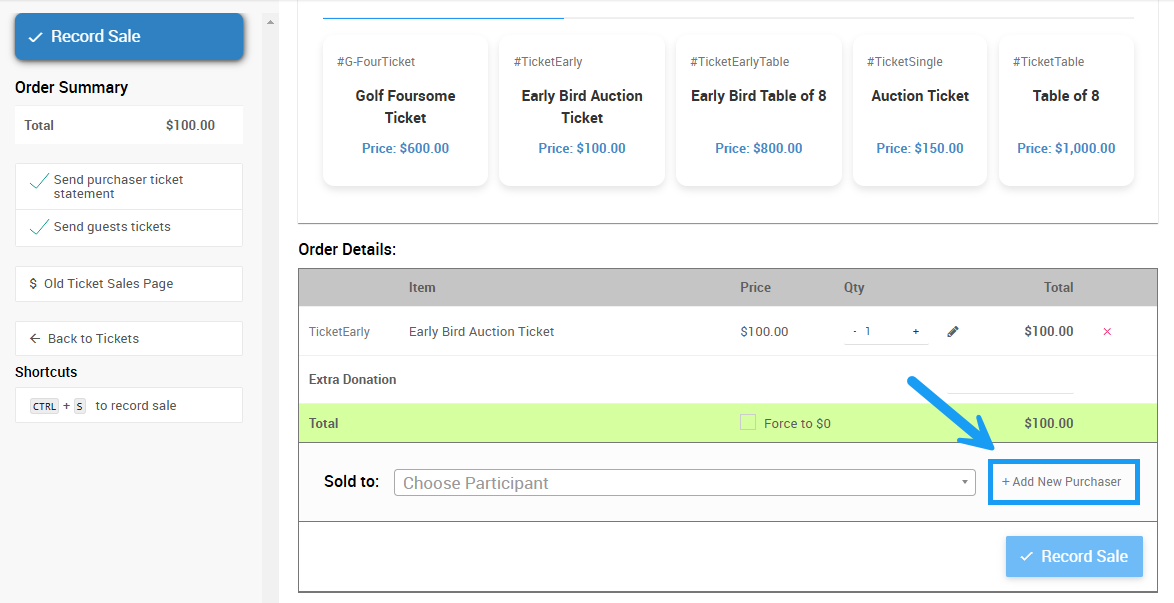
An example from a demonstration event. Add New Purchaser
Click the Add New Purchaser button to create a new participant record if the purchaser is not already in the system.
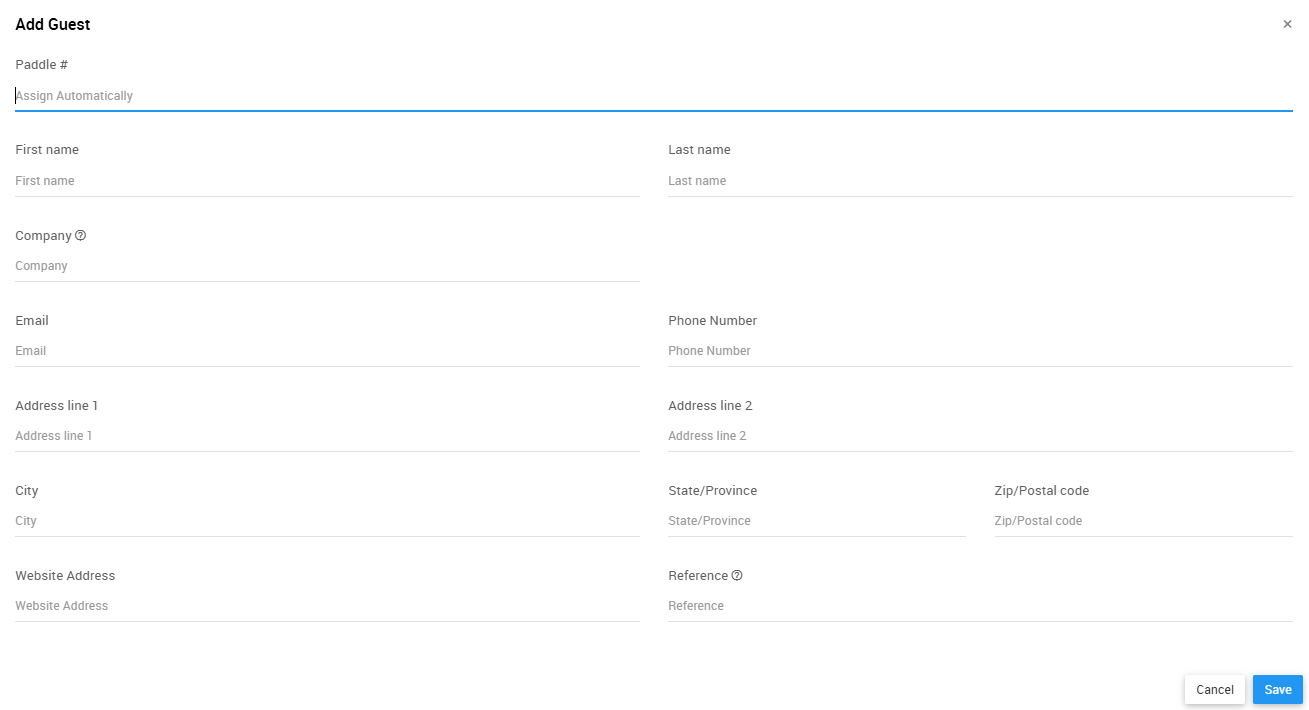
An example from a demonstration event.Enter their details in the Add Guest pop-up.
An example from a demonstration event.Based on the quantity entered and the quantity of event tickets associated with the ticket item, the page will list below the tickets available to be assigned to other guests. You have three options to choose from when assigning multiple tickets:
- Assigned to the purchaser and another guest will assign a ticket to the purchaser and a guest that is not linked to the purchaser.
- Assigned to the purchaser and their partner will assign a ticket to the purchaser and a guest that is Linked to the purchaser (they will share a Paddle#).
- Tickets are assigned to other guests, the purchaser is not attending will assign no tickets to the purchaser and will allow you to enter new guest information.
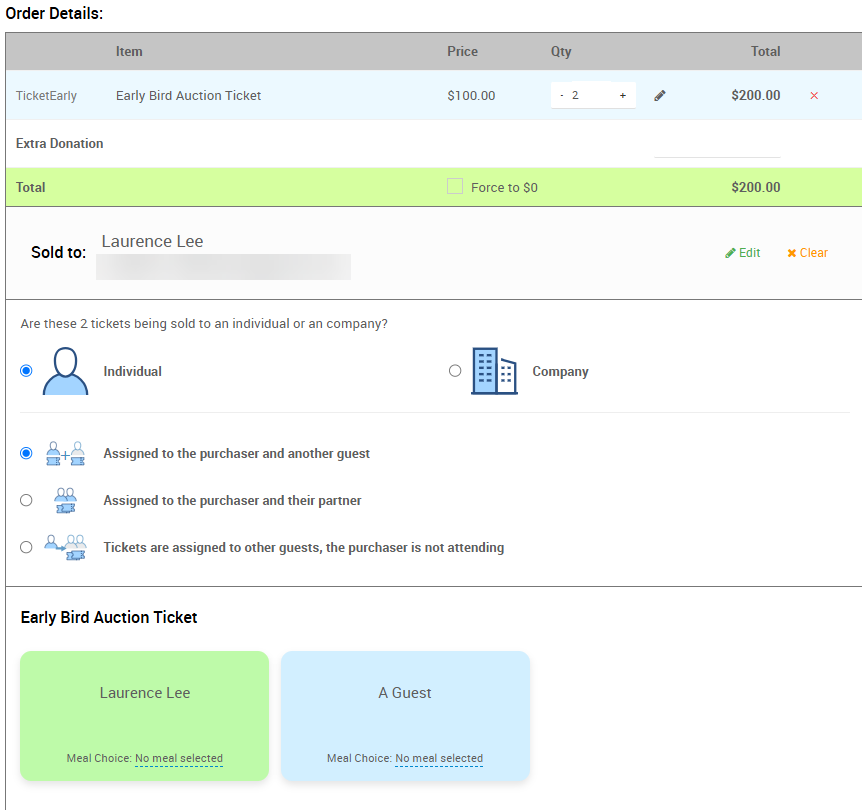
An example from a demonstration event.Clicking on the A Guest block will allow you to choose an existing participant to assign the ticket to, or allow you to enter new guest details and assign the ticket to the new guest.
Keep in mind that a purchaser can only assign a single ticket to themselves. This means that all the email addresses that are supplied for the tickets being purchased should be unique if possible. Supplying email addresses for guests is optional by default.
Guest information can always be added at a later date if the purchaser does not have the information ready during the initial ticket sale.
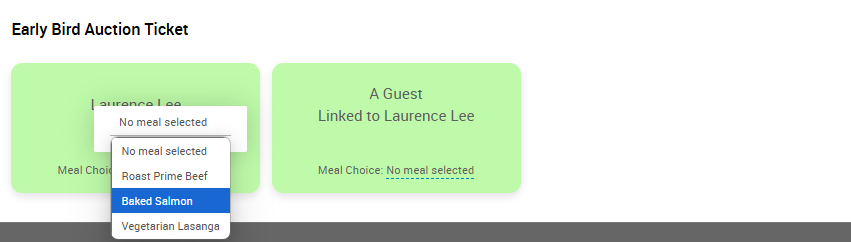
If you have set up Meal Choices with your admission tickets, you can choose the options during the sales process by clicking the Meal Choice drop down and selecting the guest's choice.
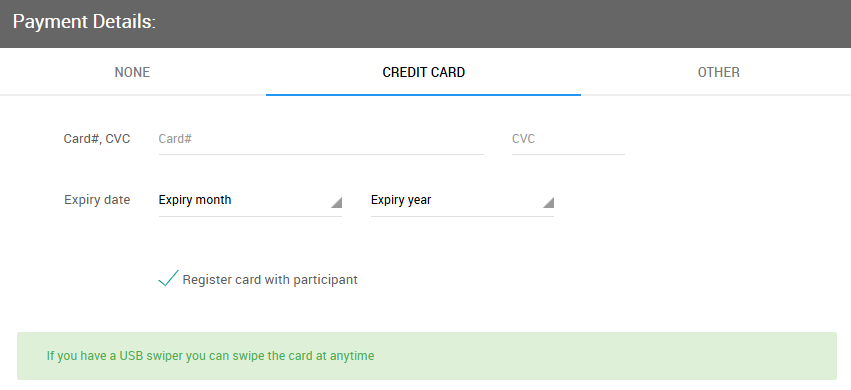
An example from a demonstration event.Select your preferred payment method from the Payment Details section. If the guest has a Registered Credit Card on file, it will be listed as one of the tabs in this section.
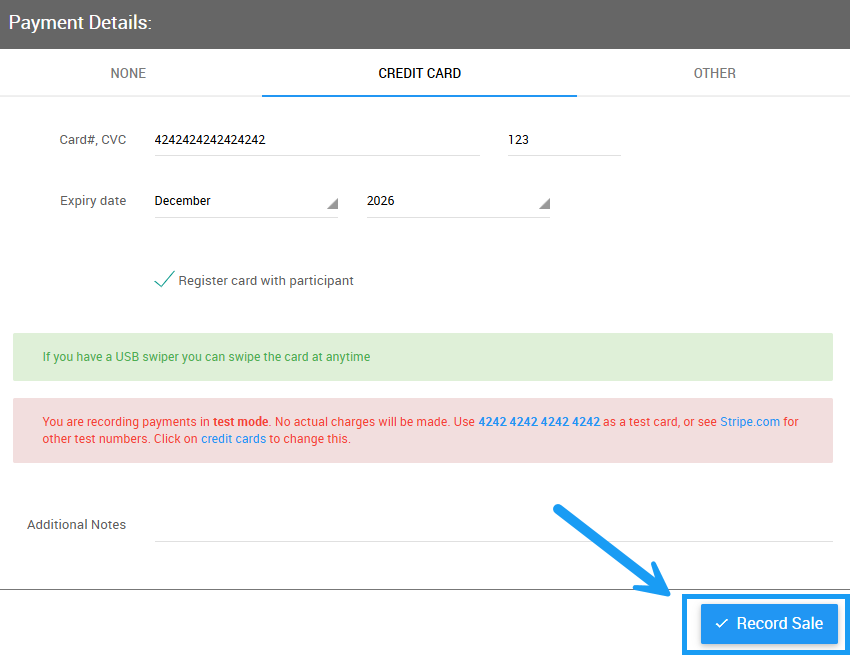
An example from a demonstration event with the Credit Card tab selected.Click the Record Sale button on the left side of the dashboard, or at the bottom of the page, to complete the transaction.
An example from a demonstration event.