How To Assign Seating
This guide will show you how to Assign Seats in Auctria.
Auctria's Tables feature makes it easy to manage seat assignments for your in-person events.
You can find the Tables page by clicking through Participants Tables.
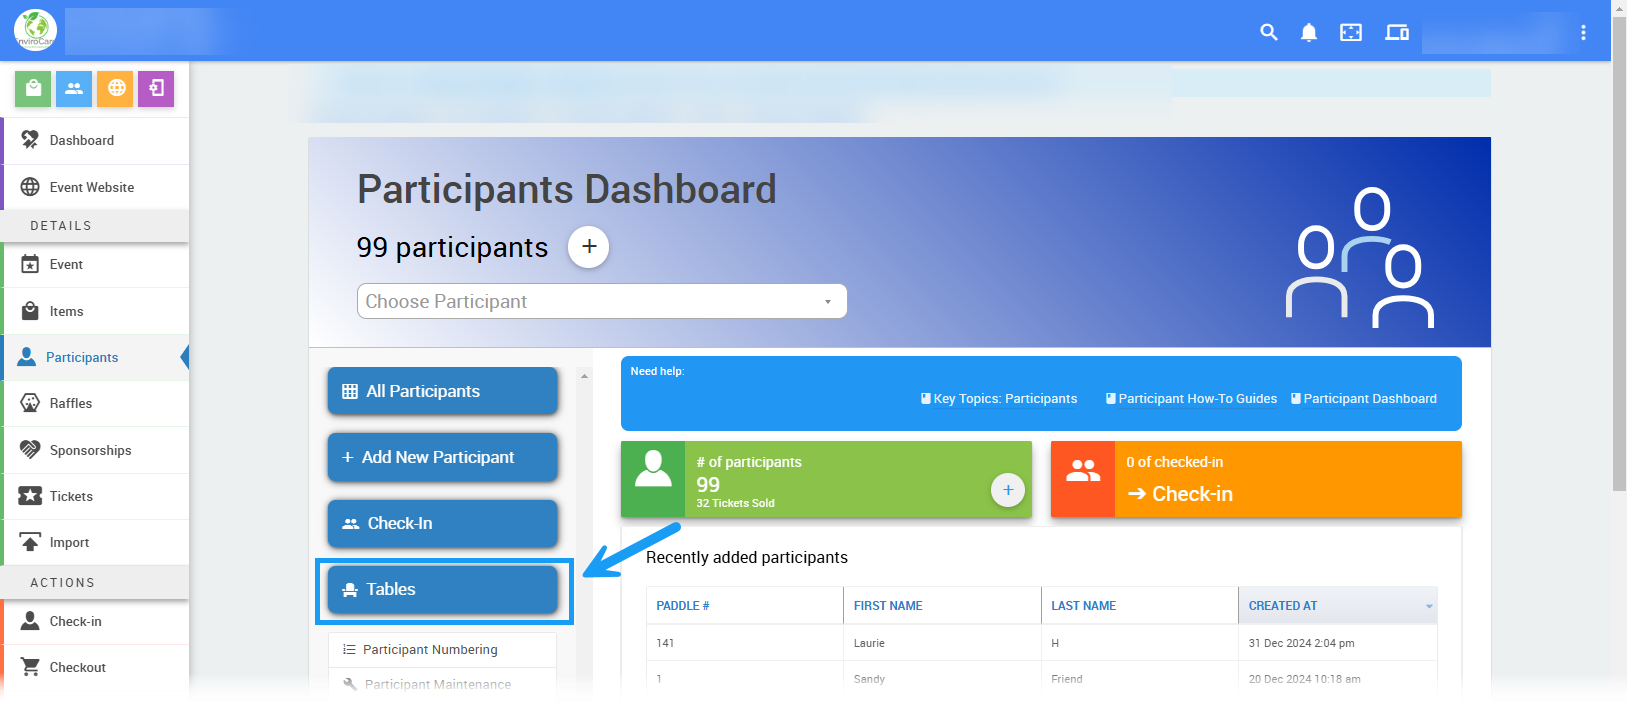
This will open the Tables page, where you can view the seating for your Participants.
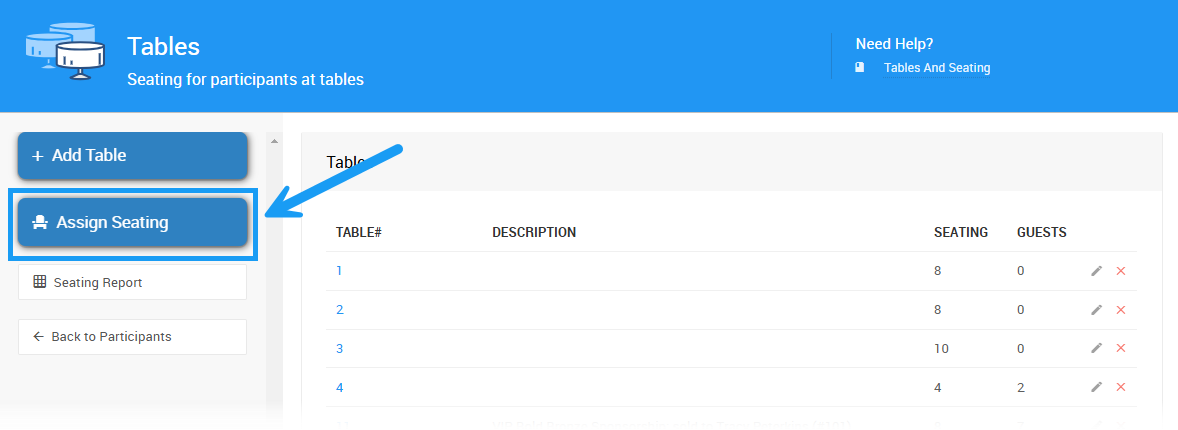
Click the Assign Seating button to open the Assign Seating page.
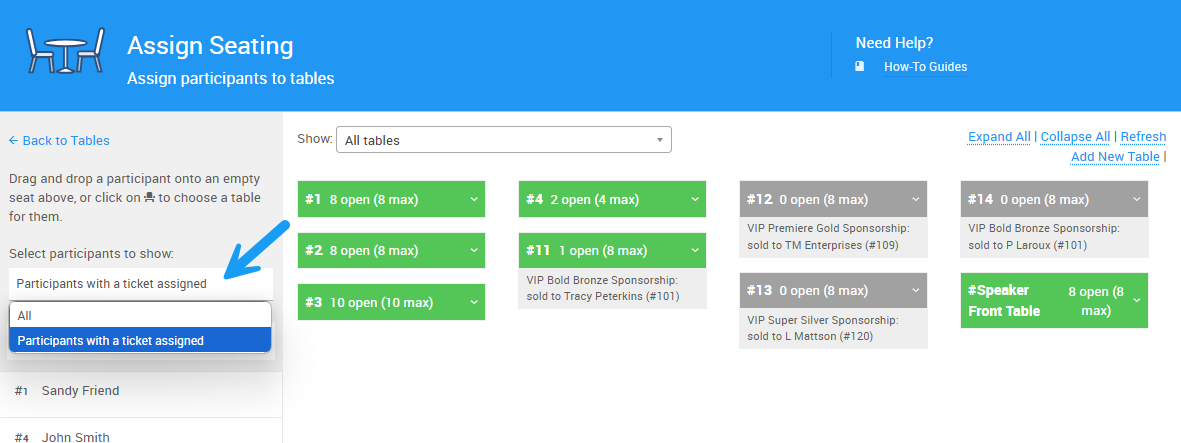
By default, this page displays all current tables, as well as participants who have been assigned a Ticket.
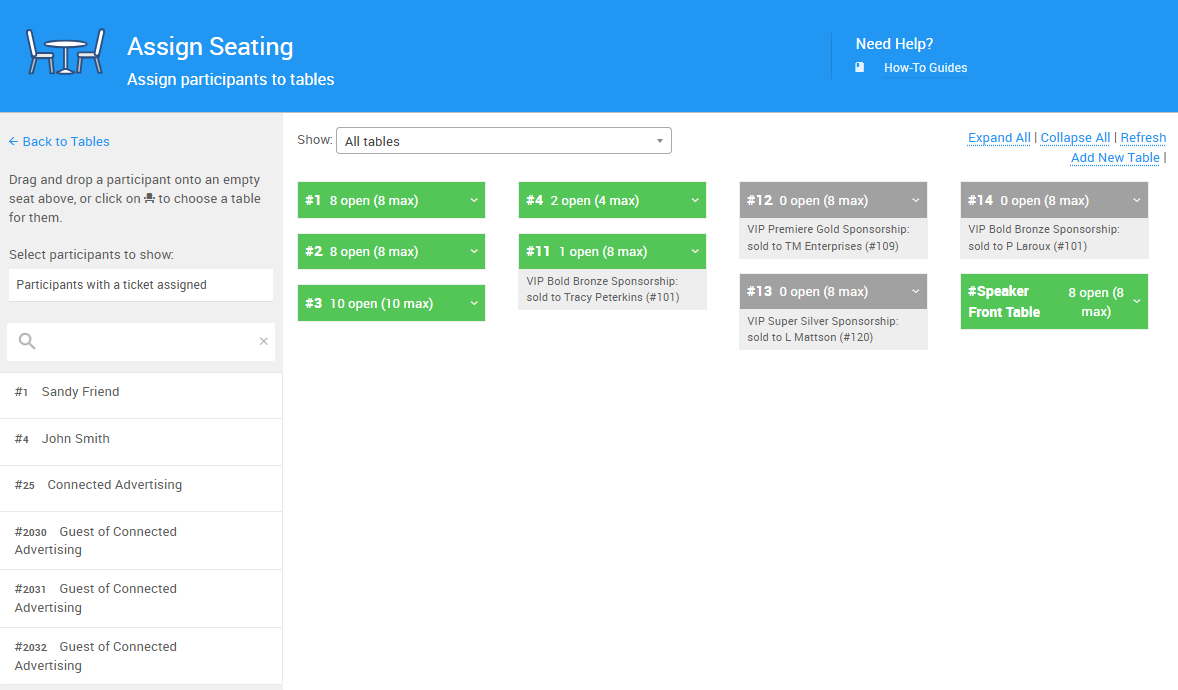
You can filter the tables displayed by adjusting the dropdown menu at the top of the list. You can choose between Table Groups or the Individual Tables that you have created.
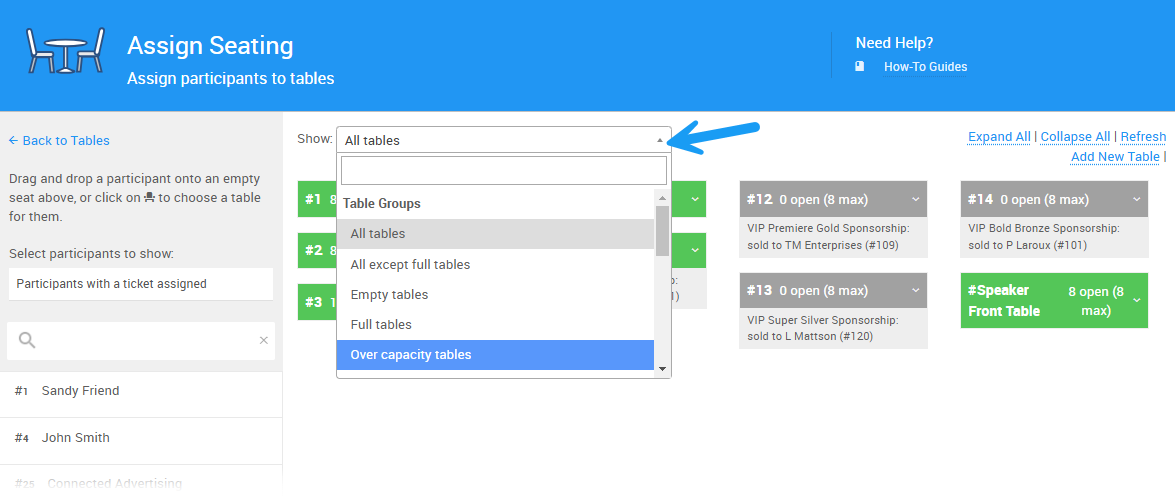
You can choose between viewing Participants with a ticket assigned, or you can view a list of all current event participants by changing the dropdown on the left sidebar to All.
To search for a specific participant to assign to a table, enter their name into the search bar.

There are two ways to add a participant to a table. First, you can drag and drop a participant to the table you wish to assign them to.
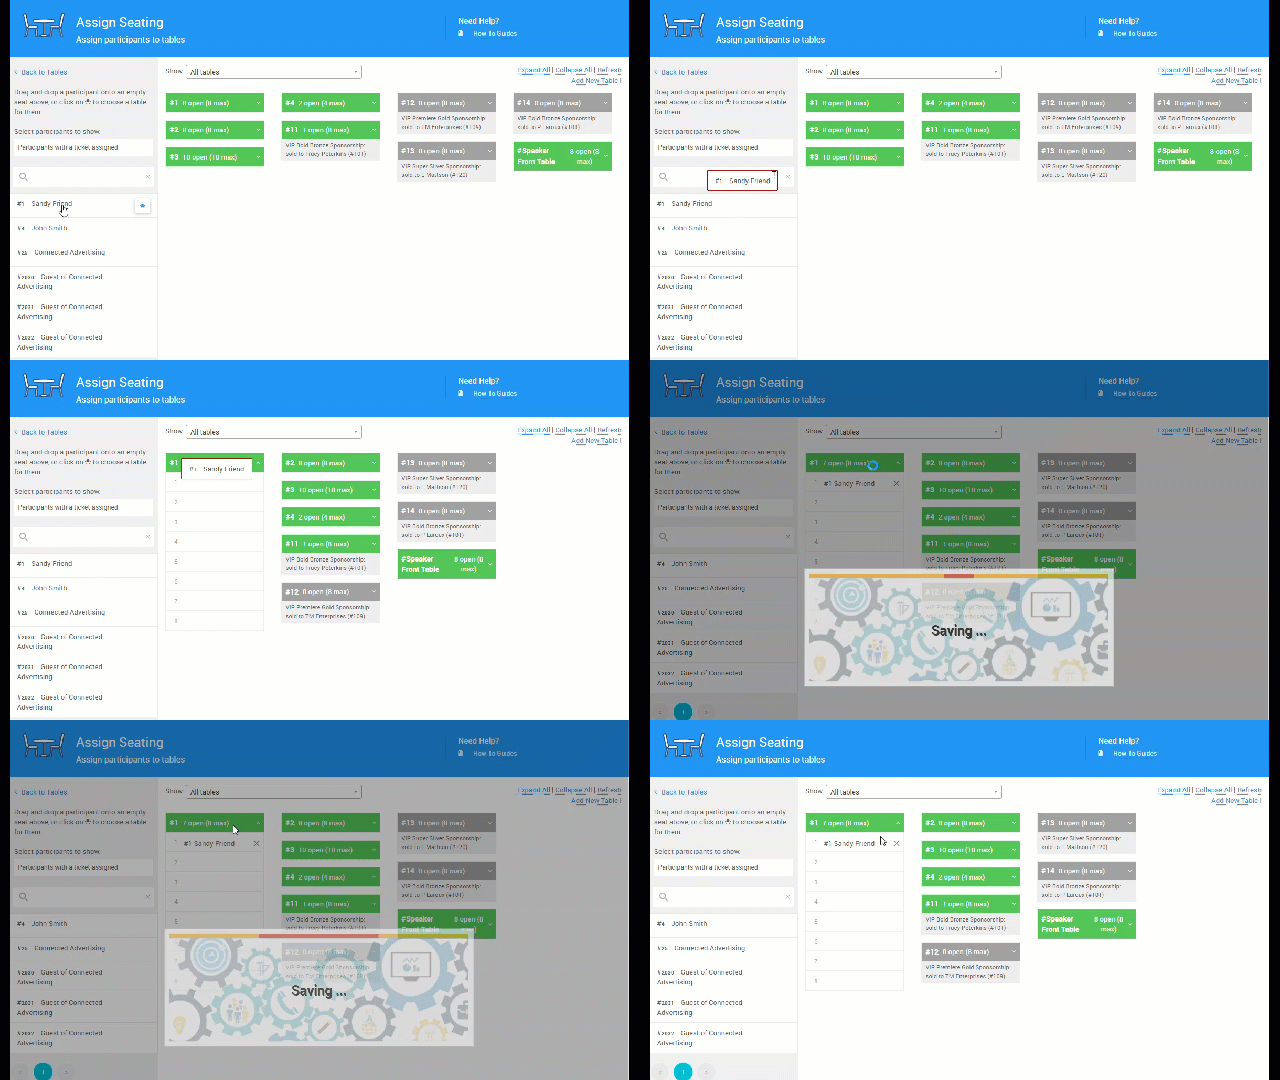
Alternatively, you can click the chair icon next to the participant name in the list and choose a table from the list.
![]()
The participant's name will appear beneath the table to which they've been assigned. You can expand any table's list of guests by clicking the arrow symbol on the right hand side of the bar.
You can also remove participants from assigned tables. To do this, simply find the guest's name beneath the table they were assigned.
Click the X mark next to their name to remove their name from the table assignment.

You can then find the guest's name on the participant list on the left and reassign their seat as needed.
- Tables And Seating
The tables and seating feature set provides in-person events with limited Tables and Seating assignments and management. - Sell Tickets
Reference page for the Auctria Sell Tickets/Sponsorships dashboard.

Last reviewed: January 2025