Donate An Item Website Element
The Donate an Item website element displays a multi-part form to provide details of an item or service being donated to the fundraising event for consideration by the organizers.
How Did I Get Here?
Row Content - Donate An Item
Drag and drop the More Row Content element from the Website Editor Sidebar into the row space where you want to add the Donate an Item element.
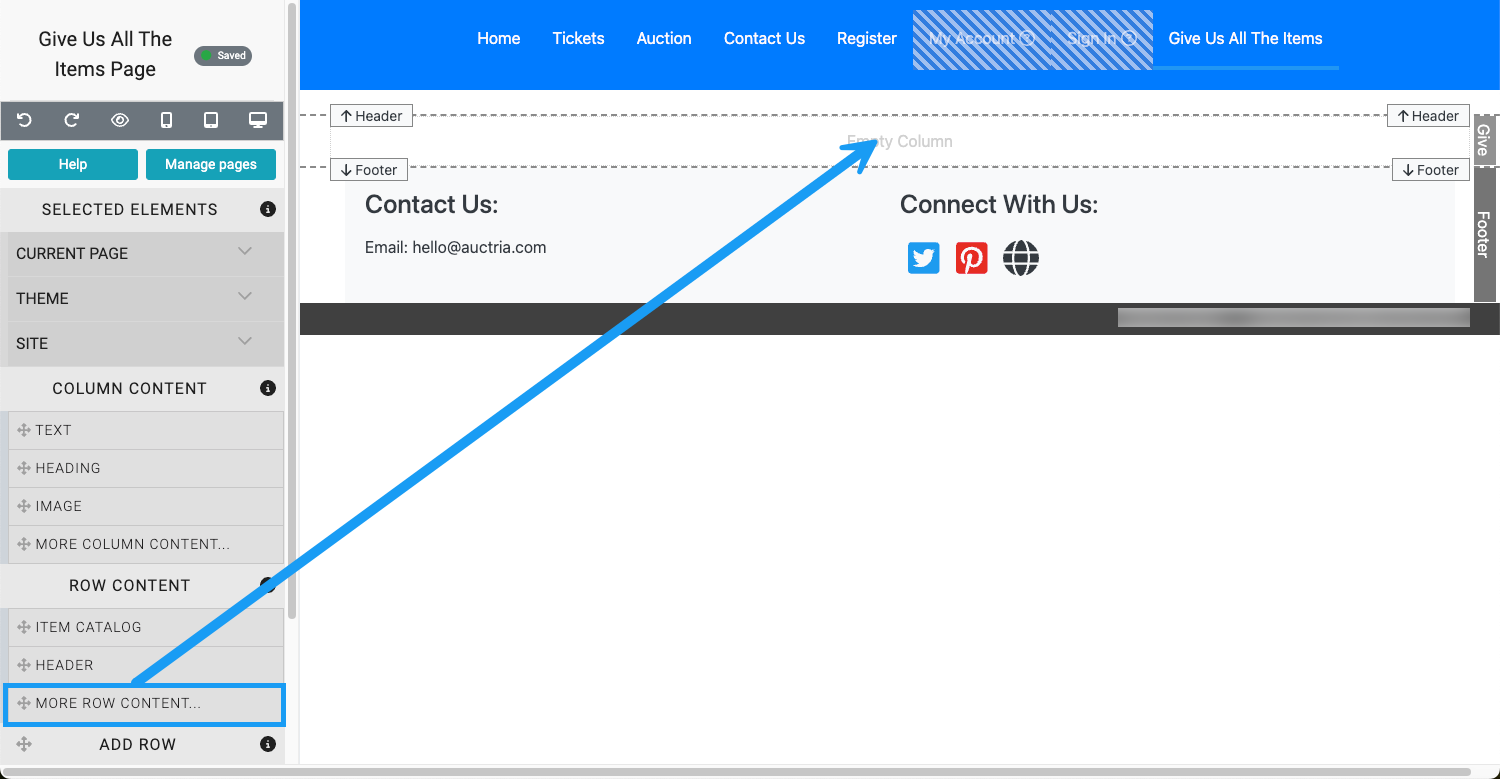
This will open the Choose Row window.
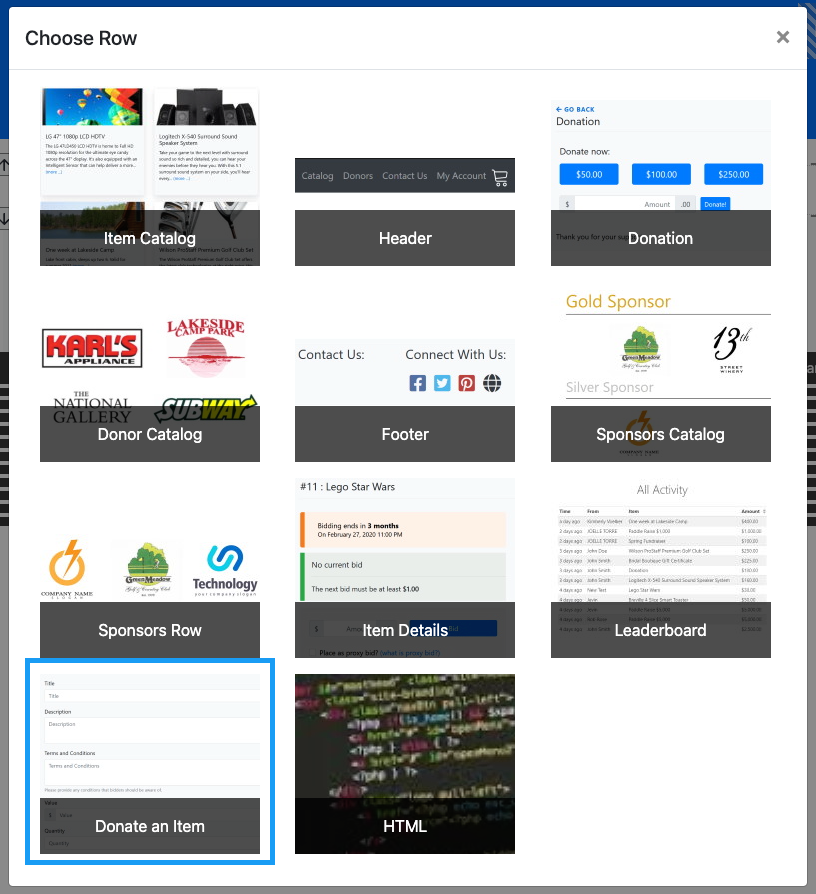
Clicking the Donate An Item element will now drop it into the row space you selected. The element will start with a Donate Item form.
Donation Item Details
The first part is for the Donate Item details.
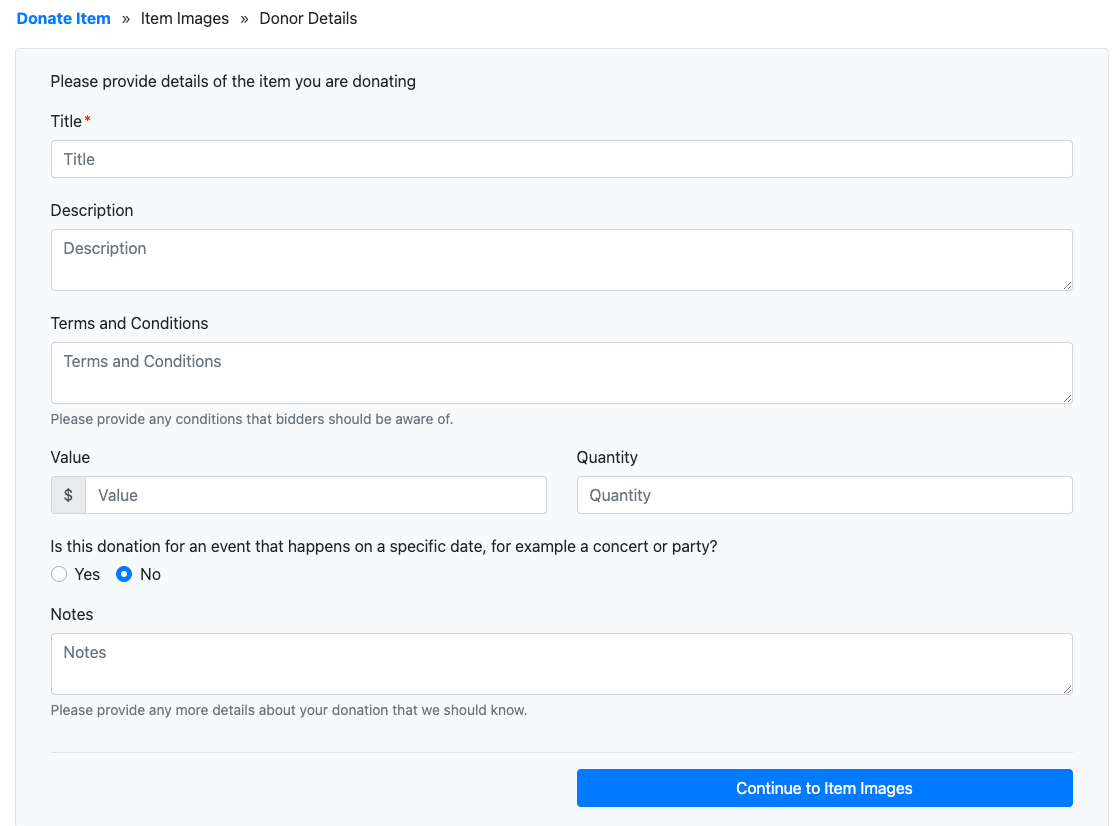
The Title field is required at a minimum by default.
The Value and Quantity fields can be set to be required as needed.
The item can be set to an event, for example, the item might be concert tickets. The date and location of the concert could added to the donated items details by the donor.

For fields with a description, such as the Terms and Conditions text box, can have their description modified by double-clicking on them to open their text editor.

Item Images
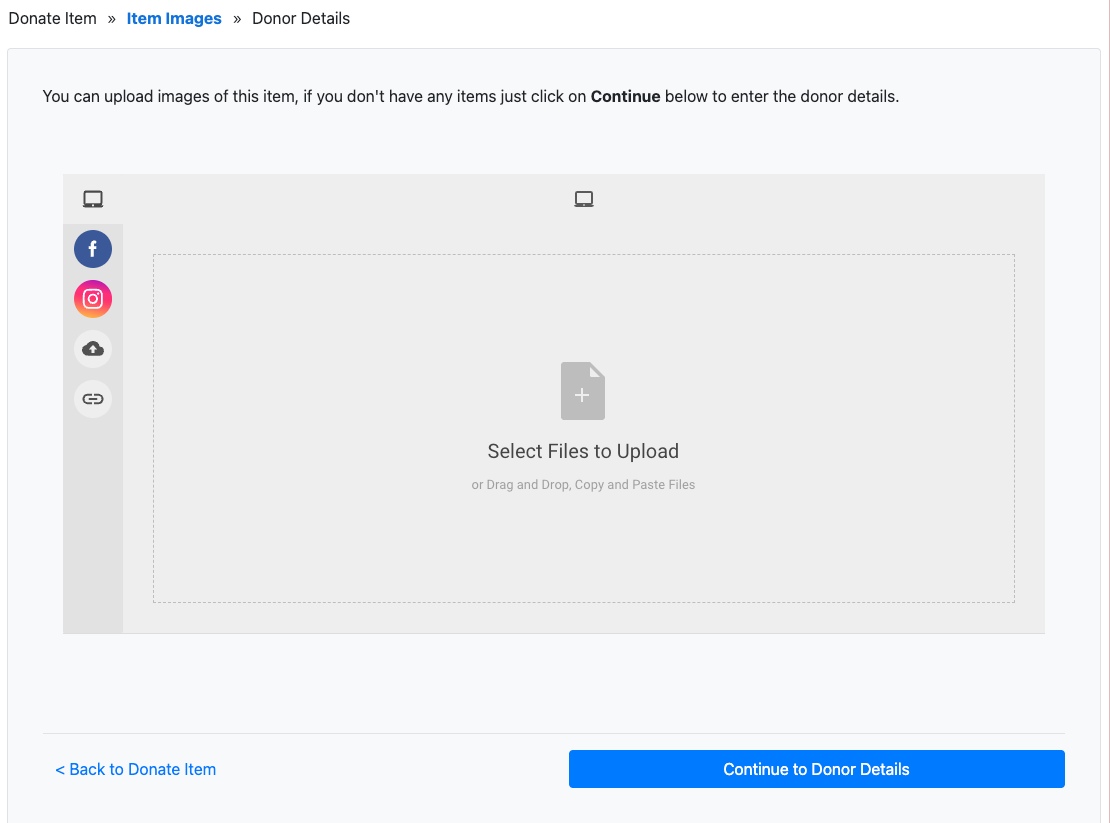
The second part allows Item images to be added using the same interface as the Choose Image element.
Donor Details
The last part allows for the Donor Details to be added. 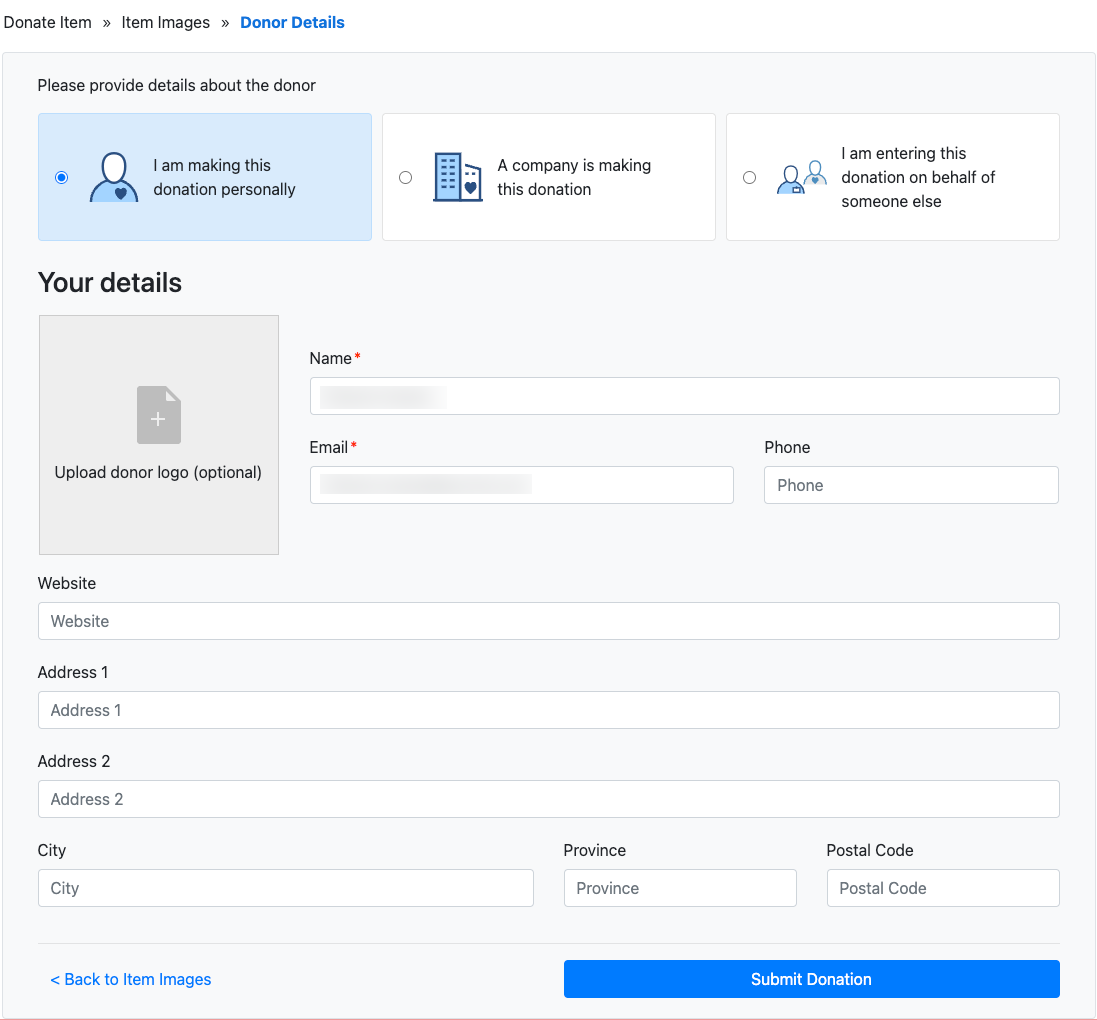
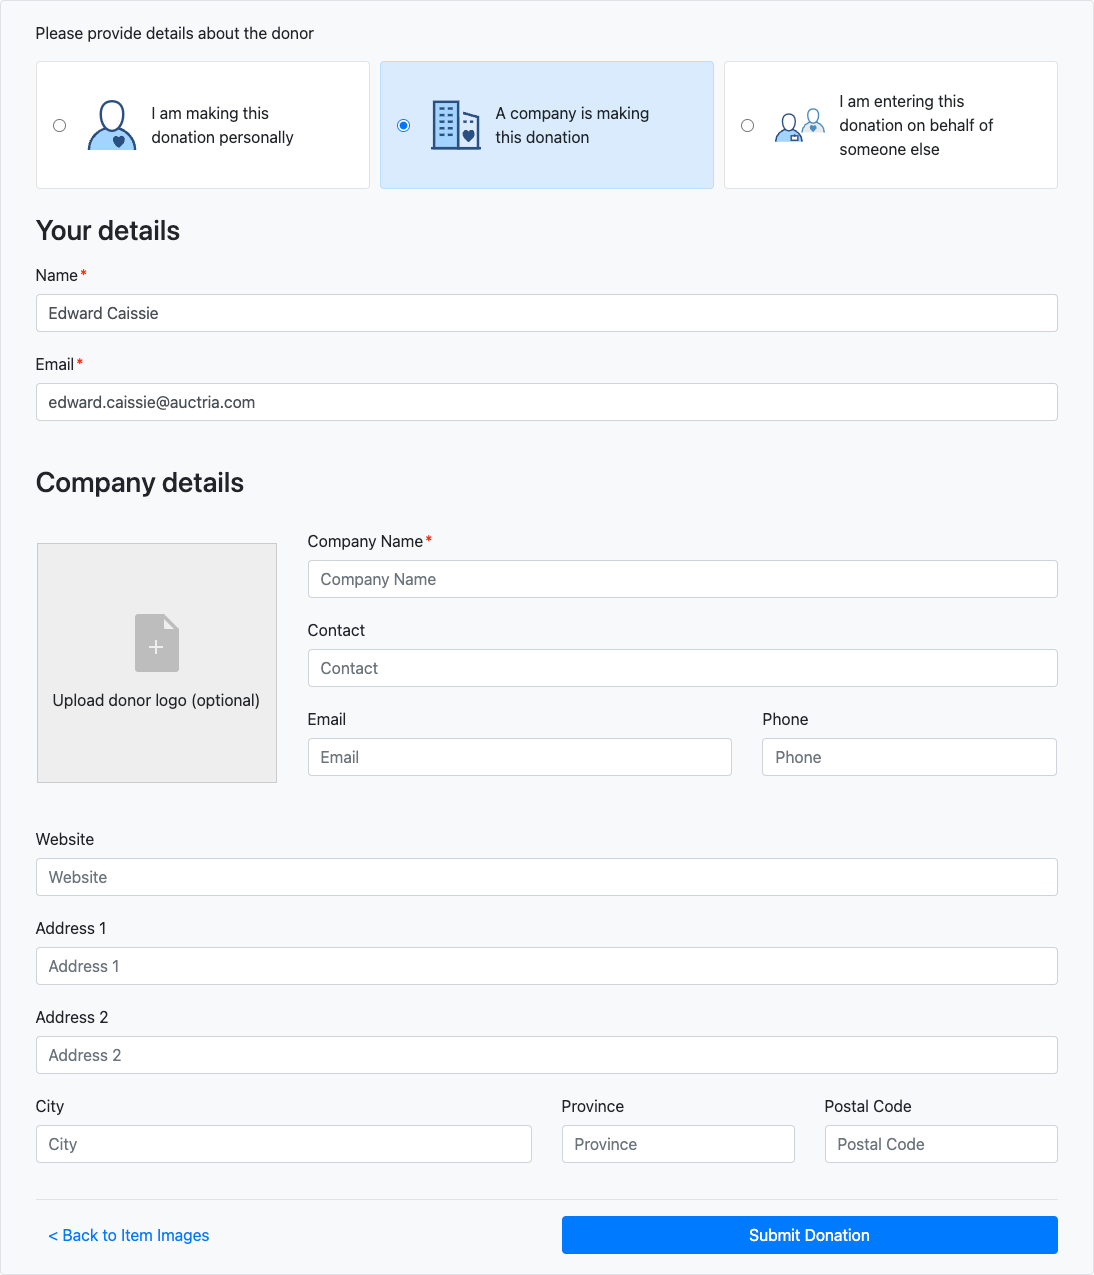
Company Donor Details View
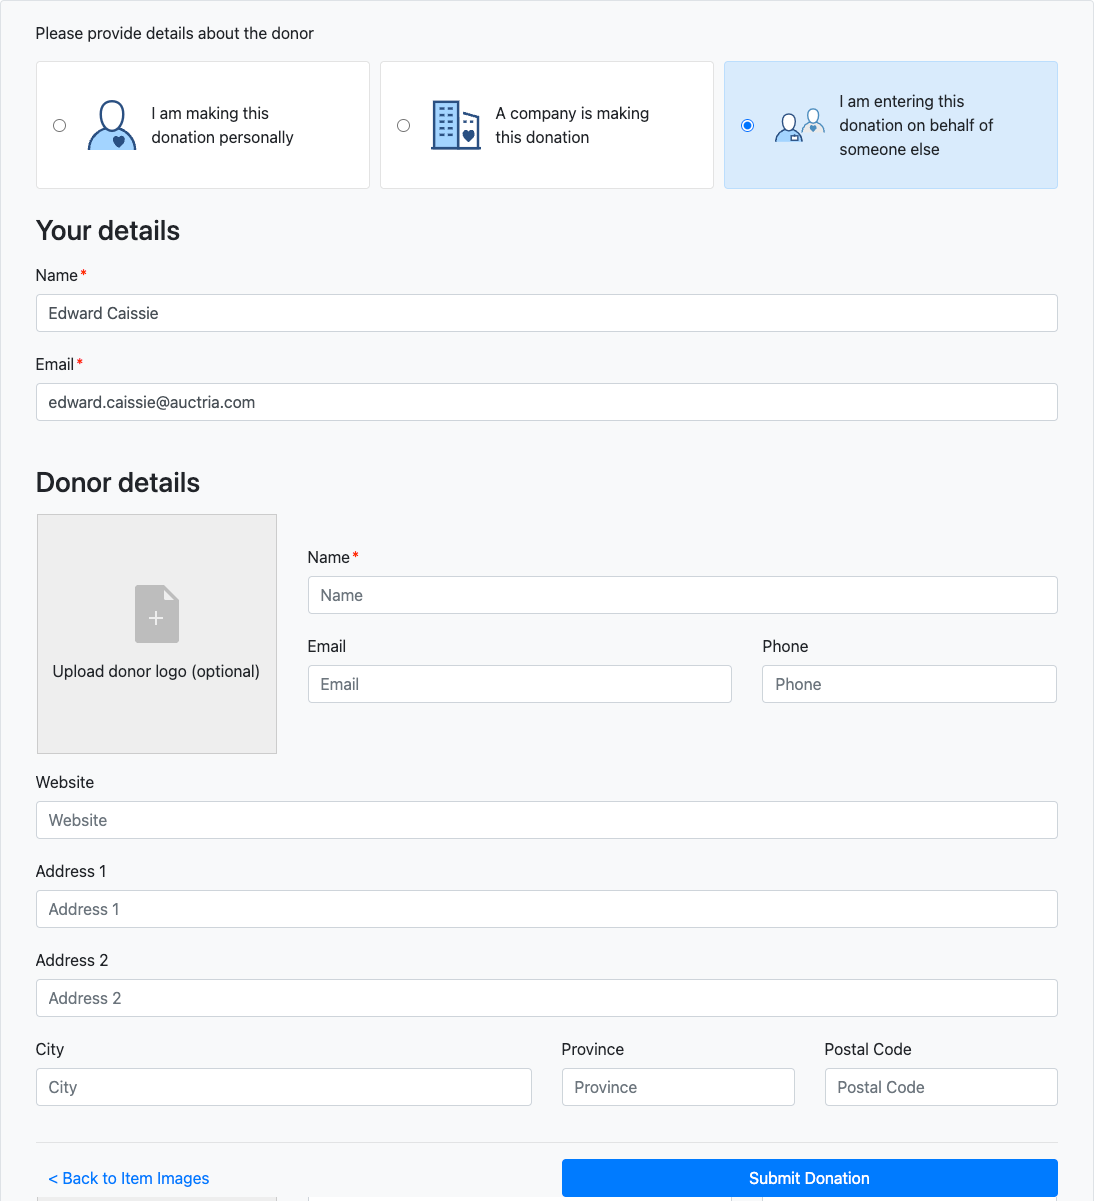
Submission On Behalf Of Donor View
Clicking on the Upload donor logo (optional) block will open the Select Donor Logo window. This image will be saved under the Images tab of the Donor record once the item has been approved.
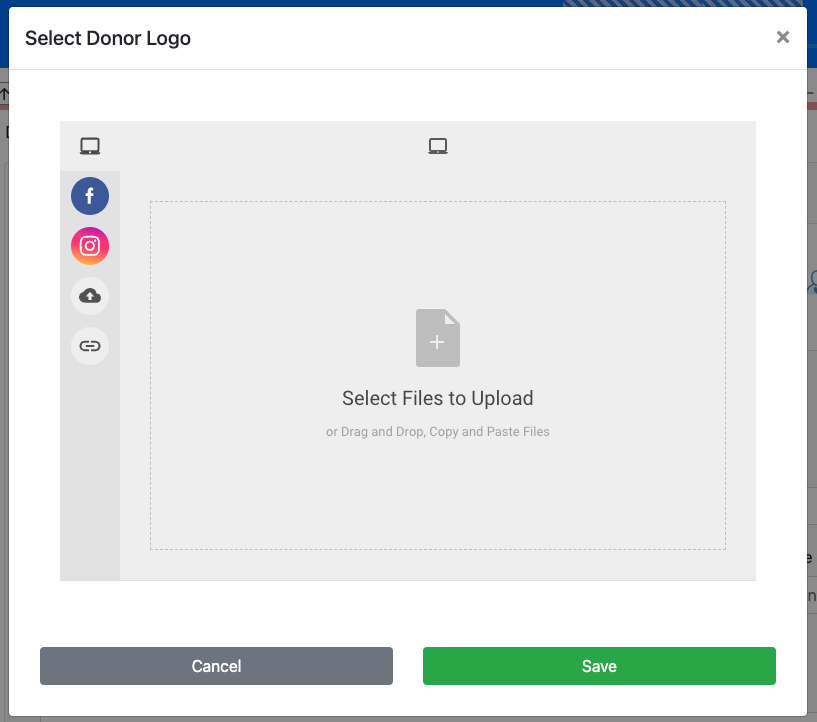
A Donor Logo will only be added if one does not already exist.
Once the form sections are completed, clicking the "Submit Donation" button will submit the item for review under the Items Dashboard via the Solicited Items sidebar menu item.
NOTES
- Accepted solicited items will use the Online type.
- Accepted solicited items will use the Next assigned item# value for their item number.
See How To Set The Next Item Number for more information.
Last reviewed: September 2024