How To Move Elements
During the design stages of your website, you may find you want to move an element from one location to another on your website page. It's also common to accidentally place a new section or new row into the Header or Footer instead of the page content area having it show up on all pages instead of just the one you want.
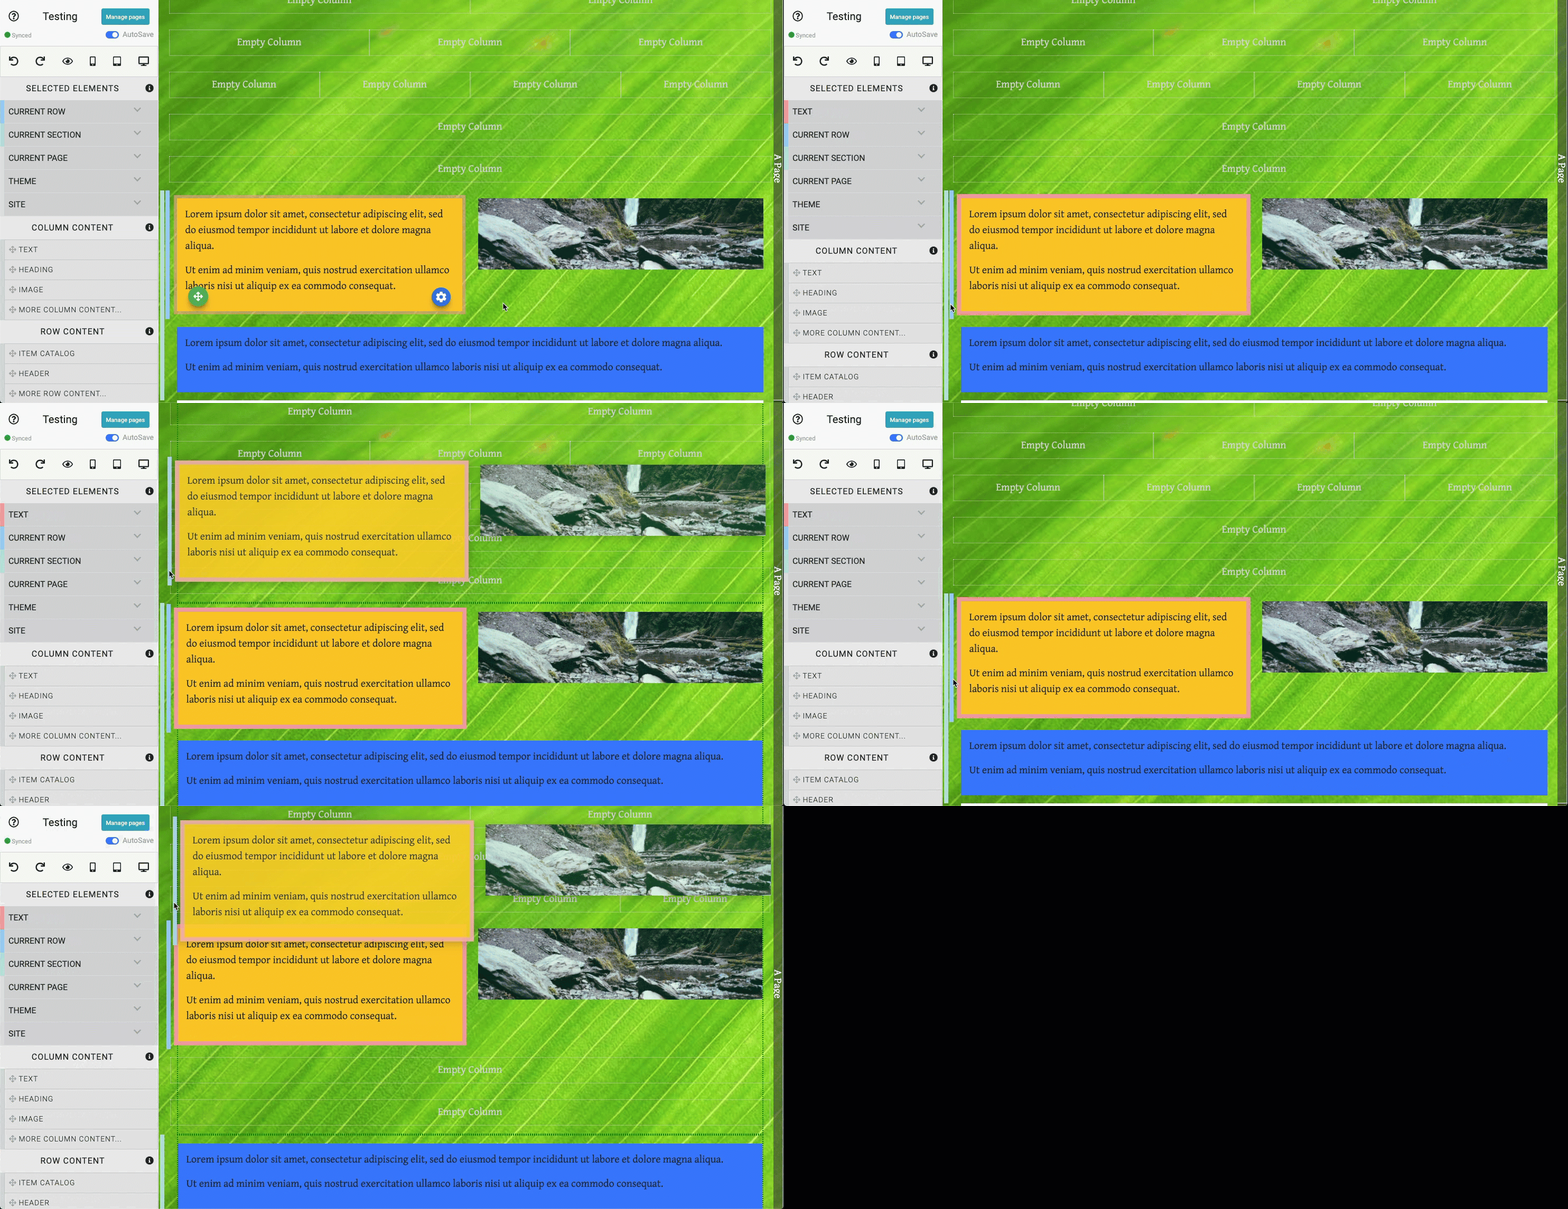
All Column Elements on the website page will have a move icon in their bottom-left corner -- a green circle with the "move" icon in it. Click on the icon then drag and drop the element into its new location.

An example from a demonstration event.You can also use drag and drop to move the column element by clicking within the column element and then drag and drop the element to its new location.
Auctria Pro-Tip from Launch Services!
If you are finding the column moves are not "sticking" when shifting the element up or down, try adding a new row into the space first and then move the column content element into the new row.
To move a Row Element, make certain the row is selected and then use its blue reference bar at the far-left to drag and drop the row higher or lower on the page.

An example from a demonstration event.INFORMATION
Note when moving, the element will preview drop into its new location when it is correctly aligned for it. Releasing your mouse button will complete the move.
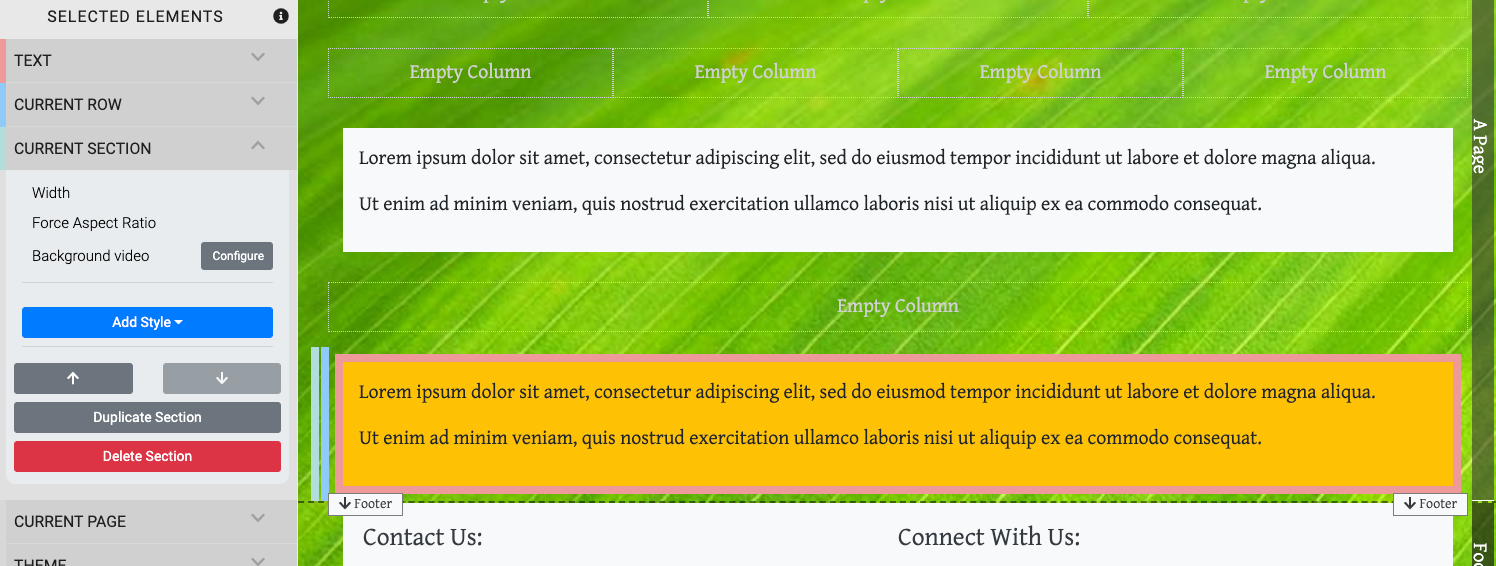
You can also move the Current Row when it is selected by opening its properties in the Website Editor Sidebar and using the Up and Down arrow buttons.

An example from a demonstration event.To move a Section, make certain the section is selected and then use its green reference bar at the far-left to drag and drop the section higher or lower on the page.
You can also move the Current Section when it is selected by opening its properties in the Website Editor Sidebar and using the Up and Down arrow buttons.

An example from a demonstration event.The respective Up or Down arrow will be greyed out if the element is at its upper or lower limit in the website page.
Last reviewed: November 2023


