Standalone Card Readers
You must complete the following to use a standalone credit card reader with Auctria.
1. Connect your Stripe account
You must have a Stripe account connected to Auctria: see How To Connect A Stripe Account for more details.
2. Acquire the Credit Card Readers
Only the BBPOS WisePOS E reader is supported. You must order the card readers directly through Stripe.
To access the Stripe store, you will need to be signed into your Stripe account. You can access it through the Terminal link on the dashboard or click on dashboard.stripe.com/terminal/shop. The hardware will ship directly from Stripe. Typical shipping time has been 3-5 days.
You can also order a special 'Stripe test card' (for about $5), which lets you run a test event and practice with the mobile checkout app without charging an actual credit card. We recommend getting a test card so you can practice using the app.
Canadian customers using Interac payments can also order a separate Interac test card.
3. Set your Credit Card Reader
The WisePOS E reader must be connected to the internet through the built-in Wi-Fi or the optional dock to use a hardwired ethernet connection.
See stripe.com/docs/terminal/payments/setup-reader/bbpos-wisepos-e for Stripe's documentation on how to set up the reader initially.
The reader will automatically download and install firmware updates periodically. To ensure the reader is up to date, you should ensure it is powered on and connected several hours before using it.
4. Set your Organization's Location
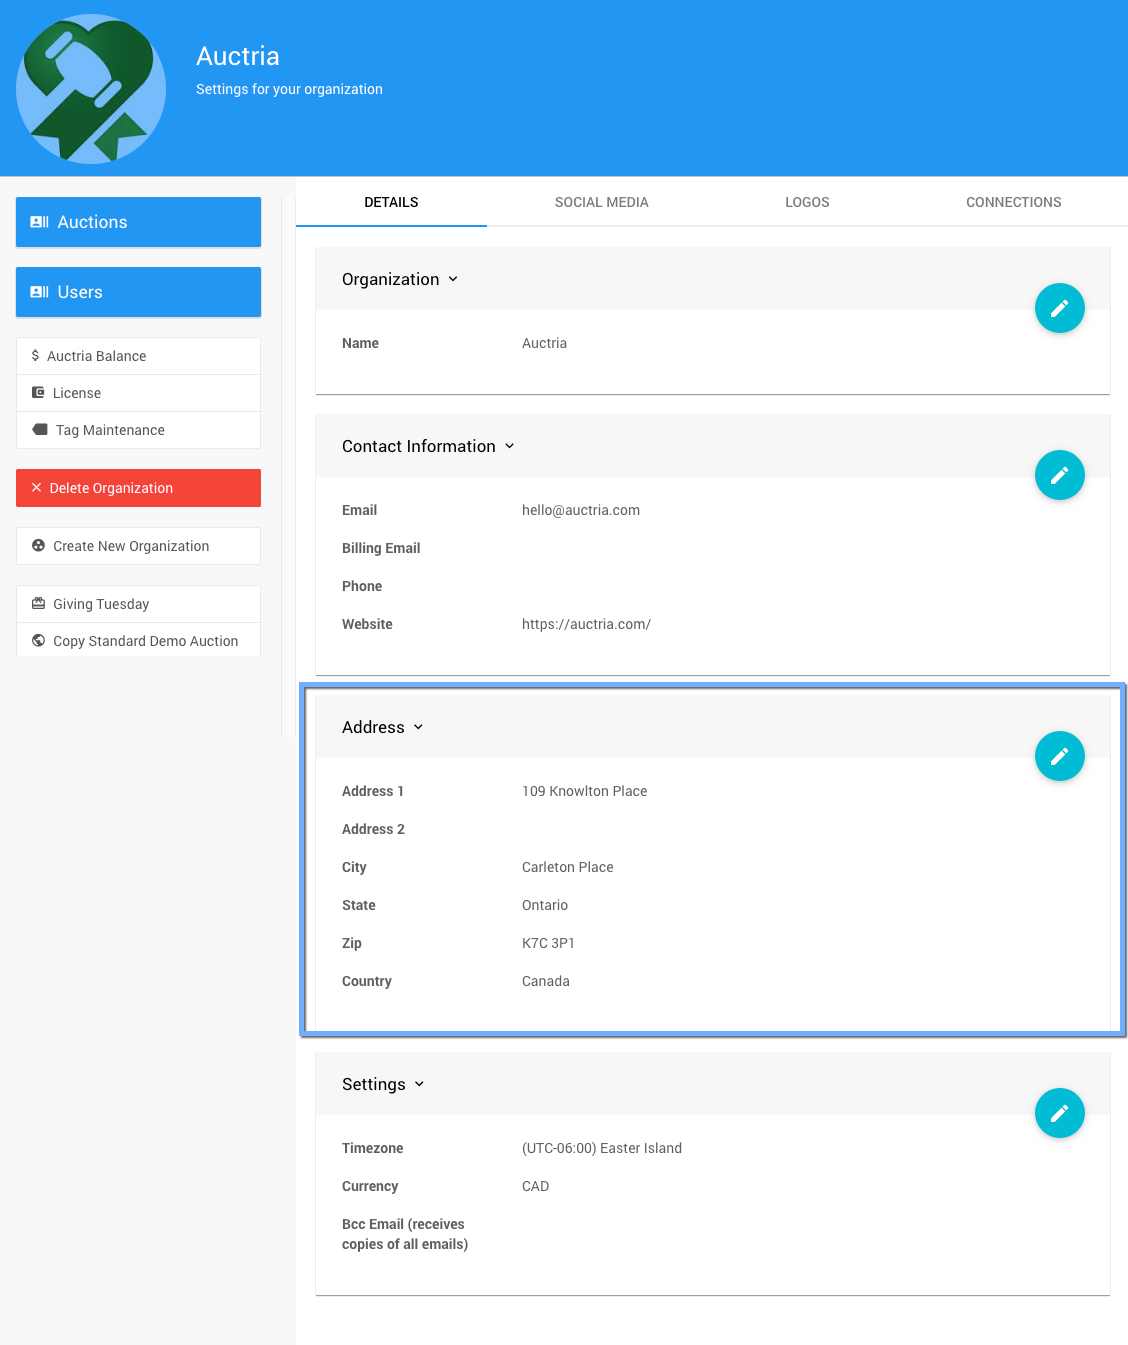
Stripe's readers require that a location is defined for where they will be used. This location is used to ensure the correct readers are used (for example, you can't use a US reader in Canada) and also to aid in fraud detection. Auctria will use the location defined by the address on the Organization page. It does not matter if this address is not precisely where the reader will be used, but if it is in the wrong country, that would be an issue.
Before connecting a reader, ensure that this is set correctly on the Organization page of the dashboard.

4. Enable credit card reader support
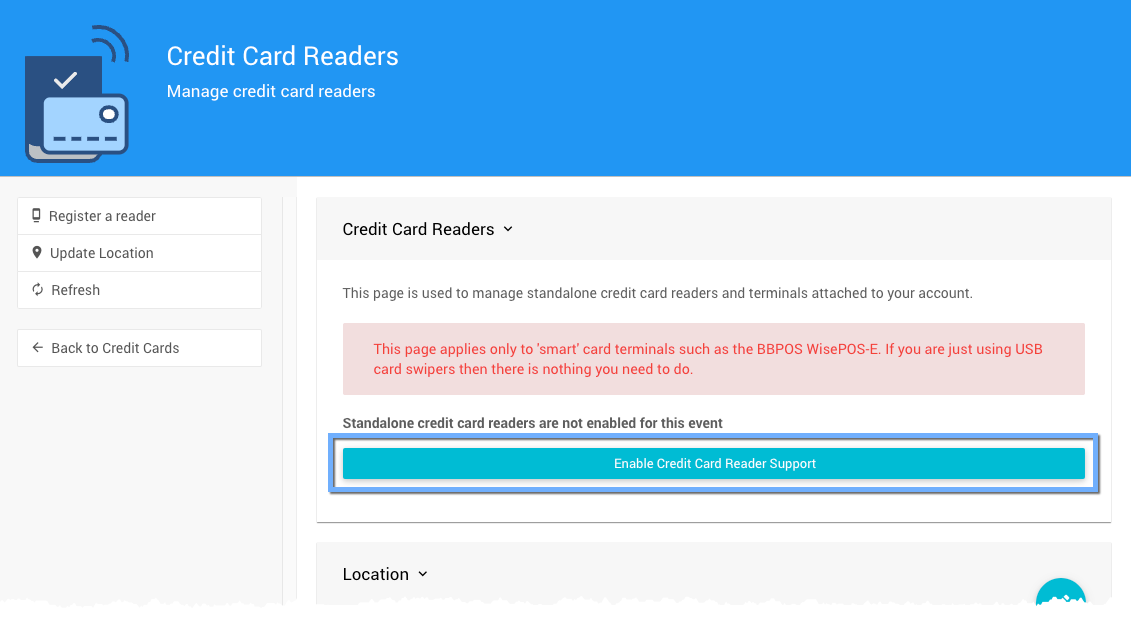
Click on Credit Cards then Credit Card Readers on the dashboard, then Enable Credit Card Reader Support

5. Register your reader
Before using a reader with your Stripe account for the first time, you must register it.
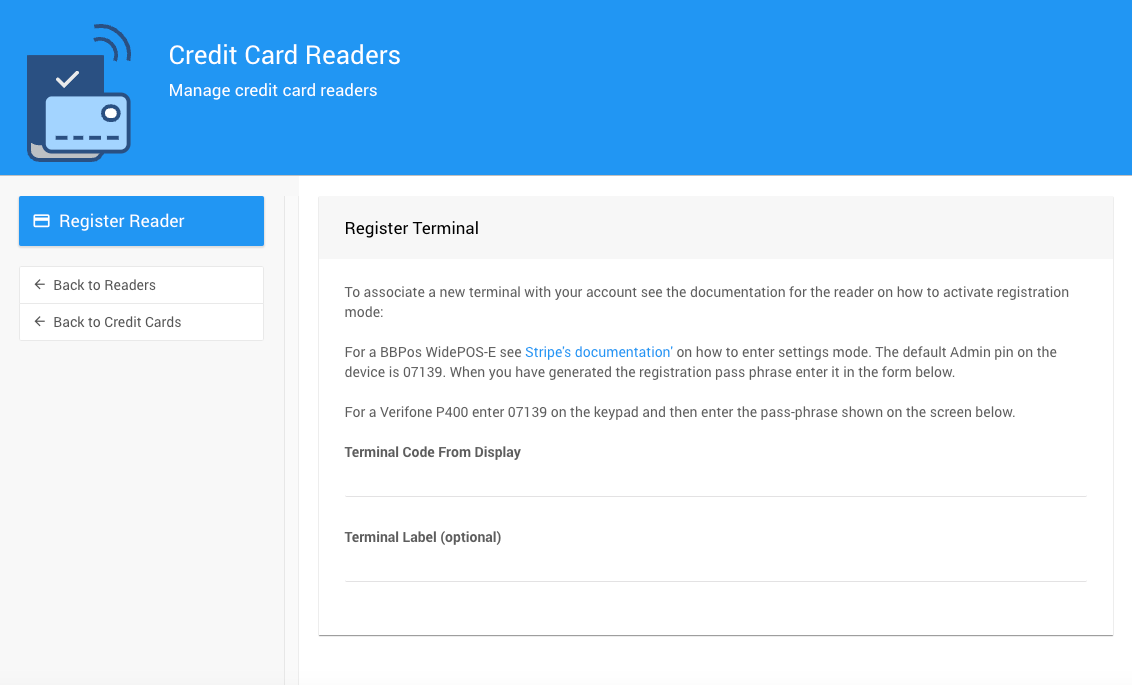
Click the Register a reader button on the left to start this process. You must ask the reader to generate a pairing code and then enter that code and a name for your reader into the dashboard page.

To generate a pairing code on the WisePOS-E
- ensure the reader is powered on and connected to the internet
- swipe from the left-hand edge of the screen
- click settings
- enter the admin PIN for your device; this is 07139 if you have not changed it
- tap 'generate pairing code'
- enter the code into the dashboard page and click Register reader
6. Connect to your reader
A reader can only be connected to one browser tab at a time, and your browser can only be connected to one reader.
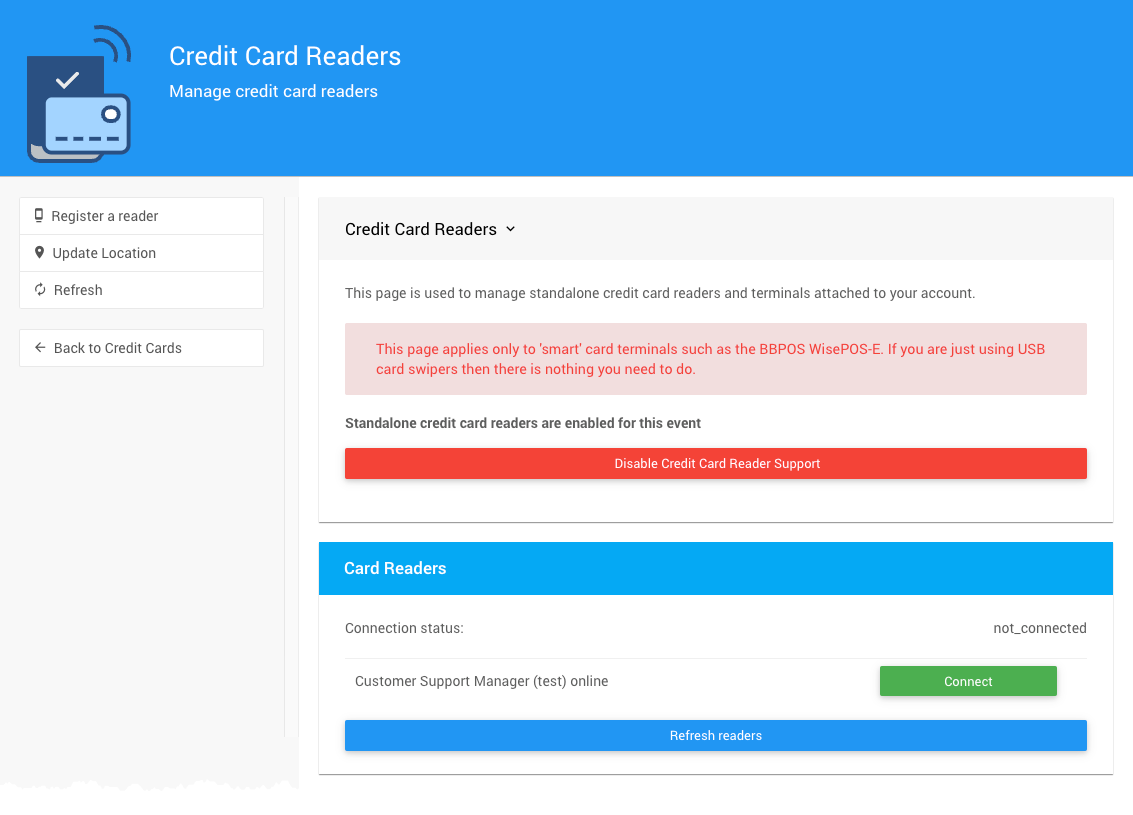
After registering your reader, you will see a list of the readers available to connect to on the reader's page and also within the payment form if you are not connected:

Click on the green connect button to connect to the specified reader. Once connected, your browser will remember the connection and automatically attempt to reconnect if you refresh the page.
Auctria Pro-Tip from Launch Services!
To ensure the connection can be made, you may need to ensure your computer and your reader are both connected to the same Wi-Fi network.
7. Using your reader
Once you have connected the reader, you should see options on the checkout page to record payments and on the check-in page to register cards.
See Standalone Card Readers for more details.
Last reviewed: March 2024