How To Convert To An Online Only Event
Transitioning To An Online Only Experience!
There may be cases where you need to move your Paper or Live event to a fully Online only event.
An Online Pre-Bidding Versus Online Bidding Only type will allow the system to manage the open and closing of your auction. You can change the item type field on multiple item records at one time with our How To Bulk Edit Multiple Records function. The Mass Changes editor can be accessed from the Items All Items list report.
- You can open the Mass Changes editor from any report that supports editing. You will find the "Edit" icon in the report banner at the top of the page. Clicking this will slide open the editor panel.
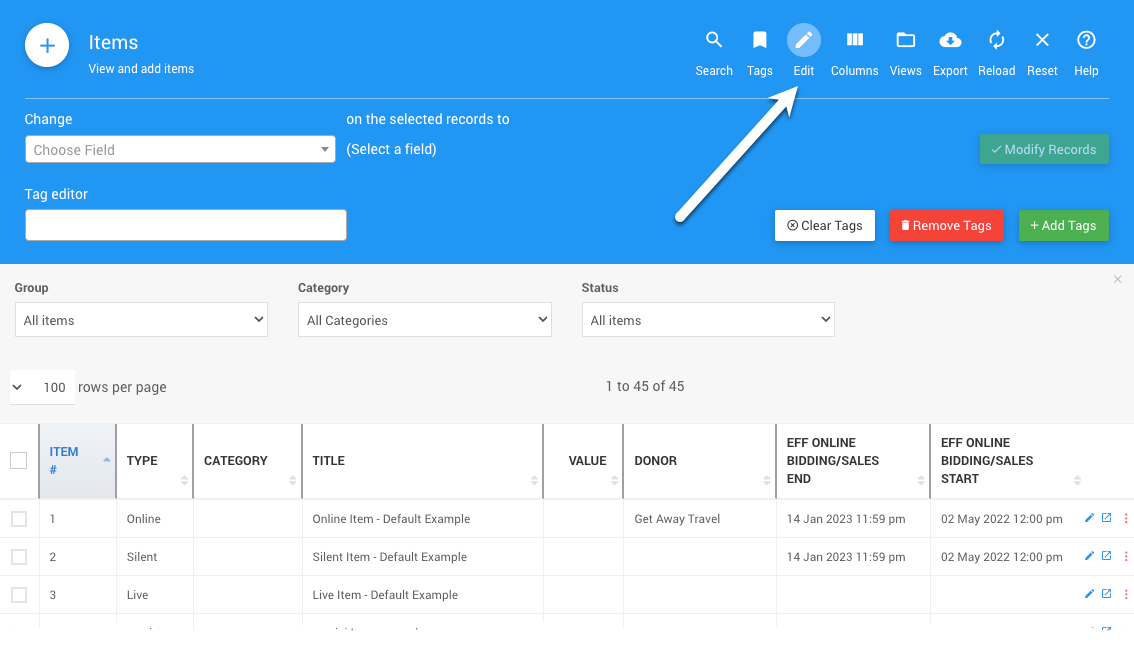
Click the Change selector box and select "Type"

In the "on selected records to" box, select Online.

Select which item records you want to modify by clicking on their respective checkboxes. To select all records (see below) in the current displayed page, click the checkbox in the top-left corner of the grid beside the column headings.
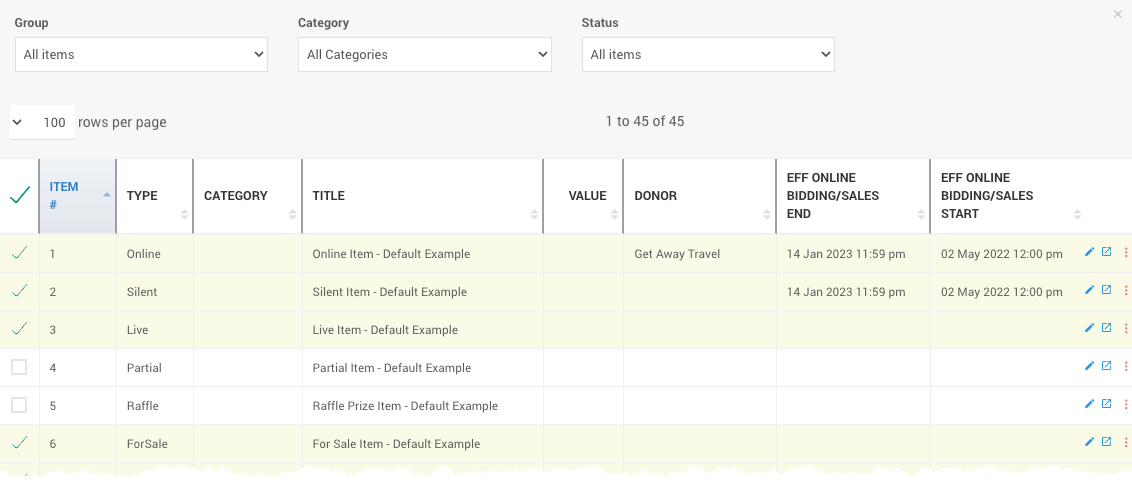
- Click the Modify Records button. The system will prompt you to confirm the changes.

Click Continue.
Recommended Reading
There is more details on making How To Bulk Edit Multiple Records in the User Guide, although the example used is not specifically for the "Item Type" field.
For an Online Auction You will need to set the start and end times for the bidding period of the auction. These are the default times applied to all Online Pre-Bidding Versus Online Bidding Only.
TIP
You can set an override time on individual items if an individual item is meant to open/close outside of the "default" online auction times. See the Bidding Rules section of the Edit Item Details page for more information.
From the main Auction Dashboard, click on Online/Mobile Bidding and then click on Online Bidding under the "Online Settings" sidebar menu to set the "default" Online bidding start and Online bidding end times. See the Online Bidding Period section of the Online Bidding page for more details.
You can also review the Online Bidding dashboard page for other default values including Maximum Bidding, Bid Extension Rules and System Notifications.
If you are selling tickets to your event through your Auctria website, there are a couple of ways you can remove the tickets from being displayed.
A quick way is to disable the Show in default web purchase element option on the individual ticket items. When set to No, the ticket items will no longer be displayed in the "Tickets" page Item Catalog.
You can also completely remove the "Tickets" page from your website through the Website Editor Sidebar, see How To Configure Menu Entries for more details on this.
You may decide to keep your "Tickets" page to explain the change to your auction's "style" and encourage visitors to register and start bidding on your wonderful auction items. This might be done by adding a Text Element, for example, with your explanation and/or other relevant elements.
To Refund Tickets requires a two-step process:
- Delete the Tickets purchase, see How To Remove An In-Progress Bid for more details.
- Refund the (credit card) payment, see How To Issue A Credit Card Refund In Full for more details.
This is a two-step process that requires two (2) different Auctria dashboard screens.
TIP
We recommend using two (2) separate tabs in the same browser.
# Preparation With Two Screens
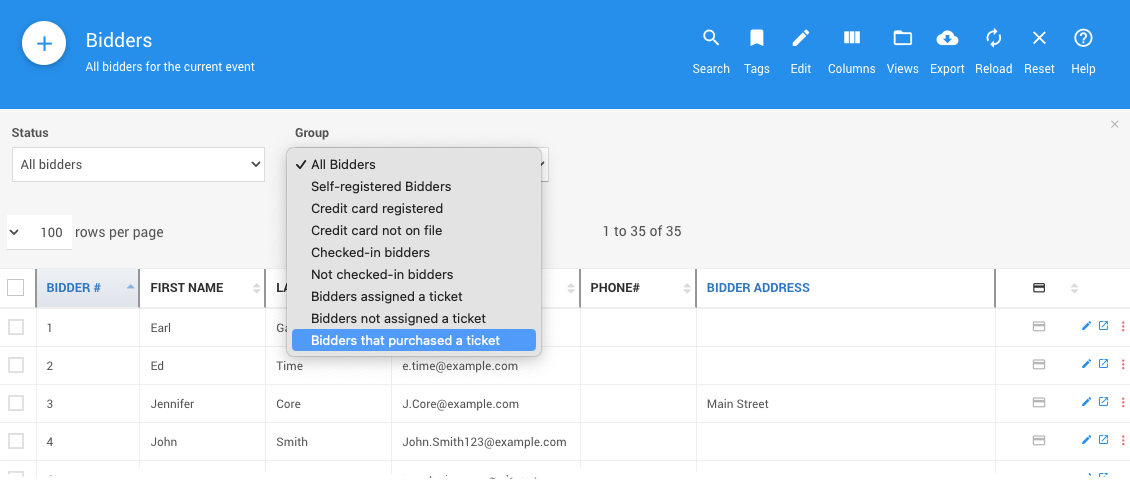
On the first screen, go to Participants and the "All Bidders" list report. In the Group dropdown selector, choose Bidders that Purchased a Ticket.
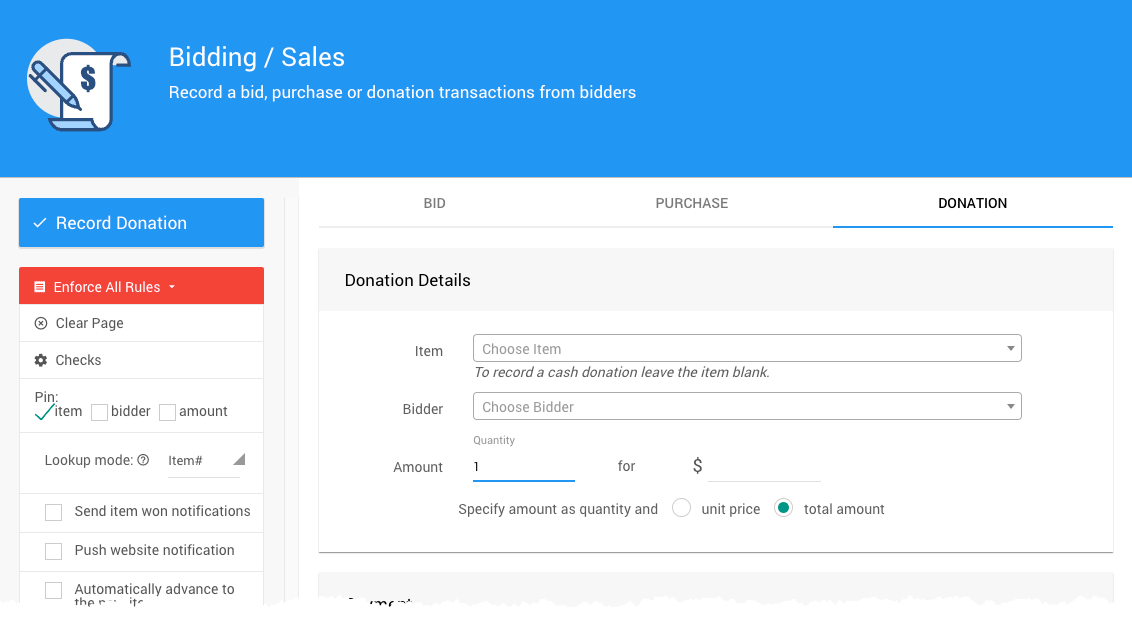
On the second screen go to the Bidding Dashboard dashboard and click on the Donations tab (see Donations Dashboard for more information on this).
# Actions
Step 1 (first screen) Double-click on the Bidder and then select their Activity tab. Find and delete the ticket purchase under the Purchases section.

Step 2 (second screen) Use the Bidder# and the ticket's Purchase Price as the amount in the Donation Details.
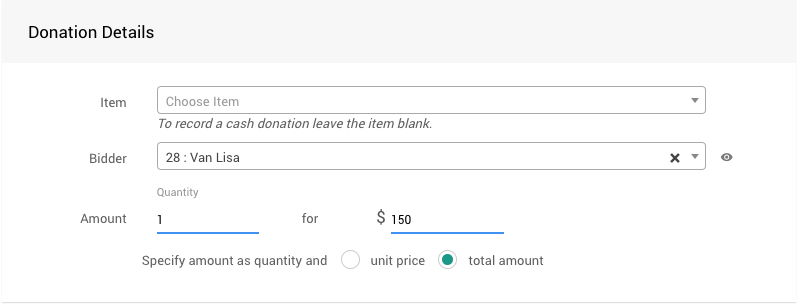 Click the Record Donation button.
TIP
When selecting the next bidder on the first screen, if you chose the Group dropdown of Bidders that purchased a ticket as your filter on the "All Bidders" list report, clicking on the right arrow will automatically take you to the next bidder record that purchased the ticket.

If you are using our "new" Introduction to Website Editor you may need to look at the following:
- Adding/editing the content of your Text Element in your event descriptions.
- Provide an explanation for the changes to the event "style" as an example.
- Remove the "Tickets" page, if one exists (see III above).
- Add more "Catalog" pages and possibly filter their displayed items.
- See Editing Custom Pages > New Custom Page section of Select Website Pages.
- See Configure Items Displayed.
If you do not currently have an Auctria event/auction website created - you could use the Basic Online Bidding template. You could also use other templates such as the Gala: Nature Themed Template and remove the "Tickets" page (if it exists in the template you chose). See How To Create A New Event Website for more information.
See Registration/Checkout for references as needed.
# Points To Consider For "Bidder Registration"
- Open to all?
- Should bidders be imported from an external list?
- Open to only those with tickets?
- Send Participant Online Access And Tokens?
# Quick Q&A:
- Q: We had tickets but refunded them, are those bidders registered to bid? A: Yes, they will still retain their bidder record that was created with the original ticket purchase.
- How To Set Up An Online Event
Creating an Auctria Online event. - How To Pause An Online Event
An overview of how to pause online bidding by adjusting the online bidding settings. - Online Bidding
The Online Bidding dashboard allows you to set the global options affecting the online bidding for your event.

Last reviewed: January 2023